You are using an out of date browser. It may not display this or other websites correctly.
You should upgrade or use an alternative browser.
You should upgrade or use an alternative browser.
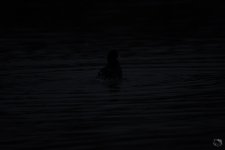
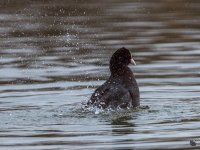
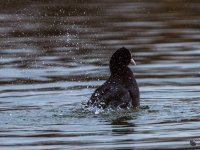
Post your 'before' and 'after' pictures
- Thread starter Felisek
- Start date
This thread proves that when shooting in RAW, it is possible to get a good image from some pretty poorly exposed shots, and also to extend the dynamic range with post processing. IMO, though, a properly exposed image is still, ALWAYS, going to look better.
It's a fact that when you expose to the left side of the histogram, you are going to get quite a bit more noise. Post processing for noise results in loss of sharpness. Blow out the exposure too far and you'll never get detail back. Again, a perfect exposure will most certainly result in the best final product.
Still, we've come a long, long way from the days of slide film, which gave fantastic images, but had to be perfectly exposed to be usable at all.
This thread proves that when shooting in RAW, it is possible to get a good image from some pretty poorly exposed shots, and also to extend the dynamic range with post processing. IMO, though, a properly exposed image is still, ALWAYS, going to look better.
It's a fact that when you expose to the left side of the histogram, you are going to get quite a bit more noise. Post processing for noise results in loss of sharpness. Blow out the exposure too far and you'll never get detail back. Again, a perfect exposure will most certainly result in the best final product.
Still, we've come a long, long way from the days of slide film, which gave fantastic images, but had to be perfectly exposed to be usable at all.
I'm not going to continue the debate here but I'm not poorly exposing the image at all. I'm skipping the amplification process and move that to post because I have benefits when doing that. The histogram is not a accurate representation of the data but a representation of the tonal range during the exposure used in the shot you look at. Change that and the histogram changes without affecting the data.
If you have questions or remarks, PM me or open a thread somewhere and we can have a normal conversation about it.
Last edited:
I'm not going to continue the debate here but I'm not poorly exposing the image at all. I'm skipping the amplification process and move that to post because I have benefits when doing that. The histogram is not a accurate representation of the data but a representation of the tonal range during the exposure used in the shot you look at. Change that and the histogram changes without affecting the data.
If you have questions or remarks, PM me or open a thread somewhere and we can have a normal conversation about it.
I wasn't posting about your shots specifically, but about the entire content of this thread. And, my statement stands.
That is correct. J-see is not saying it doesn't matter how much light gets to the sensor. So if you can add more light to the sensor through slower shutter or wider aperture, do that. J-see's point is that, shooting RAW in low light, it doesn't matter where your camera's ISO setting is. In low light conditions, use the slowest shutter you can get away with for your shot, and use the widest aperture you can get, and shoot RAW. If you do that, it doesn't matter if your ISO was set to 100 or 6400. You can take the ISO 100 shot and create the exact same pic in post as if you had shot it at 6400.
I didn't believe it when I first read it, but I've done the experiments and now believe it.
This idea is NOT the same as saying "I can shoot any shutter speed or aperture I want, then fix it in post." You still want to get as much light to the sensor as possible without blowing out your highlights.
ETA: I just did the reverse test, and it weakens J-see's theory. I shot a scene at ISO 100 properly exposed, then shot the same scene at ISO 1600, same lighting, same shutter/aperture. In theory, the exact same light reached the sensor, and the exact same RAW file SHOULD have been created, but in reality the ISO 1600 RAW file had highlights blown out that could not be recovered by simply reducing exposure 4 stops in ACR. So... more to think about. My plan is to keep trying to adjust my ISO to my shutter/aperture needs and my existing lighting... as we all do already.
Really not too sure if I want to dip my toe into this one, however - here goes.
The way I understand it is that, as so many have already agreed, it's ONLY the shutter speed-f/stop combination that determines precisely how much light the sensor is subjected to and in turn gathers. The purpose of the 'ISO' setting, which in my book should have been labelled 'GAIN' setting is to amplify the resultant image electronically within camera. As anyone with a fairly basic understanding of analogue (yes, that's the way I spell it!) amplification will know, as soon as you begin increasing the gain of a circuit - be it audio, visual or whatever - you begin introducing 'noise' of one type or another. That is a simple and well understood FACT.
As I see J-see's argument, it's far better NOT to introduce noise via amplification at the exposure stage and 'amplify' the gain of the resultant image in PP?
Really a case of whatever floats your boat
I think you nailed it !
Really not too sure if I want to dip my toe into this one, however - here goes.
The way I understand it is that, as so many have already agreed, it's ONLY the shutter speed-f/stop combination that determines precisely how much light the sensor is subjected to and in turn gathers. The purpose of the 'ISO' setting, which in my book should have been labelled 'GAIN' setting is to amplify the resultant image electronically within camera. As anyone with a fairly basic understanding of analogue (yes, that's the way I spell it!) amplification will know, as soon as you begin increasing the gain of a circuit - be it audio, visual or whatever - you begin introducing 'noise' of one type or another. That is a simple and well understood FACT.
As I see J-see's argument, it's far better NOT to introduce noise via amplification at the exposure stage and 'amplify' the gain of the resultant image in PP?
Really a case of whatever floats your boat
By no means I am a professional sound engineer, but I was seriously into home recording for almost 10 years. It is alway better to record with as much input gain as possible without going into the red , then raising the gain at the output stage when mixing down to 2 tracks.
Of course analog (this is how I spell it)
Last edited:
Is it at all possible for one of the mods to split this thread into two separate threads keeping the Before & After topic focused on its initial intention? Then a separate thread can be made from the current off-topic conversation. I'm interested in the Before & After discussion and would like to see it continue without getting side-tracked again and again...and again.....and again.....and yet again. 
Is it at all possible for one of the mods to split this thread into two separate threads keeping the Before & After topic focused on its initial intention? Then a separate thread can be made from the current off-topic conversation. I'm interested in the Before & After discussion and would like to see it continue without getting side-tracked again and again...and again.....and again.....and yet again.
3 threads would be better. I love talking about sound recording.:biggrin-new:
RocketCowboy
Senior Member
3 threads would be better. I love talking about sound recording.:biggrin-new:
You getting the band back together?
You getting the band back together?
I'm trying, but @Bill16 is still in rehab at the Betty Ford Clinic, and Ritchie Blackmore is into some medieval gothic acoustic music right now.:indecisiveness:
Very funny my friend! Lol Now I know why you drive truck for a living! Lol 
I'm trying, but @Bill16 is still in rehab at the Betty Ford Clinic, and Ritchie Blackmore is into some medieval gothic acoustic music right now.:indecisiveness:
I would go insane out here driving 12 hours a day without a sense of humor.Very funny my friend! Lol Now I know why you drive truck for a living! Lol
No I mean me being part of your band! Lol If you heard what little I could do playing my guitar you'd see/hear what I find so funny, and why you needed to drive truck instead of getting rich from "our" band! Lmao 
After that joke, comedy might just be your calling! Lmao
After that joke, comedy might just be your calling! Lmao
I would go insane out here driving 12 hours a day without a sense of humor.
No I mean me being part of your band! Lol If you heard what little I could do playing my guitar you'd see/hear what I find so funny, and why you needed to drive truck instead of getting rich from "our" band! Lmao
After that joke, comedy might just be your calling! Lmao
I got you. Besides, if you can play 3 chords, you're in!
Works great but you have no idea what you captured in the first place unless you take notes.
Yes it can be done but ...
Is it really giving you results better than the "standard" approach ?
If thats how you want to do it great - just not for me.
What do you mean with no idea what I captured? I see it in my viewfinder so I know what I shoot. I close to never check the shots on my lcd so at that level it makes no difference.
I have a much cleaner signal to work with and can decide myself which parts to increase or not. Also I have the impression the colors are richer but I need to test that some more. I know the colors are assigned depending the luminosity values so it can make a difference there. Or maybe it is just because I'm shooting them at max quality like this.
All in all, I took some of my best bird shots today. It might be the new approach or it could be coincidence.
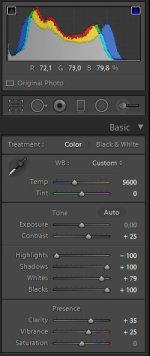
Edit; if you mean they're too dark to see what I shot when importing, I just let LR automatically increase the exposure of all shots during import and it's practically the same as before to process.
Last edited:
What do you mean with no idea what I captured? I see it in my viewfinder so I know what I shoot. I close to never check the shots on my lcd so at that level it makes no difference.
I have a much cleaner signal to work with and can decide myself which parts to increase or not. Also I have the impression the colors are richer but I need to test that some more. I know the colors are assigned depending the luminosity values so it can make a difference there. Or maybe it is just because I'm shooting them at max quality like this.
All in all, I took some of my best bird shots today. It might be the new approach or it could be coincidence.
Interesting experiment . If it works for you fine I would rather take the conventional approach, to each his own.


