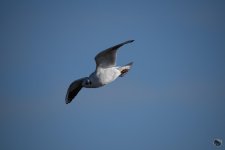
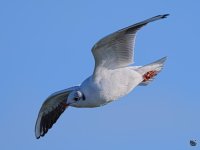
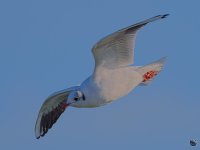
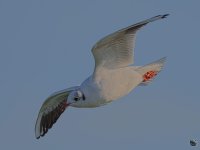
Post your 'before' and 'after' pictures

J-see

Senior Member
Not come across Raw Therapy before. What does it do that you can't do in PS ?

If you're interested to see what it can do compared to LR or other editors, give me a TiFF of the unedited RAW of a shot you think turned out pretty darn well and I'll run it through RT. I'm not that great at it yet but it does make a whole difference in my case. I'm not sure if it can compete with Niktools and such but I'd be curious to see.

I'm impressed by it, that's for sure.
 

Horoscope Fish

Senior Member
Before:
....
Before.jpg

....
....
....
After:
....
After.jpg

.....
 

rocketman122

Senior Member
This one I shot today and was fairly little work compared to others. I opened up fully and captured as much light as possible within my shutter limitation for these shots.

This is the LR import with zero editing.

View attachment 133975

Lens correction first. Then set the black and white point, kills shadows and highlights to get the tones out, adjust exposure, contrast and WB. Tweak vibrance and clarity while adjusting white and black points to prevent clipping. Apply gradient filters to tweak the sky and lower part separately. To finish; sharpen.

View attachment 133976

To add; I curved the RGB channel too, which is why the tones pop.

I like the before MUCH better. I simply would make the twilight sky a bit brighter but deeper, the trees darker so they silhouette and I would crop a bit of the bottom. the after killed the mood entirely and looks like a bad instagram or an underexposed image gone bad in PP.
 

J-see

Senior Member
I like the before MUCH better. I simply would make the twilight sky a bit brighter but deeper, the trees darker so they silhouette and I would crop a bit of the bottom. the after killed the mood entirely and looks like a bad instagram or an underexposed image gone bad in PP.

Not that I'm familiar with Instagram but I can't say I disagree with it not being a great edit. It's not even a great shot and went the way of the Dodo some time ago.
 

wornish

Senior Member
Before

Before.jpg


After

moonshadow.jpg


I hate power and telephone lines !

With hindsight I wish I had taken another shot at low exposure to get the moon in detail ah well next time.
 

J-see

Senior Member
This basically shows how RT works.

First SOOC into LR:

_DSC6237.jpg

Cam+Lens profile, adjust shot exposure, crop, disable everything else and export to RT:

0-neutral.jpg

First WB + exposure adjustments. Then highlight and shadow adjustments. It's too blue to my taste so I want to get it more neutral and bring some other colors back in.

1-exposure.jpg

I can do this using Lab color adjustments. First some adjustments in tone-mapping, then tweaking the colors.

2-labcolors.jpg

Now CIE colors for some final tweaking of about everything.

3-Ciecam.jpg

Then sharpening and addressing some noise.

4-sharpening.jpg

The fringe shows mainly in scaled shots. In my full it is practically non-existing.
 
Last edited:

Eyelight

Senior Member
This basically shows how RT works.

First SOOC into LR:

View attachment 138806

Cam+Lens profile, adjust shot exposure, crop, disable everything else and export to RT:

View attachment 138807

First WB + exposure adjustments. Then highlight and shadow adjustments. It's too blue to my taste so I want to get it more neutral and bring some other colors back in.

View attachment 138808

I can do this using Lab color adjustments. First some adjustments in tone-mapping, then tweaking the colors.

View attachment 138809

Now CIE colors for some final tweaking of about everything.

View attachment 138810

Then sharpening and addressing some noise.

View attachment 138811

The fringe shows mainly in scaled shots. In my full it is practically non-existing.

Bear in mind, I don't have a large calibrated monitor, but the 2nd image looks the best to me.
 

J-see

Senior Member
Bear in mind, I don't have a large calibrated monitor, but the 2nd image looks the best to me.

The second is too "pop" for me. I personally don't like the over-blue for bird shots because it overwhelms the bird. It's great in other shots but for this I prefer a more neutral look. Maybe it's my monitor but even the bird is too blue in that shot. I'll check on my Mac later on to see if both monitors show the same as on this one. I still didn't fully switch to the Mac because it keeps depressing me.

I've been looking for the darn delete button for half an hour and just gave up. It's going to take ages before I'm used to Maclogic. It's not, that's certain.
 

Eyelight

Senior Member
The second is too "pop" for me. I personally don't like the over-blue for bird shots because it overwhelms the bird. It's great in other shots but for this I prefer a more neutral look. Maybe it's my monitor but even the bird is too blue in that shot. I'll check on my Mac later on to see if both monitors show the same as on this one. I still didn't fully switch to the Mac because it keeps depressing me.

I've been looking for the darn delete button for half an hour and just gave up. It's going to take ages before I'm used to Maclogic. It's not, that's certain.

Interesting and brings up something I had not thought of before. Our blue skies may be entirely different. We get a rich blue winter sky that is so blue it doesn't seem real at times. When I process a winter sky pic that's the blue I'm adjusting to get.
 

J-see

Senior Member
Interesting and brings up something I had not thought of before. Our blue skies may be entirely different. We get a rich blue winter sky that is so blue it doesn't seem real at times. When I process a winter sky pic that's the blue I'm adjusting to get.

That blue in the second shot is about the bluest we get on a great summer day. The blue here is paler, more neutral. Like about everything else. It's because I shoot without ISO and then up exposure in LR, the colors become richer than they really are. The lower the light, the heavier the colors (for me). When shooting ISO it is automatically adjusted in cam, I have to adjust them according the light.
 

DMcL

Senior Member
Some great work in here, I have a lot to learn!

Here is my contribution, I PP in LR5 by basically tweaking anything that moved, probably too much so.

forum before pp.jpgforum after pp.jpg
 

J-see

Senior Member
My new flow:

SOOC in NX-D:

_DSC0188.jpg

I expose the shot correctly, crop and export as TiFF to RT:

_DSC0188-2.jpg

Then there's a bit of work at the colors, highlight, shades etc and finally some sharpening.

_DSC0188-1.jpg

Normally I export to GIMP to watermark and such.
 

J-see

Senior Member
Thanks, J-see

There is some info but most things you have to find out on your own. Once you know the basics, you quickly get the hang of it. Just try not to use every option available in the first tab. It's tempting but it's contra productive.

Try to work in lab or Cielab if possible, color adjustments are more natural compared to RGB. Oh, and don't use all sharpening options at once. ;)
 
Last edited:

tea2085

Senior Member
Alright, I'm not Bill Gates but do have some computer savvy. How in the heck do you get your picture on Raw Therapee, in the 1st place? Paul
 

J-see

Senior Member
Alright, I'm not Bill Gates but do have some computer savvy. How in the heck do you get your picture on Raw Therapee, in the 1st place? Paul

What do you mean? How to load it? Select the map with the shots in the file browser. If you want to use the RAW directly, make sure you have the cam + lens profiles since you have to load them into RT. I borrowed all from LR and moved them to my own map.

Double click a shot and it loads into the editor window. I use a dual monitor setup on a Mac so it might be different for you.
 
Last edited:
Top