You are using an out of date browser. It may not display this or other websites correctly.
You should upgrade or use an alternative browser.
You should upgrade or use an alternative browser.
Post your 'before' and 'after' pictures
- Thread starter Felisek
- Start date
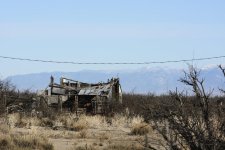
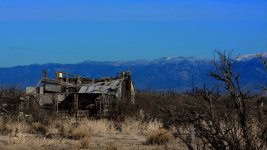
I saw another post tonight where the question was asked how to remove some poles from a photo. There was a reference to "Content Aware Brush" in PS, so I had to look into the same sort of option in GIMP. As it turns out, there isn't exactly the same option, but close, so I tried it. This photo had power lines running through it and I really didn't like it for that reason. Using the "almost" Content Aware System, cloning, and healing brushes and a little play with layers for color were used to achieve this.
BEFORE
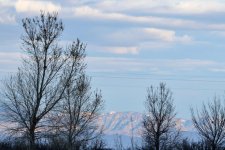
AFTER

BEFORE

AFTER

I saw another post tonight where the question was asked how to remove some poles from a photo. There was a reference to "Content Aware Brush" in PS, so I had to look into the same sort of option in GIMP. As it turns out, there isn't exactly the same option, but close, so I tried it. This photo had power lines running through it and I really didn't like it for that reason. Using the "almost" Content Aware System, cloning, and healing brushes and a little play with layers for color were used to achieve this.
BEFORE
View attachment 186526
AFTER

Good job doing this in GIMP. As a matter of fact I give anyone credit that learns that program. They say PS is hard to learn? HA!
Good job doing this in GIMP. As a matter of fact I give anyone credit that learns that program. They say PS is hard to learn? HA!
Now if I could only get deeper into RAW Therapee, I think I would be set. Ha! (Shhhh, don't tell [MENTION=31330]J-see[/MENTION] that I hate him for what he does with RT. Ha!)
Now if I could only get deeper into RAW Therapee, I think I would be set. Ha! (Shhhh, don't tell @J-see that I hate him for what he does with RT. Ha!)
I had a go with it but suffered information overload within a very short time
Every once in a while I get in the mood to play with it, then I usually get frustrated because I don't understand some (most) of the adjustments etc. and end up going back to Capture NX-D. Ha!I had a go with it but suffered information overload within a very short time
Every once in a while I get in the mood to play with it, then I usually get frustrated because I don't understand some (most) of the adjustments etc. and end up going back to Capture NX-D. Ha!
Sometimes its better the devil you know
Now if I could only get deeper into RAW Therapee, I think I would be set. Ha! (Shhhh, don't tell @J-see that I hate him for what he does with RT. Ha!)
You'd be surprised when you'd see how little I actually use of what is available in RT. A part of the confusion, or information overload, is it having multiple approaches to somewhat similar results. Once you get used to that and learn what approach works best for what kind of shots, RT becomes as simple as any other program.
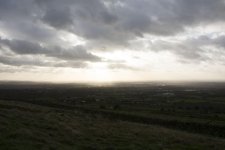
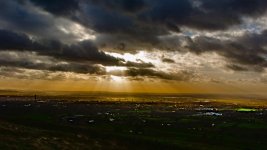
Since I shoot RAW + jpeg, the first image is the jpeg sooc that is resized without any other editing. In the second image, I started with the RAW file and converted to DNG then worked in Bridge before going to PCC. When I posted the second image on Facebook, one of the comments was being lucky to be there at the right time. Granted the having this mackerel sky was a bonus, but pulling details out of the water took time.


Since I'm on vacation and I don't fell like shooting today, I decided to process some shots that I missed the last few days. I came up on this tiny bird sitting on an electrical cable.
I was just going to do my normal PP, but since I have all this time, I started to play with it. Might be overkill and it probably is, but it gave me a chance to practice with layers in PS which I don't do enough of.
Here is the before and after and a brief explanation of how it was done.


In PS I selected the magic wand tool and chose "color range" to select out the blue sky.
I inverted the selection, so that now the bird and the cable was selected. I chose to "copy to layer" so now I had a layer without the sky.
Then I chose a background sky from my hard drive and added it as a layer.
I took the layer with thee bird on a cable without the sky into Nik Tools and did some editing like pro contrast and Detail extractor, and saved it back to PS.
Then I took my new sky and also edited in NIK using the Glamour glow filter.
I put the two layers together , flattened the image and exported it back to LR where I did some basic stuff like pulling whites, shadows and playing around with a few sliders.
I wish I had the patience to take screen shots of all the steps, but I don't. Even if I was bored out of my mind.
I was just going to do my normal PP, but since I have all this time, I started to play with it. Might be overkill and it probably is, but it gave me a chance to practice with layers in PS which I don't do enough of.
Here is the before and after and a brief explanation of how it was done.
In PS I selected the magic wand tool and chose "color range" to select out the blue sky.
I inverted the selection, so that now the bird and the cable was selected. I chose to "copy to layer" so now I had a layer without the sky.
Then I chose a background sky from my hard drive and added it as a layer.
I took the layer with thee bird on a cable without the sky into Nik Tools and did some editing like pro contrast and Detail extractor, and saved it back to PS.
Then I took my new sky and also edited in NIK using the Glamour glow filter.
I put the two layers together , flattened the image and exported it back to LR where I did some basic stuff like pulling whites, shadows and playing around with a few sliders.
I wish I had the patience to take screen shots of all the steps, but I don't. Even if I was bored out of my mind.
Last edited:

