Post your 'before' and 'after' pictures

Felisek

Senior Member
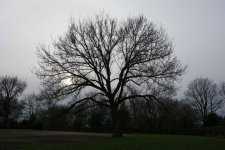
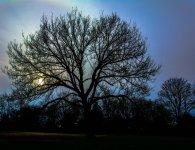
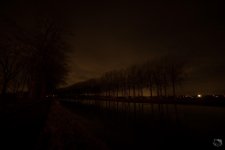
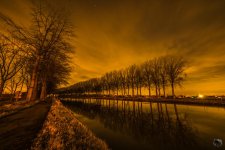
This was my desperate attempt on lazy astrophotography. Lazy, because I took this picture from my back garden, with all the street and neighbours' lights polluting the picture.

1MG_2881.jpg


1MG_2881e.jpg


I took me quite a while to clean this picture. It was a while ago, so I don't remember the details, but it involved pushing contrast quite a lot, changing while balance and removing colour cast and quite a painful local work in Nik Viveza - I tried to remove brighter patches at the edges of the picture. At the end I had to crop it to remove the worst parts and decided to turn it by 90 degrees to get some meaningful composition with a tree at the bottom.
 

paul04

Senior Member
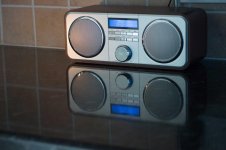
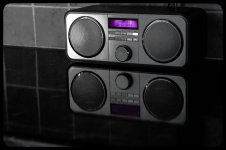
I took this picture yesterday afternoon, it was a dull day, and the sun was just trying to shine through the clouds,

Tried quite a few adjustments in lightroom to get the picture looking better,

DSC_0250.jpg

DSC_0250-2.jpg
 

cbay

Senior Member
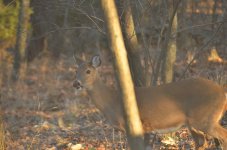
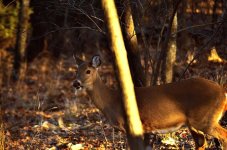
First day with my new camera. Decided to try out an old lens i had from film days (sigma 75-300), it's all beat up and figured it would at least be worth a try. It metered fine in camera but came out way overexposed. So just out of curiosity i thought i would try my hand at the NX-2 program that came with the camera.
DSC_0096.jpgDSC_0096_01.jpg
 
Last edited:

J-see

Senior Member
I shot this one today. I first pushed it into distortion while shooting.

SOOC:

_DSC2340.jpg

The cam picked a pretty warm WB but it did turn out quite well this time and I didn't adjust it.

I adjusted black and white to recover detail, killed the highlights and shadows, adjusted exposure, upped the contrast, clarity and vibrance a bit, curved the RGB channel slightly and finished with sharpening.

A pretty easy shot to process.

_DSC2340-2.jpg
 

Eyelight

Senior Member
First day with my new camera. Decided to try out an old lens i had from film days (sigma 75-300), it's all beat up and figured it would at least be worth a try. It metered fine in camera but came out way overexposed. So just out of curiosity i thought i would try my hand at the NX-2 program that came with the camera.
Before: View attachment 134260View attachment 134261

I'm guessing the real Before picture probably looks about the same, but the after deer has a slightly different expression that I'm thinking didn't come from the post work. Or were you just checking to see if we were paying attention?
 

cbay

Senior Member
I'm guessing the real Before picture probably looks about the same, but the after deer has a slightly different expression that I'm thinking didn't come from the post work. Or were you just checking to see if we were paying attention?

I think i got it fixed now.

Thought i might get caught there. FWIW, i was only off by a fraction of a second!! :D
 

Eyelight

Senior Member
I think i got it fixed now.

Thought i might get caught there. FWIW, i was only off by a fraction of a second!! :D

Funny thing is it just looked like it had a different look in it's eye, like the difference between alert and alarm, but I couldn't figure out what it was because it was identical. Then I noticed the lower jaw, but not certain until the turned ear confirmed.

Like the shot by the way.
 

sonicbuffalo_RIP

Senior Member
It would be great if the pictures being worked are described as to what PP tools you used....not necessarily all the tweaks you gave it but at least the tools. That would help us that are learning our way around. Thanks.
 

Blacktop

Senior Member
I wasn't going to post this , because the original shot is sooo embarrassing, but I did such an awesome job saving it:p that I just had to put it up here.:pride:

Let's see if anyone can tell which is the "before" and the "after".

night church-5120.jpg


night church--2.jpg
 

Felisek

Senior Member
Blacktop, quite a dramatic difference! However, I think you pushed the perspective correction a bit too far; instead of converging lines you have now diverging lines ;)
 

Felisek

Senior Member
Here is another example of the dramatic difference post-processing can do. It also shows how much information is hidden in the dark!

1MG_0178.jpg


1MG_0178a.jpg
 

J-see

Senior Member
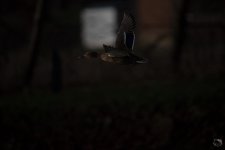
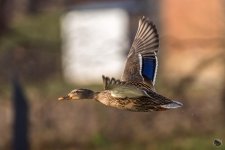
I went out today to check if my theory was confirmed by the practice when shooting birds. I switched to manual, set the shutter and aperture I needed for flight while sticking to ISO 100. It wasn't a very bright day so I wondered if I was wasting it.

SOOC. Not the best shot when it comes to framing but I had to be fast and am not that great with the long lens yet.

_DSC2498-3.jpg

Post:

The usual approach; set black and white, lower shadows and highlights, I upped the exposure by almost 3 stops and tweaked vibrance/clarity and contrast. I also adjusted the RGB curve. Sharpening but no noise reduction. I cropped to get a better composition.

_DSC2498.jpg

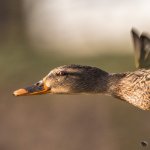
Focus wasn't good enough. Should anyone wonders what it looks like at 100%:

_DSC2498-2.jpg
 

J-see

Senior Member
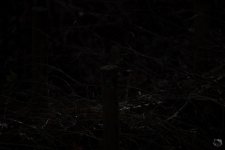
Here's another of my test shots today. I expected the worst when shooting this one since it was in a pretty low light area.

SOOC:

_DSC2548.jpg

I first upped the exposure by 4 1/3th stop, then did some serious cropping. Next the same as usual: black, white, highlight, shadow...etc. Since it is cropped that much, I needed to do some noise reduction but 20 was enough. Some sharpening using a mask and we're finished.

_DSC2548-2.jpg
 
Top