You are using an out of date browser. It may not display this or other websites correctly.
You should upgrade or use an alternative browser.
You should upgrade or use an alternative browser.
Nik Tools - Control Points
- Thread starter sonicbuffalo_RIP
- Start date
Don Kuykendall_RIP
RIP :(
I still love PhotoShop and would never get rid of it. The content aware healing brush is worth the money. I was shooting a shot with my drone the other day and the ground was covered with trash. I was the shot I wanted but the trash was so distracting. With the content aware healing brush I picked up 20 pieces of trash in less than a minute. That saved the shot. A person got in your perfect shot. Just wipe him out.
sonicbuffalo_RIP
Senior Member
You know, this gives me an idea. You feed me your RAW files, and I'll PP them for 5 bucks a piece. Oz
That would pay for Nik fairly quickly....Is it gov.'t subsidized?
sonicbuffalo_RIP
Senior Member
You should be on the gov.'t payroll for picking up so much trash!I still love PhotoShop and would never get rid of it. The content aware healing brush is worth the money. I was shooting a shot with my drone the other day and the ground was covered with trash. I was the shot I wanted but the trash was so distracting. With the content aware healing brush I picked up 20 pieces of trash in less than a minute. That saved the shot. A person got in your perfect shot. Just wipe him out.
Wonderful tip - I had a copy of Nik Tools but had never used Viveza 2, fabulous tool!
Now a question for all of you Photoshop guru's out there.
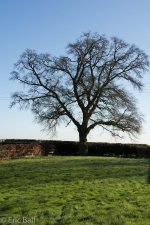
I have a shot of a beautiful old oak tree, leafless this time of year obviously - but have three power lines passing through the branches. I've really tried with the 'content aware healing brush' but keep ending up with really noticeable jumbles where the content aware bit gets confused with the mass of bare twigs and branches resulting in a really unusable result.

Horoscope Fish
Senior Member
What I do in situations like this is... I first duplicate my background layer (Ctrl/Cmd + J) and using the Quick Select or Lasso I make the big, easy selections of what I want removed. We just want to get the big chunks right now so go to the "Edit" menu and use the "Fill" option with "Content Aware". This should knock out the bulk of the problem pretty much. To clean up I use the "Clone Stamp" tool with verrrry soft settings.Wonderful tip - I had a copy of Nik Tools but had never used Viveza 2, fabulous tool!
Now a question for all of you Photoshop guru's out there.
I have a shot of a beautiful old oak tree, leafless this time of year obviously - but have three power lines passing through the branches. I've really tried with the 'content aware healing brush' but keep ending up with really noticeable jumbles where the content aware bit gets confused with the mass of bare twigs and branches resulting in a really unusable result.
Now we're down to the details and for very small areas you could probably get away with just using the Clone Stamp so see how that works. To do this detail work, I zoom in as far as I need to (400% or whatever). It's important this detail work be done PRECISELY. Watch out for repeating patterns and big areas of "smear" if using the Clone Stamp; both will look odd in the final output.
If you find yourself doing edits like this a lot a pen and tablet will be invaluable. I can't even tell you how much easier it is doing really fine edits in PS using a Wacom tablet.
....
Last edited:
Kind of repeating what Paul said in his reply.
You have picked one of the hardest things to do.
The temptation is to go in and pixel peep - don't do that keep going back and looking at the picture at the normal viewing level.
The second issue is that you know where to look as you know where the power lines are so don't get into the really fine areas. If you clear up the longest clear runs of the lines first the rest disappear into the branches and twigs.
There is no magic shortcut to this, patience is needed.
What do you think of this edit.
Done in PS using
Spot Healing Brush
Mode : Normal
Content Aware
Type : Proximity Match
with a very small brush
and using a Wacom tablet !
View attachment 138528
Thanks to both of you for getting back to me in such detail, it's really appreciated.
You both recommend the use of a Wacom tablet so a Intuos Pen Tablet with Pressure-Sensitive, Ergonomic Pen & Software Recognition is winging it's way to me as we speak!
I'm itching to try it out on this image because, as you say Wornish, it's probably the most difficult task and therefore one that I'd like to learn to do well.
I'll post my efforts sometime next week and garner your opinions
Wornish, sorry I meant also to add that, whilst I tried to view your image, all that I got was . . .
Invalid Attachment specified. If you followed a valid link, please notify the administrator
Invalid Attachment specified. If you followed a valid link, please notify the administrator
Vixen
Senior Member
What I do in situations like this is... I first duplicate my background layer (Ctrl/Cmd + J) and using the Quick Select or Lasso I make the big, easy selections of what I want removed. We just want to get the big chunks right now so go to the "Edit" menu and use the "Fill" option with "Content Aware". This should knock out the bulk of the problem pretty much. To clean up I use the "Clone Stamp" tool with verrrry soft settings.
Now we're down to the details and for very small areas you could probably get away with just using the Clone Stamp so see how that works. To do this detail work, I zoom in as far as I need to (400% or whatever). It's important this detail work be done PRECISELY. Watch out for repeating patterns and big areas of "smear" if using the Clone Stamp; both will look odd in the final output.
If you find yourself doing edits like this a lot a pen and tablet will be invaluable. I can't even tell you how much easier it is doing really fine edits in PS using a Wacom tablet.
....
Thanks for this. Powerlines is one thing I struggle with. Going to try doing it this way on large areas
Michael J.
Senior Member
I just did one more test.
I shot JPEG.
SOOC

and some adjustments used Viveza and sharpening as well es define

JPEG is not that easy to pp but it can be done
I shot JPEG.
SOOC
and some adjustments used Viveza and sharpening as well es define
JPEG is not that easy to pp but it can be done
Don Kuykendall_RIP
RIP :(
I just did one more test.
I shot JPEG.
SOOC
and some adjustments used Viveza and sharpening as well es define
JPEG is not that easy to pp but it can be done
Do you always shoot in JPEG?
Michael J.
Senior Member
Do you always shoot in JPEG?
No, I shoot RAW but just this was for some test to see how NIk does. After that test I know PP Raw is much easier and faster than JPEG.
Never mind I shoot 1 photo or 600 I shoot RAW. I am not sure should I after PP in LR safe the photos it to JPEG ( I do it until now) or should I safe the PP photos as tif, dng?
Don Kuykendall_RIP
RIP :(
No, I shoot RAW but just this was for some test to see how NIk does. After that test I know PP Raw is much easier and faster than JPEG.
Never mind I shoot 1 photo or 600 I shoot RAW. I am not sure should I after PP in LR safe the photos it to JPEG ( I do it until now) or should I safe the PP photos as tif, dng?
A lot depends on what you plan to do with the photos. I generally go to web with my photos. Either here or Facebook so JPEG is find for either one on these places. Print is a different story. Generally Tiff but a lot of that depends on where you are having those printed.
Wornish, sorry I meant also to add that, whilst I tried to view your image, all that I got was . . .
Invalid Attachment specified. If you followed a valid link, please notify the administrator
Don't know what happened with that it worked for me yesterday. But today it doesn't work.
Sorry but I deleted the copy so I can't re submit.
All I can say is it was brilliant
Seriously though follow the steps that Paul suggests and you will get there. The Wacom does make it easier but be warned there is a learning curve to using one.
sonicbuffalo_RIP
Senior Member
Yes dicklefan.....I totally underestimated the power of control points
Sent from my SGH-T399 using Tapatalk
Sent from my SGH-T399 using Tapatalk
