You are using an out of date browser. It may not display this or other websites correctly.
You should upgrade or use an alternative browser.
You should upgrade or use an alternative browser.
The Horoscope Fish Bowl-O-Rama :: Photos Occasional ::
- Thread starter Horoscope Fish
- Start date
Horoscope Fish
Senior Member
Horoscope Fish
Senior Member
Horoscope Fish
Senior Member
Horoscope Fish
Senior Member
Horoscope Fish
Senior Member
Horoscope Fish
Senior Member
dh photography
Senior Member
Loved catching up on your thread! Some fantastic work. Seeing things through your glass is so much fun.
Horoscope Fish
Senior Member
Wow... Thank you. That was nice to hear just after having a major "facepalm" moment...Loved catching up on your thread! Some fantastic work. Seeing things through your glass is so much fun.
I've been noticing the color and contrast on my uploaded photos have not been looking as they should. Turns out the fresh install of Photoshop I did some time ago has been using aRGB instead of sRBG by default; and I just figured that out a few minutes ago. GAAAH!
Future uploads won't look so dull and washed out.
....
dh photography
Senior Member
Well, if what you've been uploading is dull, I can't wait to see what's not!
Seriously nice work regardless! Really dig your HDR stuff.
Seriously nice work regardless! Really dig your HDR stuff.
Horoscope Fish
Senior Member
LOL... Now I"m confused. Maybe I posted an HDR shot I'm not remembering (entirely possible!) but you'll have to point it out to me because I don't really do HDR.Well, if what you've been uploading is dull, I can't wait to see what's not!
Seriously nice work regardless! Really dig your HDR stuff.
...
dh photography
Senior Member
LOL... Now I"m confused. Maybe I posted an HDR shot I'm not remembering (entirely possible!) but you'll have to point it out to me because I don't really do HDR.
ROFL! Could have sworn a couple of your shots in post #77 and the one in #76 were HDR stacks. If not, I want to know how you get that similar surreal HDR look in pp. Now looking closer at them on my big monitor, they don't look the same as on the macbook. Either that or I need to stop catching up on threads so late in the evening!! LOL.
I've been noticing the color and contrast on my uploaded photos have not been looking as they should. Turns out the fresh install of Photoshop I did some time ago has been using aRGB instead of sRBG by default; and I just figured that out a few minutes ago. GAAAH!
Future uploads won't look so dull and washed out.
....
I don't think your shots look washed out.
Your comments made me check my settings in Lightroom and I was set at aRGB as well. I tried exporting a shot in sRGB and again in aRGB and on my screen I can't see any difference when loaded into my browser.
maybe its just the subject of the photo. Are particular colours impacted more than others.
Horoscope Fish
Senior Member
I wonder then, if it's a browser thing because I have definitely noticed a difference between how my shots look in Photoshop, after being processed, and how they look when viewed online and I'm referring specifically to things like color saturation and contrast, most notably. I didn't have a lot of time to test things last night but I could definitely see a difference between saving in aRGB (colors looked washed out and contrast was lacking) and sRGB (color and contrast matched what I had in PS) for the one shot I did run a test on.I don't think your shots look washed out.
Your comments made me check my settings in Lightroom and I was set at aRGB as well. I tried exporting a shot in sRGB and again in aRGB and on my screen I can't see any difference when loaded into my browser.
maybe its just the subject of the photo. Are particular colours impacted more than others.
I'm going to have to investigate this further...
....
I wonder then, if it's a browser thing because I have definitely noticed a difference between how my shots look in Photoshop, after being processed, and how they look when viewed online and I'm referring specifically to things like color saturation and contrast, most notably. I didn't have a lot of time to test things last night but I could definitely see a difference between saving in aRGB (colors looked washed out and contrast was lacking) and sRGB (color and contrast matched what I had in PS) for the one shot I did run a test on.
I'm going to have to investigate this further...
....
Sorry to derail your thread. You have got me at it now. I have my both camera and Lightroom colour space set to aRGB. I think this makes a difference even shooting in RAW.
Going to play with the variables.
Horoscope Fish
Senior Member
*Goes back and looks at Posts 76, 77...*ROFL! Could have sworn a couple of your shots in post #77 and the one in #76 were HDR stacks. If not, I want to know how you get that similar surreal HDR look in pp. Now looking closer at them on my big monitor, they don't look the same as on the macbook. Either that or I need to stop catching up on threads so late in the evening!! LOL.
Well I can see how you might think those were HDR shots but they're not... *crosses heart*.
Hidden Doorway #5 (Post 76) was done with a filter called Glamor Glow in NIK Tools and adjusting the default settings using the sliders. I wanted a dreamy, surreal, sort of look with that shot and the Glamor Glow filters are a nice starting point for that. I also used a Curves adjustment layer on that shot to punch up the contrast and it was sharpened slightly using Unsharp Mask.
South Tufa #1, #2 & #3 (Post 77) look over-processed to me now (as I was thinking they did when I posted them). What you're seeing with those shots is some really good Golden Hour light and my heavy-handed use of NIK Tools. I used Detail Enhancer on all three of those shots and played a lot with the sliders to bring up the contrast and punch up the clouds. That one filter (Detail Enhancer) can do amazing things if you're willing to learn how it works and experiment. I think I went a little overboard on those shots in particular, but that's basically how I got that particular look. I really was trying to get the shot to look like it did when we were there; the early morning light was just amazing and those shots do a pretty decent job of conveying what we saw that day.
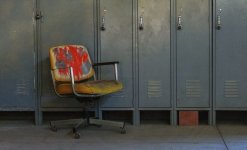
For Cheap Seats I again wanted a soft, surreal sort of look so it was back to the Glamor Glow filter. I also used the Detail Enhancer (lightly this time), a Curves adjustment layer and touched everything up with Unsharp Mask to get everything "just so".
The Natives are Friendly was just a lucky shot and processing was minimal; Unsharp Mask and a Curves adjustment layer.
....
Horoscope Fish
Senior Member
I don't consider this a de-railing at all... Please let me know what you find out. I shoot RAW pretty much exclusively myself and I really want to know what's going on with this. I swear I'm seeing a difference in color saturation and contrast at the very least.Sorry to derail your thread. You have got me at it now. I have my both camera and Lightroom colour space set to aRGB. I think this makes a difference even shooting in RAW.
Going to play with the variables.
Your input would be very much appreciated.
....

