Recently my Late 2012 iMac gave me a notice S.M.A.R.T. Status: disc failure.
Explanation of S.M.A.R.T.: from Western Digital website*
"Critical: A S.M.A.R.T. failure indicates that your drive is at risk for imminent failure. If your drive has failed S.M.A.R.T. and you are still able to access your data WD recommends creating a backup of your data as quickly as possible. Once backed up, you should replace your drive by following the insturction in Answer ID 8: How can I replace a product under warranty?.”*
"Explanation of S.M.A.R.T.:
S.M.A.R.T. is an acronym Self Monitoring Analysis and Reporting Technology. It is used to perform a quick analysis of the hard drive for problems during system boot up. “*
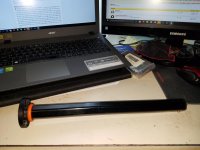
Not taking any chances I decided to open my iMac and this is the thin one with the screen and display is “welded” together. Watching several videos I decided to take the plunge and order the necessary adhesive strips and cutting tools. I had the rest of the tools that may be needed as I had worked on Mac Mini’s and other versions of the iMacs. You can see the image of the display when I had it opened.
With some tips , I had the confidence to tackle the job and re-create a fusion drive. If you are familiar with Fusion (not the atomic kind) it marries a SSD to a mechanical drive and below you can see it made a Logical Drive Macintosh_HD from disk0s2 and disk1s2. You must do this in terminal, the scary black screen with the Command Line Interface or CLI. Old DOS users, Linux, Unix users and “hackers” are familiar with this type of interface.
I added a 3TB and formatted it outside and ran a test to make sure it was not DOA or had some other failure. Luckily it good and FRESH (Jun 2016 date of manufacture). I now have more space and a brand new fusion drive running in my 2012 iMac. UUID numbers removed to protect the innocent. Oh you can do this on most Mac’s.
Yes I had done a clone of my drive and restore partition using Bombich Carbon Copy Cloner. I actually used the restore portion of the clone to make the fusion drive and install a fresh copy of El Capitan and used Apples Migration Assistance to bring the programs and other files back. Everything worked! Surprised myself!
Below is what happens or how the OS sees the hard drives individually and the creation of fusion drive.
Macintosh_HD:
Available: 2.52 TB (2,520,762,531,840 bytes)
Capacity: 3.11 TB (3,114,866,704,384 bytes)
Mount Point: /
File System: Journaled HFS+
Writable: Yes
Ignore Ownership: No
BSD Name: disk2
Volume UUID:
Logical Volume:
Revertible: No
Encrypted: No
LV UUID:
Logical Volume Group:
Name: Macintosh_HD
Size: 3.12 TB (3,120,722,075,648 bytes)
Free Space: 115 KB (114,688 bytes)
LVG UUID: a number
Physical Volumes:
disk0s2:
Device Name: APPLE SSD SM128E
Media Name: APPLE SSD SM128E Media
Size: 120.99 GB (120,988,852,224 bytes)
Medium Type: SSD
Protocol: SATA
Internal: Yes
Partition Map Type: GPT (GUID Partition Table)
Status: Online
S.M.A.R.T. Status: Verified
PV UUID: a number
disk1s2:
Device Name: ST3000DM001-1ER166
Media Name: ST3000DM001-1ER166 Media
Size: 3 TB (2,999,733,223,424 bytes)
Medium Type: Rotational
Protocol: SATA
Internal: Yes
Partition Map Type: GPT (GUID Partition Table)
Status: Online
S.M.A.R.T. Status: Verified
PV UUID: a number