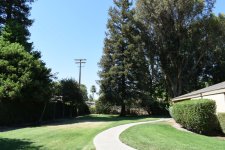
Need review on my landscape photo experiment

Browncoat

Senior Member
You'll get no further response.

That's a shame. I was looking forward to clarification on how shooting modes are not relevant, but are relevant in certain situations, only it doesn't matter which mode you use, except for when they do.

If you need me, I'll be scratching the mode indicators off my dial. I'll just give the wheel a spin from now on and hope for the best. Wheel...of...Exposure!
 

crycocyon

Senior Member
The modes were created only to afford a shortcut to combinations of aperture/shutter speed/ISO. If you like to have more control over a photograph, then you can go from AUTO or program mode (everything is set automatically) to one of the S (shutter priority...you set shutter speed, camera sets aperture) or A (aperture priority, you set aperture, camera sets shutter speed). Usually aperture priority is fine if you wish to maintain control over depth of field, but don't really care what shutter speed the camera chooses (within reason ofc like not below 1/30th of a second to avoid camera shake). If you like full control, then M (manual mode) is your ticket and then you can set both aperture and shutter speed. It also depends on how quickly you shoot. If it is a bright sunny day, ISO 100 is fine, if it is evening or indoors then you might need ISO 400-1600. But with your lens the camera will be trying to go max aperture anyway when it's darker, or upping the ISO a lot making the images noiser. If you are still learning the ropes it is good to try aperture priority so you learn more about the effects of changing aperture with changes in depth of field and composition. When I started out that's what I did. I also learned to underexpose -0.3 to -0.5 stop so that the images don't seem too bright. Japanese cameras might meter to average but they are also biased on consumer cameras to make a scene look vivid so by underexposing a bit you bright down some of those overly bright tones and reduce highlights somewhat. Of course the experienced photographers here would want you to go full manual all the time, but we all have a learning curve as well and the other modes are useful even to pros (ie: shutter priority is useful when shooting sports in changing lighting conditions). It's also important to find a center of interest and then use the rule of thirds in composing around that center of interest. Think about where the viewer's eye would be led to in the photo, rather than being lost in a mix of things that do not have a real driving interest.
 

Danno

Senior Member
The thing about landscapes ist that it is the best place to learn to use manual mode. Aperture priority is a good way to get used to how the camera responds with shutter speed and ISO, but I think that landscape is a really good place to learn the exposure triangle and you get to see how each change impacts the others. That is where I learned the exposure triangle.

It is an outstanding learning ground. In manual you can adjust to the settings to keep your histogram properly positioned. You can set the blinkies to keep you from blowing out the highlights and the shadows. It allowed me to see so much more than the auto modes did.

Just food for thought.
 
Last edited:

blackstar

Senior Member
Hi Dan,

Thanks for the hint of learning exposure triangle and manual mode.

Hi Browncoat and Sparky,

Appreciate all your insights on photo exposure and the hot debate on camera shooting modes. I hope to learn catching the significance of your insights and wish you both vision yourselves the winner of the debate with no resentment. Thank you.
 

blackstar

Senior Member
Hi Cindy,

Thank you for your explanation of exposure compensation with an example. I am pretty sure that the liv view on the camera would look same as the 1st example image with EV+1.3. But I wonder and suspect that the liv view on the camera set EV=0 would look the same as the 2nd example image that is processed from 1st image with -1.3EV. Correct me if I am wrong that I think the image with camera EV+1 processed with EV-1 (through image editor) is not the same as the image with camera EV=0. Do you think and remember that your 2nd example pic is what (exposure wise) you perceived the scene was (looked)? And you mentioned the scene was bright, so you knew you had to bump up the EV... I hope this matter can be cleared-up a bit as I am not experienced with this with any authority. But thank you very much. (I processed my experimental images with EV-2 and the result (too dark) is absolutely not what I visualized the scene at the shooting time.)
 

hark

Administrator
Staff member
Super Mod
Hi Cindy,

Thank you for your explanation of exposure compensation with an example. I am pretty sure that the liv view on the camera would look same as the 1st example image with EV+1.3. But I wonder and suspect that the liv view on the camera set EV=0 would look the same as the 2nd example image that is processed from 1st image with -1.3EV. Correct me if I am wrong that I think the image with camera EV+1 processed with EV-1 (through image editor) is not the same as the image with camera EV=0. Do you think and remember that your 2nd example pic is what (exposure wise) you perceived the scene was (looked)? And you mentioned the scene was bright, so you knew you had to bump up the EV... I hope this matter can be cleared-up a bit as I am not experienced with this with any authority. But thank you very much. (I processed my experimental images with EV-2 and the result (too dark) is absolutely not what I visualized the scene at the shooting time.)

There is a concept called Dynamic Range. I'm just going to stick your toe in the water to initiate the concept to you. Our eyes can see a wide range of brights and darks all at once, but unfortunately our cameras aren't able to capture this entire range in one image. The sensors aren't quite there yet. If you've ever heard of HDR, it mean High Dynamic Range. When doing HDR photography, it involves taking several images in succession to capture brights, mids, and darks over several images. Then those images are combined together in Photoshop or some other program to yield a similar image to what we see with our eyes.

As far as my image, the sky was even brighter than it appears in the first image. So in that case, the sky still wound up being underexposed a little. However, because the camera can't capture the entire dynamic range in the image, the shadows (meaning the underside of the hawk) are reasonably exposed.

During post processing, when we raise our exposure - especially the shadows - we run the risk of introducing more noise into those shadowed areas. So overall I was happy with the exposure because the shadows have enough detail and wouldn't require raising the shadows/exposure a great deal. However, I can easily increase the brightness of my sky if I wanted because it was very bright.

So when I calculate just how much over exposure to dial in, I have to keep in mind how the shadows will appear. Theoretically I could have shot the image at 0 EV and increased the exposure during post processing. Photoshop and other programs (such as Lightoom) have become much better with raising and lowering exposure of RAW files. Jpegs won't allow nearly as much latitude for adjustments to exposure. And again, that's because RAW files have a greater dynamic range than jpegs.
 

blackstar

Senior Member
Thanks, Cindy.

Yes, I have studied both "dynamic range" and "HDR" and I do agree with you that cameras' image sensor is far inferior from normal human eyes. Yet the details of how cameras visualize and perceive a scene as well as how they proceed and set all parameters to take a shot are still beyond my comprehension. As for how to reset EV=0 after taking the shot by photo editor, I doubt it can be done by straightforwardly inversing the EV#. I did it again with EV set to 0 and all came out like (almost) ideal exposure. Here is one of them (A mode with best DOF):

2020-07-19 14.23.37-s.jpg

And look at the blue sky :)
 
Last edited:

hark

Administrator
Staff member
Super Mod
Thanks, Cindy.

Yes, I have studied both "dynamic range" and "HDR" and I do agree with you that cameras' image sensor is far inferior from normal human eyes. Yet the details of how cameras visualize and perceive a scene as well as how they proceed and set all parameters to take a shot are still beyond my comprehension. As for how to reset EV=0 after taking the shot by photo editor, I doubt it can be done by straightforwardly inversing the EV#. I did it again with EV set to 0 and all came out like (almost) ideal exposure. Here is one of them (A mode with best DOF):

View attachment 341951

And look at the blue sky :)

That looks much better! :cool:
 

480sparky

Senior Member
The camera doesn't see the dynamic range of the scene. It sees the overall brightness of the scene. My histogram viewer put the median brightness of the images pixels at 105.9 (on a scale of 0-255). Which is slightly below(darker) than the middle of the scale (127).

I copied your shot into an editor, desaturated it and started blurring it repeatedly. Once all the pixels ended up the same shade of gray, I measured them. They all came out as 106:106:106. Which is exactly what one would expect.

The trick here is to know the limitations of your camera. A scene that exceeds the dynamic range it is capable of recording with have blown-out highlights and/or shadows that are pure black. It then becomes a matter of whether you attempt an HDR set of images and combine them in post (not always possible due to subject movement), or decide whether it's better to get details in the shadows and let the highlight blow out or keep the details in the highlights and let the shadows go black.
 

crycocyon

Senior Member
Yes and dynamic range is a property of the sensor (the ratio of light or saturated pixel wells to dark or minimal intensity value, or noise floor). More expensive cameras have sensors with higher dynamic range, for example the Nikon D850 has 14.8 stops of dynamic range (which is very good for a DSLR). The Nikon D3500 has at ISO100 a maximum of 11.5 stops of dynamic range (averages around 10 stops across the ISO range), which is also very respectable. So if you are keeping track of the light and dark areas of the scene either visually or with a histogram, you can try to avoid compositions with too much contrast/highlights. A simple example is composing a landscape with the sky in view. You can include less of the sky to get a better balance of light and dark (ie: minimizing bright areas that might saturate the sensor).
 
Last edited:

blackstar

Senior Member
Hey, Sparky and Crycocyon.

Thank you so much for more insightful info on the Dynamic range. Try very hard to keep up with what you guys throw on me :) CCC gave some useful practicing guide I like to take and see how it works. I read a Darktable tutorial on how to recover over-exposed images and it includes several sections explaining the "Dynamic range" in all details, yet easy for a layman to catch. And then the main task for fixing over-expose as well as DR issue is covered by using tools of "highlight reconstruction" and "color reconstruction" after exposure is adjusted. And the examples are all on the points with very "real" and serious photos. I would put this as a backup for my future failed photos. For landscape photos (and other photos), I am also interested in learning and using Channel mixer to fix or optimize image color.
 

crycocyon

Senior Member
Sounds like you are off to a great start and like to learn about these things. That's the fun part about photography, it's both a very creative exercise but you can also delve into the technical side as much or as little as you like. It's great to see that motivation...you would make a very good scientist :D
 

blackstar

Senior Member
Hey, CCC.

I reckon I got the motivation in photography mostly from you nikonites, only a little self-motivated. I like your thinking in broadway covering various aspects from technical to practice. I am a beginner swimmer, learning fundamentals and practicing strugglingly, and just hope not to get drowned before completing the course :) Finally, just wonder what makes you relate me to a scientist?
 

blackstar

Senior Member
Hi, everyone.

Thank you all for helping me with my experiment. I see that so many respondents here are experts if not specialists in landscape photography. So decide it's a good place to ask a very basic skill-wise question in landscape-related practice: For A mode, AF-S, and single-point focus area, large f number, shooting a long, deep scenic photo with more than 2-3rd of frame space filled with sky above the horizon. In order to cover the background to infinity and keep as much as possible of the foreground in focus, hyperfocal point can be used. In a normal situation like this, the hyperfocal point likely will be located at near bottom of the foreground (hyperfocal distance ~ 1.5 to 3m for my camera setting). Using viewfinder to focus in this situation will require first select a focus point (from within viewfinder) not in the center, but below and on the side. I feel this move bit awkward as your right thumb press on bfb and your left hand cross over to press multi-selector buttons, meanwhile your face is on the viewfinder. How hard is it to get done! Now if you choose the center point, it will point up in the sky and most of time it would find no object to focus and won't fire. If using liv view to focus, it's easier to move the focus square to the spot of your pick, but then there is no in-focus confirmation to check (like in viewfinder). So simple version of the question: how do you practically focus your landscape photos with hyperfocal distance?
 
Last edited:

Horoscope Fish

Senior Member
... If using liv view to focus, it's easier to move the focus square to the spot of your pick, but then there is no in-focus confirmation to check (like in viewfinder).
When using Live View half-pressing the shutter button should turn the focus-box on the rear LCD from red, which indicates what is under the focus-box is NOT in focus, to green, which indicates what is under the focus-box IS in focus. In short: green focus-box = focus confirmation.
 
Last edited:

hark

Administrator
Staff member
Super Mod
Use an aperture that will allow you to have a decent amount of DoF, and focus 1/3 of the way into your scene. There is a paid app for phones called Simple Depth of Field. You enter your camera model, focal length, aperture, and distance, and it will display the amount of feet or meters that will be in focus in front of and behind your focus point. It also offers hyperfocal information. With any image, you will have a greater amount of DoF behind your focus point than you will in front of it. Here is an example showing the difference between using f/7.1 vs. f/11 with the same focal length, same body, and same distance for focusing.

Simple DoF 2.PNG


Simple DoF 1.PNG
 

blackstar

Senior Member
Hi Paul,

Thanks for replying. The red box turns green was exactly in my mind it should be if in focus. However, in my practice, the red box never turned green when I pointed to a spot and pressed BFB (back focus button). Then I closed out liv view and used viewfinder, the focus point was about the same position as the red box in liv view. When pointing to the same spot and pressing BFB, the confirmation dot appeared and stable -- in focus! So I opened liv view again and point the red box to the same spot and press BFB -- no turning green! Repeat and still the same result! This is so strange and frustrating...

Yet my way of thinking changed, to resolve this issue, it could be done by just using the center focus point and turn to the spot desired (e.g., hyperfocal distance) and press BFB to get in-focus confirmation, then release BFB (to lock focus distance) and re-compose. My practice seemed to confirm it's working correctly, but it's not sure releasing BFB provides locking focus distance. Will you confirm this so I can close this matter? Thanks
 
Top