The wonder of the tone curve

blackstar

Senior Member
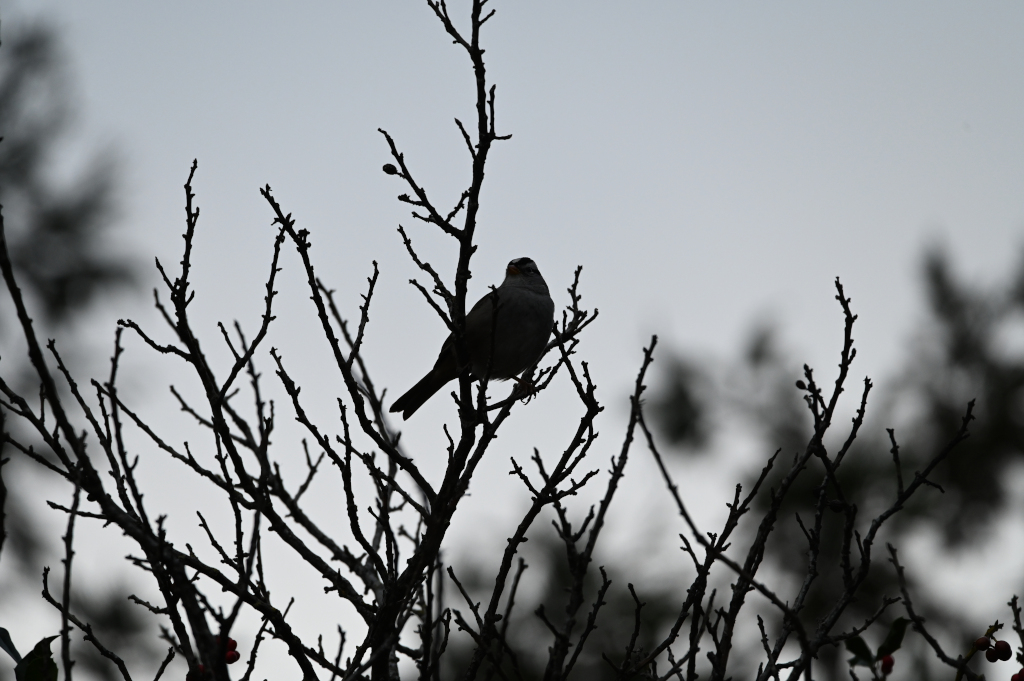
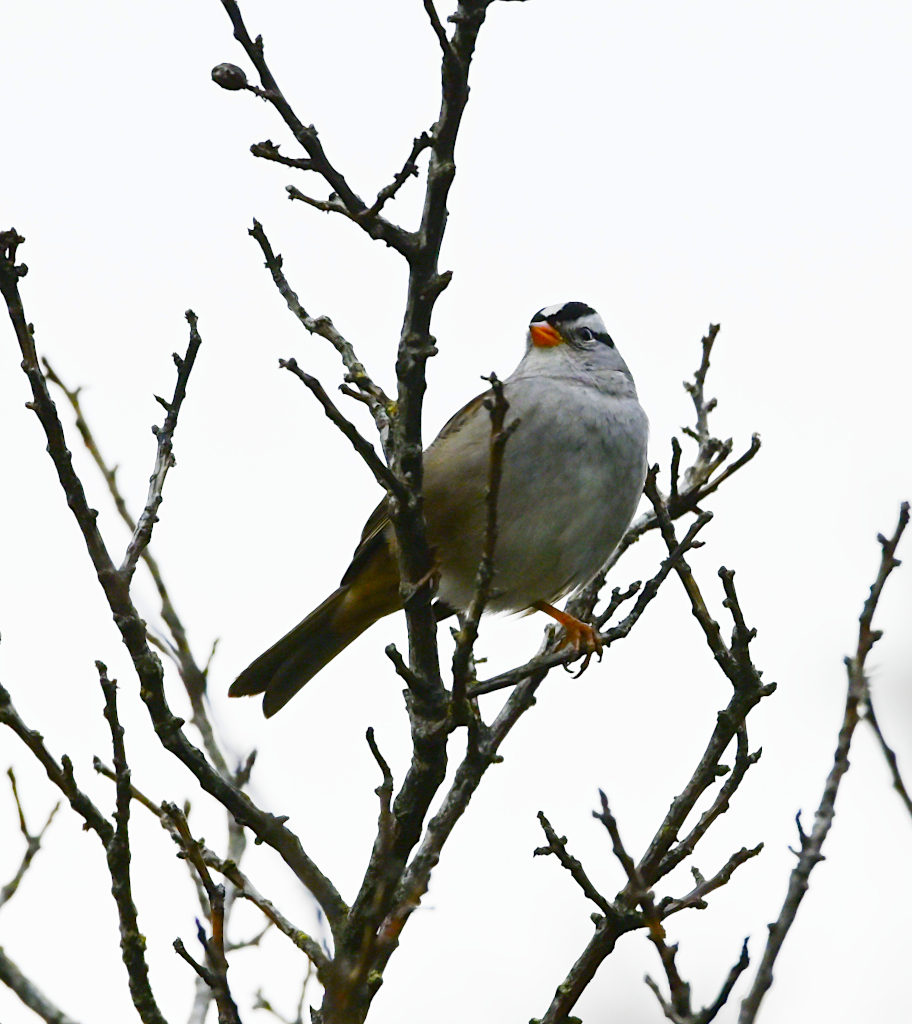
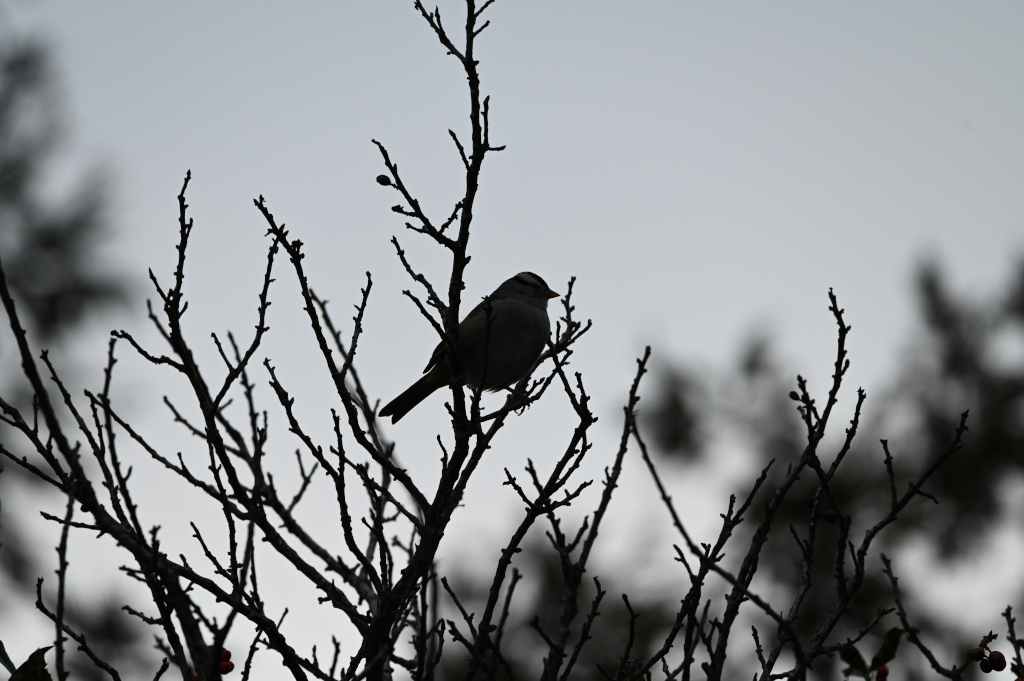
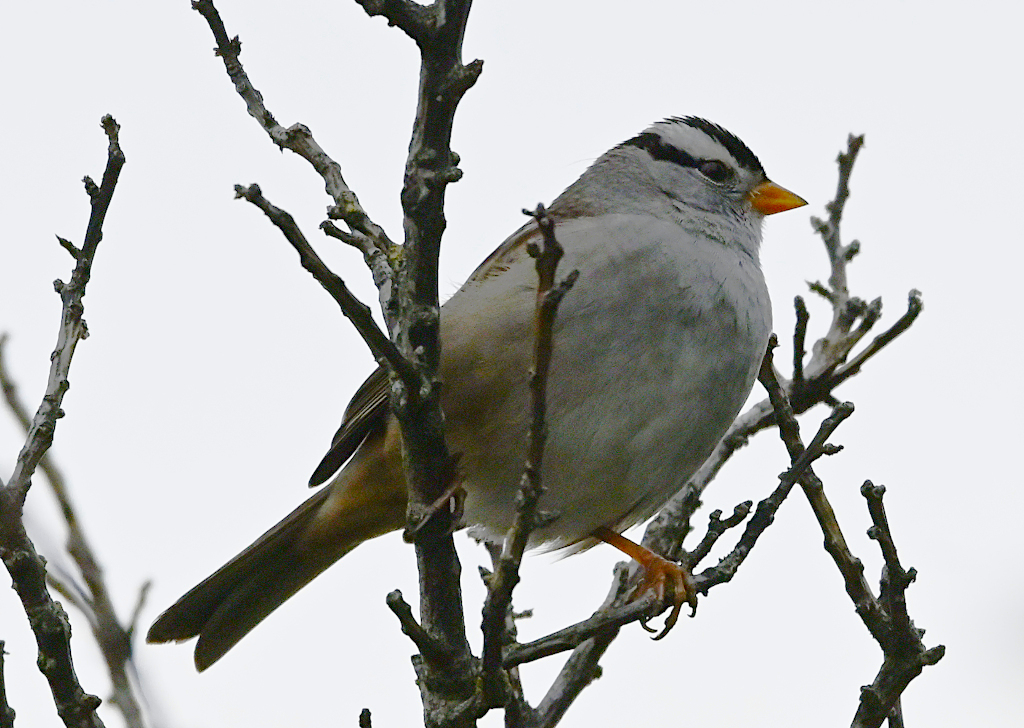
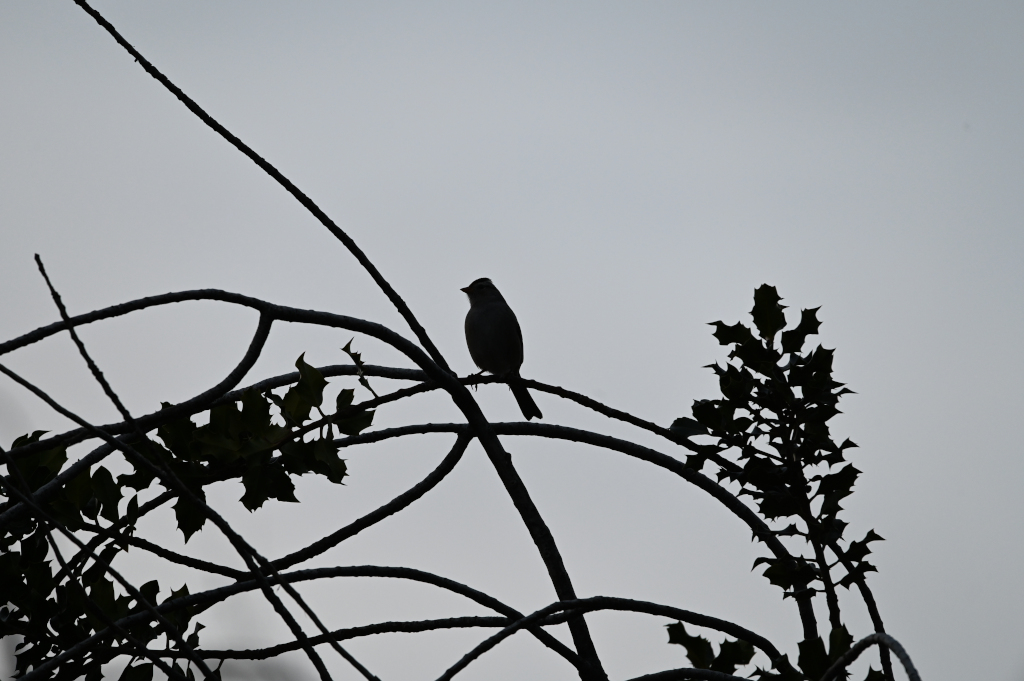
I was out in the yard trying to test z6ii + sigma + gimbal tripod again. It's still cast in no good light. Saw some small birds and made some shots. It turned out all subjects, bird, and tree, are backlit and become like silhouettes. Somehow before riding all the images when viewing them in gimp, hit a tool called "color tone curve". Played a bit with it on some images and was surprised by its wonder of bringing images back to life! It's not perfect, especially in this case it introduces a lot of noise, as shot in good light. But still amazing to be able to salvage a bit. Some examples: (before and after)

2023-01-18_16-49-30s.jpg

2023-01-18_16-49-30gimps.jpg

2023-01-18_16-44-44s.jpg

2023-01-18_16-44-44gimps.jpg

2023-01-18_16-44-37s.jpg

2023-01-18_16-44-37gimpNiks.jpg
 

blackstar

Senior Member
What's the simplest way (if possible) to change the sky color (guess the white point?) from pale white to light blue with the same tool or others in gimp you would suggest? Appreciate.
 

BF Hammer

Senior Member
What's the simplest way (if possible) to change the sky color (guess the white point?) from pale white to light blue with the same tool or others in gimp you would suggest? Appreciate.
I have similar issues with my Z5. The color profile the camera uses is working against you.

Are you just processing JPEG files? You need to experiment with custom color profiles in the Z6. You can adjust an existing profile, or just download one. You can put a several profiles on the body and select different profiles for different situations.
https://www.nikonusa.com/en/learn-a...techniques/picture-controls-step-by-step.html
https://nikonpc.com/

If you do like me and shoot Raw+JPG, I am applying a color profile in my default workflow in RawTherapee. GIMP and RawTherapee have some small degree of integration with each other. I do most of the adjusting in RawTherapee, then the file is exported to GIMP for final work. That typically is just adding my watermark or anything that needs to be done with a layer mask. Yes the curves tool in RawTherapee is better and more advanced than GIMP's .
http://rawtherapee.com/

Now the interesting part. Nikon D750 color profiles work perfectly on the Z5, and I presume other Z-series also. I just apply the D750 Standard color profile from Adobe. It turns gray skies blue. Colors look normal again instead of washed out. Whoever wrote those D750 color profiles years ago simply was on top of their game. They are great. Unfortunately the way to get those profiles involves installing Adobe DNG Converter and digging into the hidden folders to copy the files to a place that RawTherapee will access. I had read that this software is unsupported now and not available, but a quick DuckDuckGo search and there it is, hosted at Adobe.
https://helpx.adobe.com/camera-raw/using/adobe-dng-converter.html

I will let you web search for the detailed directions for extracting those camera profiles. RawTherapee has it somewhere in their online help documentation.
 

blackstar

Senior Member
I have found several methods to change sky color or replace sky scenes in gimp. I did one that uses "selection by color" and "Hue-saturation" to get this: (the color blue is still not my desire though)
(will reply to Chris' input when free)

2023-01-18_16-44-37gimpNiksSKY.jpg
 

Woodyg3

Senior Member
Contributor
While I've heard of GIMP, I am not familiar with its capabilities. The best thing you can do in these types of situations is shoot RAW and use advanced software like Lightroom and Photoshop. Of course, that means having a computer that can handle the graphics and memory requirements, and also paying for the software. The ability to use advanced selections and layers would be very helpful in these shots.

Are there hue and tint tools in GIMP? If so, that might help make the sky more realistic.
 

Peter7100

Senior Member
I agree with Woody, that Lightroom after shooting in RAW will give you more scope to achieve the desired effect. Although you have to pay for programs like Lightroom, Topaz Denoise etc, they usually cost a lot less than the price of a second hand lens, therefore imo offer excellent value. My own experience is that these programs work really well with 16GB RAM and a AMD Ryzen 7 processor or similar (I know someone that owns 8GB RAM and an intel i5 processor and the Denoise is way too slow, although LR works fine..
 

blackstar

Senior Member
While I've heard of GIMP, I am not familiar with its capabilities. The best thing you can do in these types of situations is shoot RAW and use advanced software like Lightroom and Photoshop. Of course, that means having a computer that can handle the graphics and memory requirements, and also paying for the software. The ability to use advanced selections and layers would be very helpful in these shots.

Are there hue and tint tools in GIMP? If so, that might help make the sky more realistic.
Other than hue-saturation there is hue-chroma for changing color scenes. Both are similar, but hue-saturation is more advanced, IMO. I think taking the time I can tweak the tool for more desired color scenes though. Another issue with this kind of process is using any kind of selection tool always faults more or less on subjects' edges and causes fringe issues after changing color.
 

BF Hammer

Senior Member
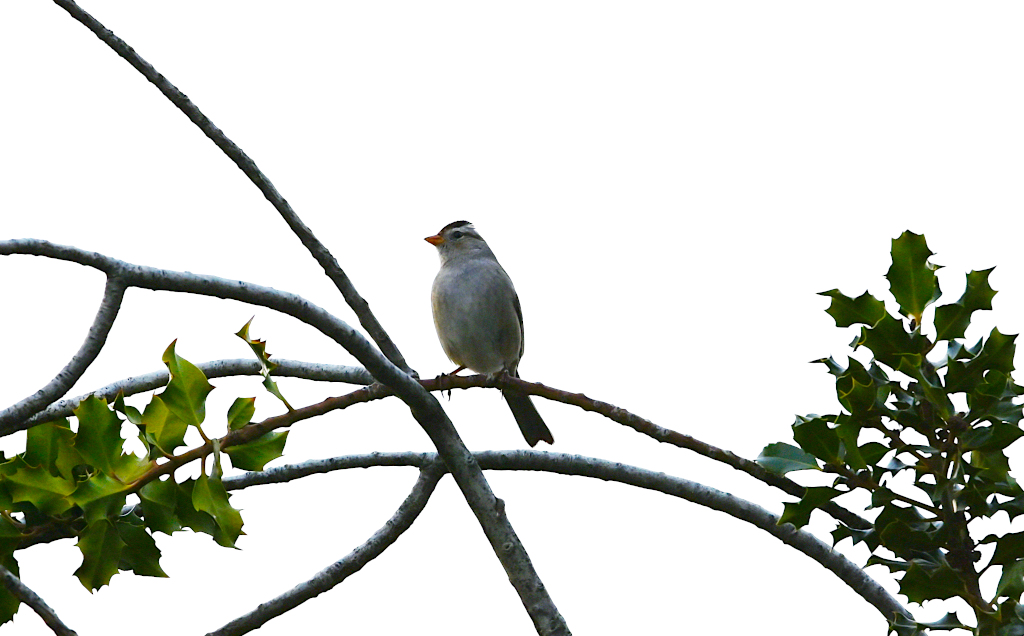
@blackstar I took the liberty to just use one of your silhouetted bird shots and try to adjust in RawTherapee. Keep in mind, I'm using your low-res exported JPG file.

I applied the D750 color profile, but to no immediate visible difference. I think it would have changed for the better with a Raw file.
I adjusted the white balance to "Sunny" and the sky changed to a blue. I enhanced this a bit by decreasing the color temperature a little more manually.
With a JPG file, this next step is very limited in results. I activated the Shadows/Highlights tool and brought the shadows nearly all the way up, decreased the highlights, also by a very large amount. It would not be so extreme an adjustment with a Raw file.
Moved the Lightness slider, Exposure, Black Level up a small amount.
Just to see how far I could pump that JPG, I also activated Noise Reduction and limited that to just a little bit of correction.

Again, only RawTherapee was used and I exported again as a JPG. GIMP does not make these adjustments as well similar to how Photoshop is not as good as Lightroom for those types of adjustments. At least that is what I have read online. I've never interfaced with either of those programs, way out of my price league. I use free and open-source software as much as I can. You really don't loose that much on features, and save so much cash.
2023-01-18_16-44-44s RawTherapee.jpg
 

blackstar

Senior Member
I have similar issues with my Z5. The color profile the camera uses is working against you.

Are you just processing JPEG files? You need to experiment with custom color profiles in the Z6. You can adjust an existing profile, or just download one. You can put a several profiles on the body and select different profiles for different situations.
https://www.nikonusa.com/en/learn-a...techniques/picture-controls-step-by-step.html
https://nikonpc.com/

If you do like me and shoot Raw+JPG, I am applying a color profile in my default workflow in RawTherapee. GIMP and RawTherapee have some small degree of integration with each other. I do most of the adjusting in RawTherapee, then the file is exported to GIMP for final work. That typically is just adding my watermark or anything that needs to be done with a layer mask. Yes the curves tool in RawTherapee is better and more advanced than GIMP's .
http://rawtherapee.com/

Now the interesting part. Nikon D750 color profiles work perfectly on the Z5, and I presume other Z-series also. I just apply the D750 Standard color profile from Adobe. It turns gray skies blue. Colors look normal again instead of washed out. Whoever wrote those D750 color profiles years ago simply was on top of their game. They are great. Unfortunately the way to get those profiles involves installing Adobe DNG Converter and digging into the hidden folders to copy the files to a place that RawTherapee will access. I had read that this software is unsupported now and not available, but a quick DuckDuckGo search and there it is, hosted at Adobe.
https://helpx.adobe.com/camera-raw/using/adobe-dng-converter.html

I will let you web search for the detailed directions for extracting those camera profiles. RawTherapee has it somewhere in their online help documentation.
First, really appreciate your many inputs of information for possible solutions to my needs. I was aware of changing the color profile in z6ii and did experiment with one "vivid" for landscape scenes. It turned out the vivid color shade is too "heavy" for my liking. However, IMO, the standard color profile is pretty good for most scenes, much better than D3500 in my experience. I like the natural color flavor for out-of-camera images, then, if needed, process to adjust for special occasions. In the case of this thread, I got the grey sky image from the cast day, that's natural. The key is to lift subjects' shallowness and bring out their highlight details (by tone curve). So even if the D750 color profile is used and the grey sky turns blue, shallows still need to be lifted which will probably affect the sky color again. I checked the link and found that I am out of luck with the dng-converter due to my old Mac machine :(

Too bad, it seems so many things waiting for a computer upgrade!
 

blackstar

Senior Member
@blackstar I took the liberty to just use one of your silhouetted bird shots and try to adjust in RawTherapee. Keep in mind, I'm using your low-res exported JPG file.

I applied the D750 color profile, but to no immediate visible difference. I think it would have changed for the better with a Raw file.
I adjusted the white balance to "Sunny" and the sky changed to a blue. I enhanced this a bit by decreasing the color temperature a little more manually.
With a JPG file, this next step is very limited in results. I activated the Shadows/Highlights tool and brought the shadows nearly all the way up, decreased the highlights, also by a very large amount. It would not be so extreme an adjustment with a Raw file.
Moved the Lightness slider, Exposure, Black Level up a small amount.
Just to see how far I could pump that JPG, I also activated Noise Reduction and limited that to just a little bit of correction.

Again, only RawTherapee was used and I exported again as a JPG. GIMP does not make these adjustments as well similar to how Photoshop is not as good as Lightroom for those types of adjustments. At least that is what I have read online. I've never interfaced with either of those programs, way out of my price league. I use free and open-source software as much as I can. You really don't loose that much on features, and save so much cash.
Thanks again, for your input. I see that you can process the image in RT with a series of filters and tools to come up with a similar result. My version basically was done in gimp with just tone curve (lift up shallows) and hue-saturation (change sky color). IMO, the color tone curve can achieve at least shallows, highlights, contrast, and scene clarity. Using hue-saturation or hue-chroma (and selection by color) in gimp, I am sure it can be achieved to have the blue sky (more natural) you did.

As you recommended, I had RT installed and tried hard to use it (man, the learning curve is so deep!). Now my main using RT is to utilize its wavelet module to better process the MW raw images. So far, reach only about 1/3 of the whole path... slow progress. Hope you or anyone enlighten me on this task.
 

BF Hammer

Senior Member
RawTherapee could use improvement on how the tools are grouped and arranged. It feels like you jump around instead of following a linear workflow.

My best advice is to figure out which things you do regularly in the same way nearly every time, set and save that as a profile (in the upper-right segment of the screen). Once you have a profile, it can be applied in bulk for any new files you import. It saves a lot of time and navigating around. For instance when I take pictures of my watch collection in my photo studio tent, I always use the same camera/lens, and the WB is consistently the same due to internal LED lighting in the studio tent. I also resize to the same settings always and apply the D750 colors. That is all saved as a profile and I just jump into the exposure settings for fine adjustments, then export. Sometimes a crop might be applied, or some sharpen filters, but I get to skip the basic things.
 

Needa

Senior Member
Challenge Team
Which one? Did watch the dng converter. My Mac version is too old to install the converter. One question: Does file size change after converting from nef to dng, larger or smaller, and how much?
As for videos what ever you are interested in doing like sky replacement using GIMP. I don't convert my NEF to DNG so no help there.
 

Fred Kingston_RIP

Senior Member
Which one? Did watch the dng converter. My Mac version is too old to install the converter. One question: Does file size change after converting from nef to dng, larger or smaller, and how much?

For reference, the same NEF file (from my D810) is 36M and converted to DNG is 78M

Just for reference, you can convert a NEF directly within Lightroom from the Library menu with many more options than Adobe's DNG converter program... It converts the above 36M NEF file to a 39M DNG...
 
Last edited:
Top