Taking pictures of circuit boards.

Mike D90

Senior Member
Also...
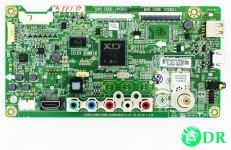
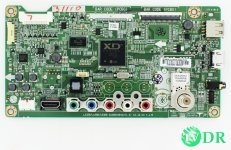
Here is an example of my image vs competitor image.

Theirs just looks better to me, also, notice how pure white their the background on the edges of their board is? Mine is so dingy grey looking and I cant seem to get it better?

LG 32LN530B UA Ausyljm Main Unit EBR75172695 | eBay
I attached the competitors image in attachments.

Thanks,
Tim

Youshould have linked to the competitors image and posted yours.

Anyhoo, all I see different is his image is a little better lit than your is. Its a little brighter.
 

nickt

Senior Member
If using autofocus, use single point and try to find a clear shot at the silkscreen. You might have to focus/recompose. That could be a pain. I think it might be easier to manual focus. Try live view and zoom in the the silkscreen and focus manually. As well as sharpening, try playing with the clarity, vibrance, and saturation in Lightroom too. Get those colors to pop a bit.
 

tvdrss

New member
Thanks again, we have been working with manual focus, the only pain is that we like to be tethered with lightroom and we cant find a live view program that will run at the same time as light room, as soon as you take a picture one of them will crash and we cant figure out why.

I do have one final question if possible. Our background which is bright white paper, is always showing and dingy grey and not white. Is there a way to make it look more white without ruining the photos?

Thanks,
Tim
 

Mike D90

Senior Member
I do have one final question if possible. Our background which is bright white paper, is always showing and dingy grey and not white. Is there a way to make it look more white without ruining the photos?

Thanks,
Tim

I think that is either your white balance setting or you are underexposing. Do you shoot JPEG or RAW? If you shoot JPEG set your white balance to "Flash" if you are using a flash. Or try setting your camera to expose a little more.
 

Horoscope Fish

Senior Member
How does this look?

$_57.jpg


I took your shot and increased the brightness and contrast significantly, then sharpened it moderately. When I compare this shot, side-by-side, with the one you posted from one of your competitors I think they're very, very close. Your competitor's shot has a color balance that, to my eye, is not quite correct. And I've worked with a circuit board or ten in my day so I have some idea of what I'm talking about. The color rendition in the shot I posted using your original is much truer to my eye.

All of my edits were done using Photoshop, but they're all rudimentary things that LR will be able to duplicate easily; I just can't give you step-by-step directions for doing them in LR because I'm not really a LR user.
 
Last edited:

tvdrss

New member
Horoscope Fish,

That right there is 100% perfect. I am going to go in and try moving the brightness and contrast up and see if I can duplicate what you did. I will post my results.

Thanks,
Tim
 

tvdrss

New member
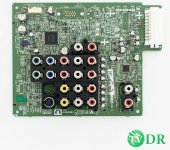
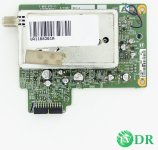
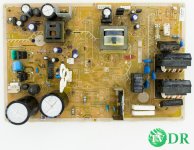
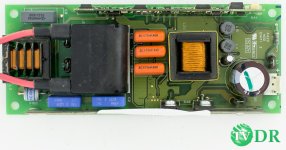
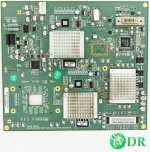
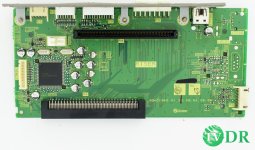
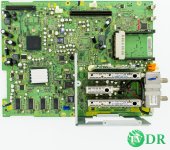
timtest.jpgtimtest2.jpgtimtest3.jpgtimtest4.jpg

Wow when you know which settings to change it makes all the difference in the world. I adjusted like you said and thy are coming out very white.

I guess I just have to live with the silk screening a little out of focus or take the time to manually focus every time. I wish there was a way to make the camera auto focus on the farthest away item, that would make it perfect.

Anyway, thanks for everyone's help. I do believe this will do for us at this stage of the game.

Thanks,
Tim
 

Horoscope Fish

Senior Member
Hey Tim, hope that helps... The shots you're getting with the equipment you have are entirely adequate for what you want; I think you just need a little experience working with LR to get the final output to look exactly like you want it. Bear in mind I'm working JPG's here, so you having the RAW file will give you a huge amount of additional flexibility in making these sorts of corrections.

You might also want to try adding a little Saturation and/or Vibrance to see how you like that, but go easy on those sliders. The same goes for Sharpening. Too much anything in Post Processing will give your shots an "over cooked" appearance and that's no good. Post Processing often times is about knowing when to STOP.

For example... This is the same shot of yours I used in my previous post, but this time I've deliberately gone just a little overboard with the processing; not totally nutty-crazy mind you, but this is definitely on the ragged edge of acceptable in my estimation:

$_57-2.jpg
 

Mike D90

Senior Member
View attachment 79897View attachment 79898View attachment 79899View attachment 79900

Wow when you know which settings to change it makes all the difference in the world. I adjusted like you said and thy are coming out very white.

I guess I just have to live with the silk screening a little out of focus or take the time to manually focus every time. I wish there was a way to make the camera auto focus on the farthest away item, that would make it perfect.

Anyway, thanks for everyone's help. I do believe this will do for us at this stage of the game.

Thanks,
Tim

Youshould be able to set the aperture small enough to get all of it in focus. What aperture do you use?
 

tvdrss

New member
Yes, helps a ton, I appreciate it. I definitely have seen what happens when we play around too much as the pictures start looking horrible, grainy and not at all the correct colors.

This is adequate enough for what we do. The only thing that would be nice is if people could read all the silk screening. I know when ordering parts, that is what I like to look at for many reasons as many times there can be two boards with similar part numbers and just a little variation in the circuits and so I like to verify before ordering. On our shots, sometimes its difficult to see all the detail I need.


Also Mike, we are using 7.1 for aperture.


Thanks,
Tim
 

Horoscope Fish

Senior Member
This is adequate enough for what we do. The only thing that would be nice is if people could read all the silk screening. I know when ordering parts, that is what I like to look at for many reasons as many times there can be two boards with similar part numbers and just a little variation in the circuits and so I like to verify before ordering. On our shots, sometimes its difficult to see all the detail I need.

Also Mike, we are using 7.1 for aperture.
Is there a shot you've posted already that would be a good example of that, with the silkscreening being difficult to read? Or, if not, could you post one up? Using f/7.1 should be giving you way more depth of field than you need at the focal lengths you're shooting at to give you sharp focus (dare I say it?)... Across the board (HA!).

This is one time it sounds to me like you really can have it all and I'm not sure why you're not getting it...

....
 

Horoscope Fish

Senior Member
Yes, if you look here:

http://d3d71ba2asa5oz.cloudfront.net/12014191/images/ua1175974a__1.jpg

You can see the silk screening, especially in the bottom left corner is really blurry and you just cant read it.

Hmmmm... Yeah, I see what you mean.

In looking at this shot quickly, I'm thinking it's just a poor shot (no offense). The fact is getting really, REALLY sharp shots, consistently, is not as easy as some people think. What I mean to say is I think there are issues here with technique. This is not a depth of field issue or an issue with your current equipment. That being said, I think it could be motion blur, or mirror-slap, causing the blurriness in that particular shot. The fact that some of your other shots ARE as sharp as they are kind of confirms this in my mind. Your camera and lens are definitely capable of giving you what you want but I think there's some pilot error here. Again, no offense intended, I'm legitimately trying to help you get the very best shots you can...

In looking over you previous posts, I do notice the shutter speeds you're using tend to be a bit on the slow side. That's not a bad thing but it needs to be understood and dealt with. I'm assuming you're shooting these from a tripod, yes? If not you absolutely need to be.

Also, you might want to try using the camera's built-in self-timer to delay the shot by 5 seconds after you press the shutter button. This will kill 99% of motion-blur. That, or you could invest in one a cheap wireless shutter-release so you don't have to wait 5 seconds between shots. The Nikon-branded wireless releases are in the $25 range with decent third-party knock-offs running $10 or so on Amazon. Trying some shots using the self-timer would tell you if it's motion blur causing the issue before you go and invest $10 in a wireless release, though.

Okay, big edit...

I'm also wondering how you're taking the shots. Let me see if I can ask this coherently...

When you frame the shot of the board in the viewfinder, are you zooming in so the board fills the viewfinder? I ask because the lens you're using may be going "soft" in the corners and if that's the case then we need to know that. What you might try doing is taking the shot with the board centered in the frame but with lots of space around it; maybe fill *half* the frame with the subject as you see it in the viewfinder, the rest being empty space. This keeps your subject (and the silkscreening) away from the potentially soft corners of your frame. Take the shot as described and then, in Lightroom, zoom in and crop the shot before you do any other adjustments (to color, saturation, contrast, etc.) and check your corner sharpness.

....
 
Last edited:

tvdrss

New member
U913700820005__1.jpgU00L38805G00__1.jpgU934C15400__1.jpgU934C15200__1.jpg


No worries, I am coming here for help so I know we don't know what we are doing.

To address your questions:

Yes, its on a tripod, rock solid mounted in the top of our light booth.
We are using the tether feature in light room so we don't even touch the shutter button, we take the picture from the computer keyboard.

I have been talking with my employee who takes photos and I guess the problem has been compounded because the detail level I like, which is to zoom in and read all the silk screening is not possible in his opinion because the files end up being too big and are filling up our allotted space on the server too quickly. Apparently they had to reduce the photos now to below 500kb max a piece which makes zooming in impossible and therefore I guess I have to give up on the detail level aspect until we move to our own website where we can have files as big as we want.

Good news is my guy has taken 84 photos in the last hour and they are looking great, the background is perfectly white and the pictures look 10 times better just because of that aspect.

As for the silk screening, it just looks horrible if you try to zoom in because they had to keep the file size so small.

Looks like I am going to have to accept these. Which look amazing in my opinion because the background is perfectly white. I guess if we were able to let them be 1 or 2 mb a piece then maybe I could get the silk screening perfectly clear but apparently at this point its not going to happen.

Thanks,
Tim
 

wornish

Senior Member
Sorry I have come into this a little late. I agree with Horoscope Fish and again no offence .
The camera was focussed on the top of transformer and the relays so probably 1 inch ( 2cm) above the circuit board base hence the printing on the board is slightly blurred.
Even at a high aperture f/16 this would probably still be out of focus when you are so close.

Use both the inbuilt delay AND either a cable shutter release or the cheap wireless releases ( I have one and they work great).
The camera should be in AF-S mode
Definitely use Live View to focus and move the red focus box around to select an area where the small print on the board is to use this as the focus point.
you can then zoom the Live View right in and half press the shutter release to see the focus box turn green ( Don't Zoom the lens )
The print should be crystal-clear. Press the shutter release all the way down to take the pic.


By the way a macro lens would not make it any better as the DOF will be very thin

Hope this helps
 

wornish

Senior Member
Your reply to H/F came in while I was composing my last mail so I didn't realise you were shooting tethered.

Lightroom does not support Live View focussing when tethered but Nikon Camera Control Pro 2 software does and it truly is amazing you can use your mouse to select where you want to focus and zoom in on the area you want to use and see it on your computer screen.

You can even micro adjust the focus distance

The only drawback is its not cheap I think it supports the D5100 so thats good ( double check) but it is what the pros use hence the name
 

Mike D90

Senior Member
So we have been taking the pictures with the new settings and the background looks white as snow, 100% perfect on the computer and in lightroom.....

BUT when you view them on eBay, the background looks dingyish again. This is driving me mad, how do all the pros get them to look like there is no background at all?

Toshiba 62HM95 Color Wheel N449 | eBay
Sony KDF E50A10 Lamp Door x 2108 370 1 | eBay

Thanks,
Tim

It is possible that others are shooting their pieces against a green screen (Chromakey) background and then removing that background in Photoshop and replacing it with white (computer white).
 
Top