BackdoorArts
Senior Member
OK, so I grabbed one image (2453) and decided to see what I could do with it.
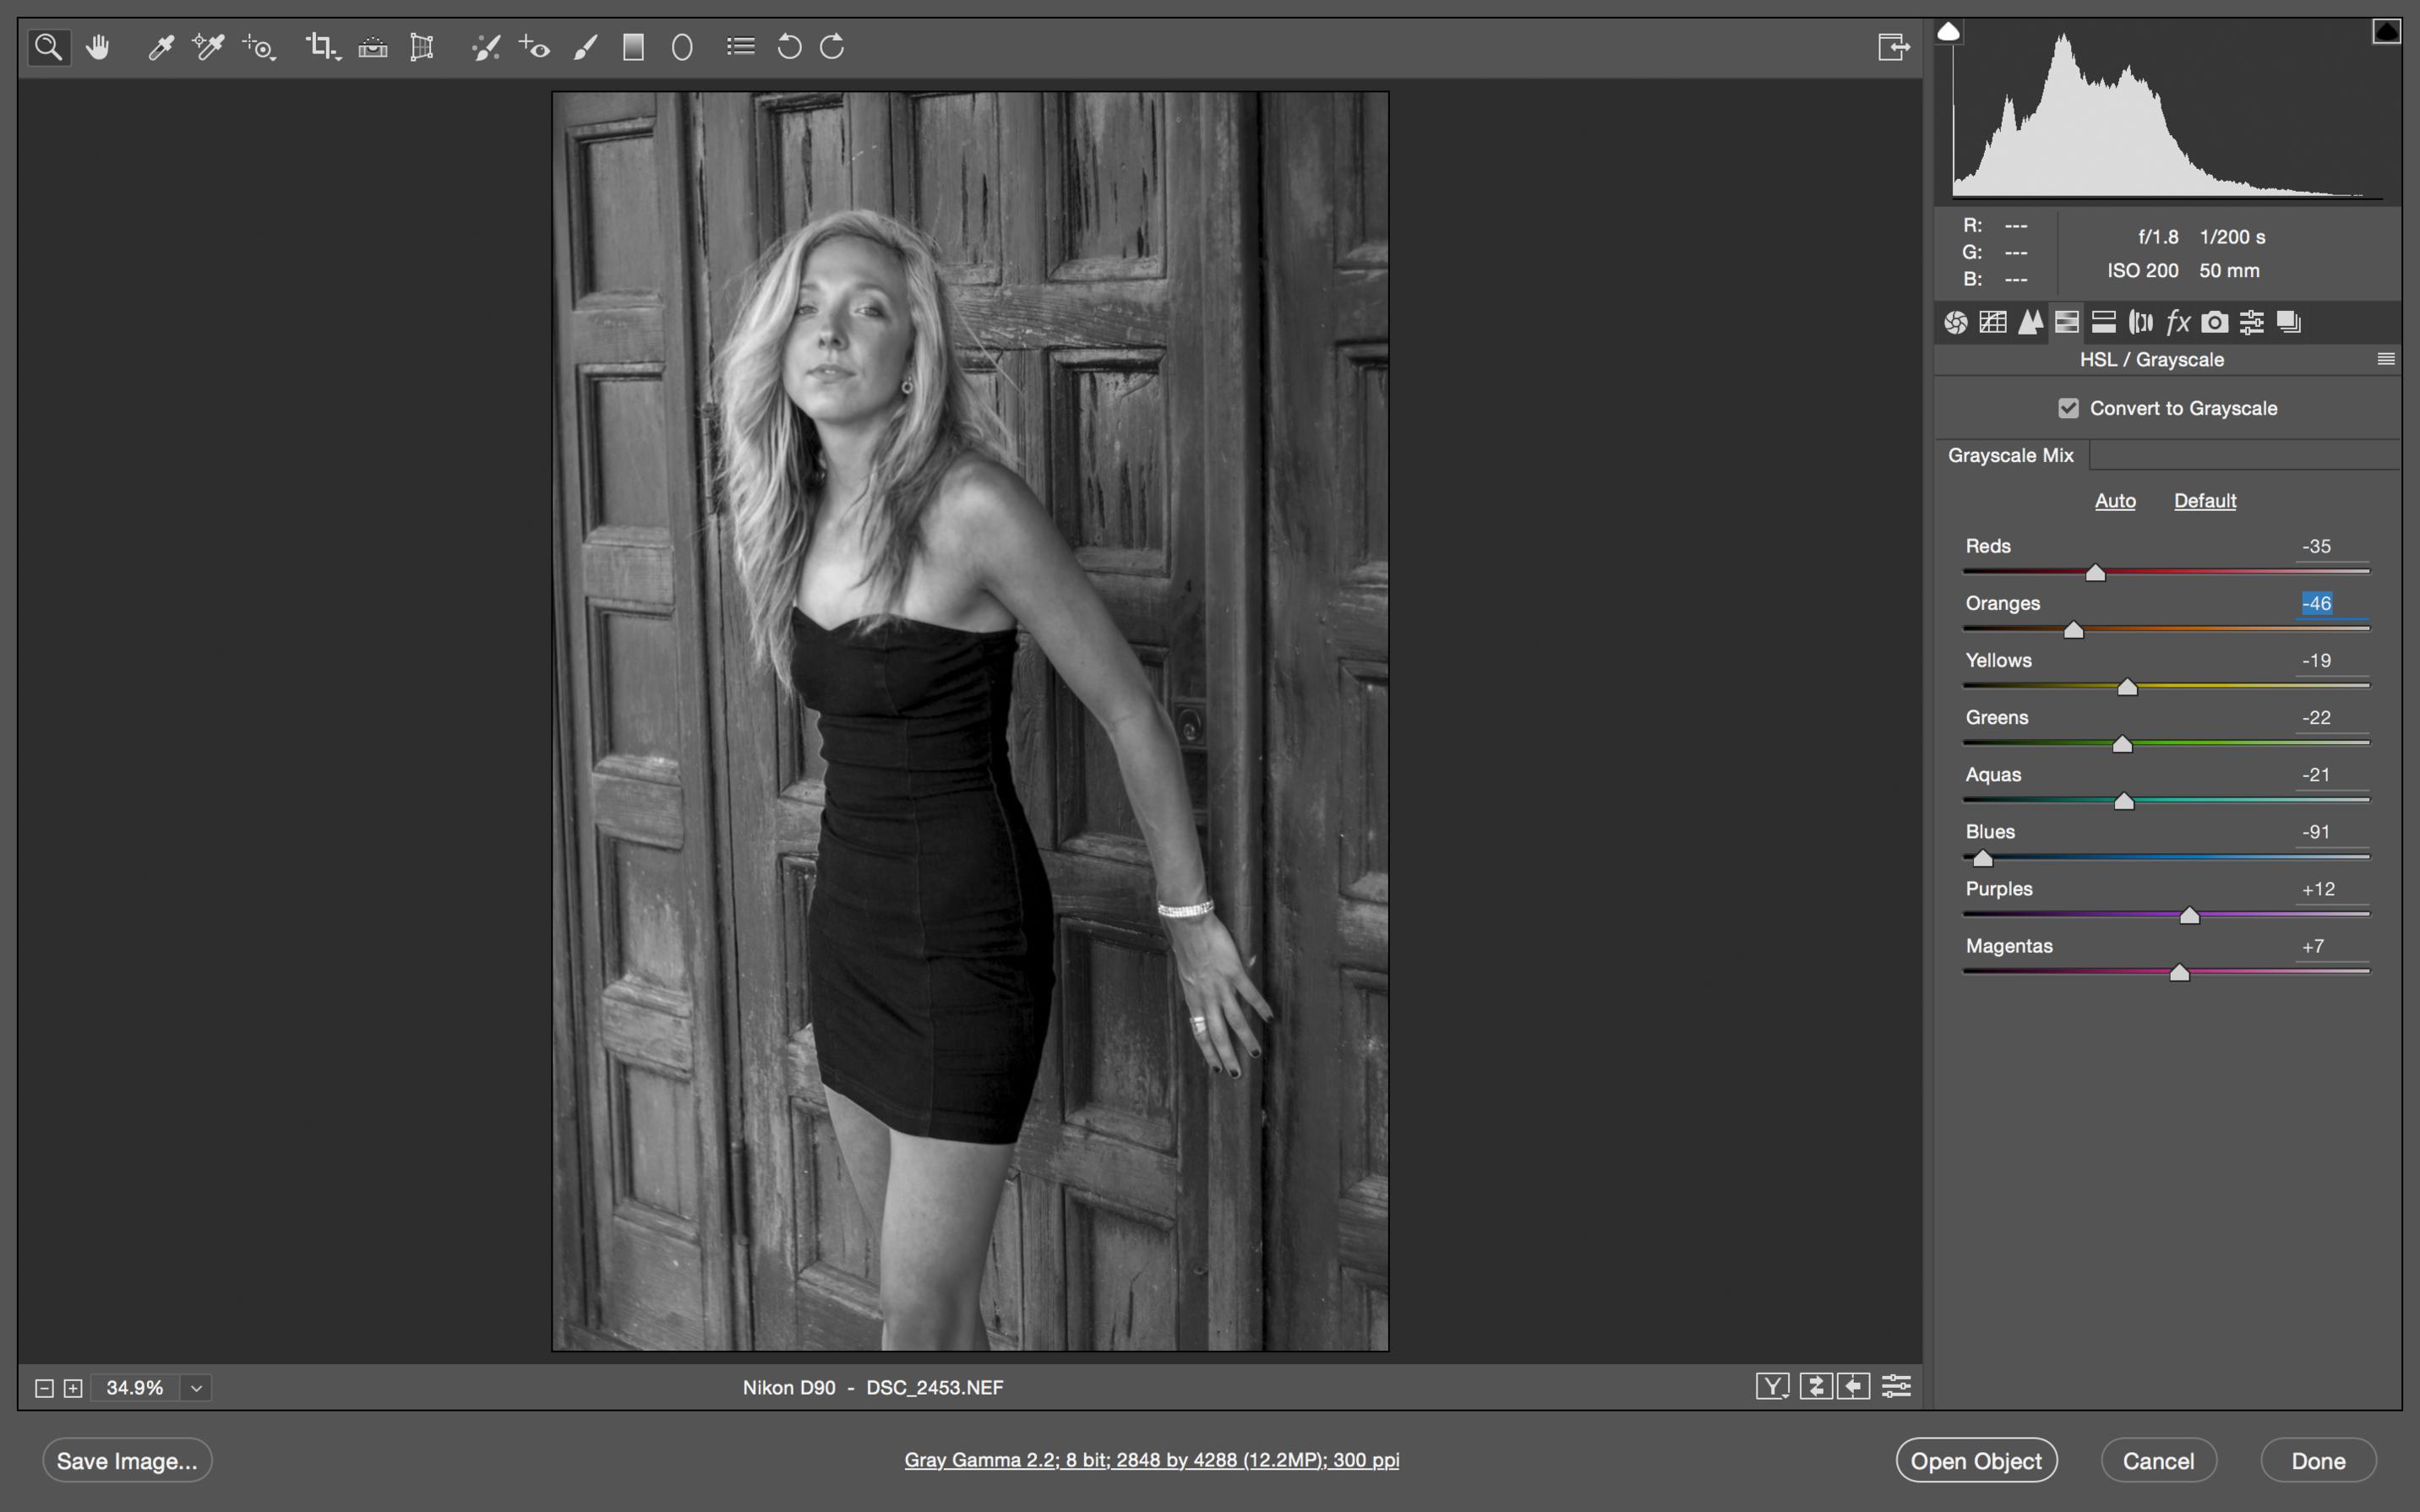
It's slightly over-exposed so I set about getting a good exposure first (wound up pulling back the highlights 100% and some other stuff you'll see later). Once I had that I went to the HSL section and started playing with sliders. The key to this image is the blonde hair against the fair skin, so you want to isolate the skin tones while preserving the look of the hair. For me that was bringing the oranges to the dark side while boosting the yellows. This is what I got...

I actually could have isolated the effect of each slider better had I adjusted the hue of the oranges and yellows first, pushing oranges toward red and yellows toward green (makes for an ugly color photo, but that's why B&W film photographers rely on filters).
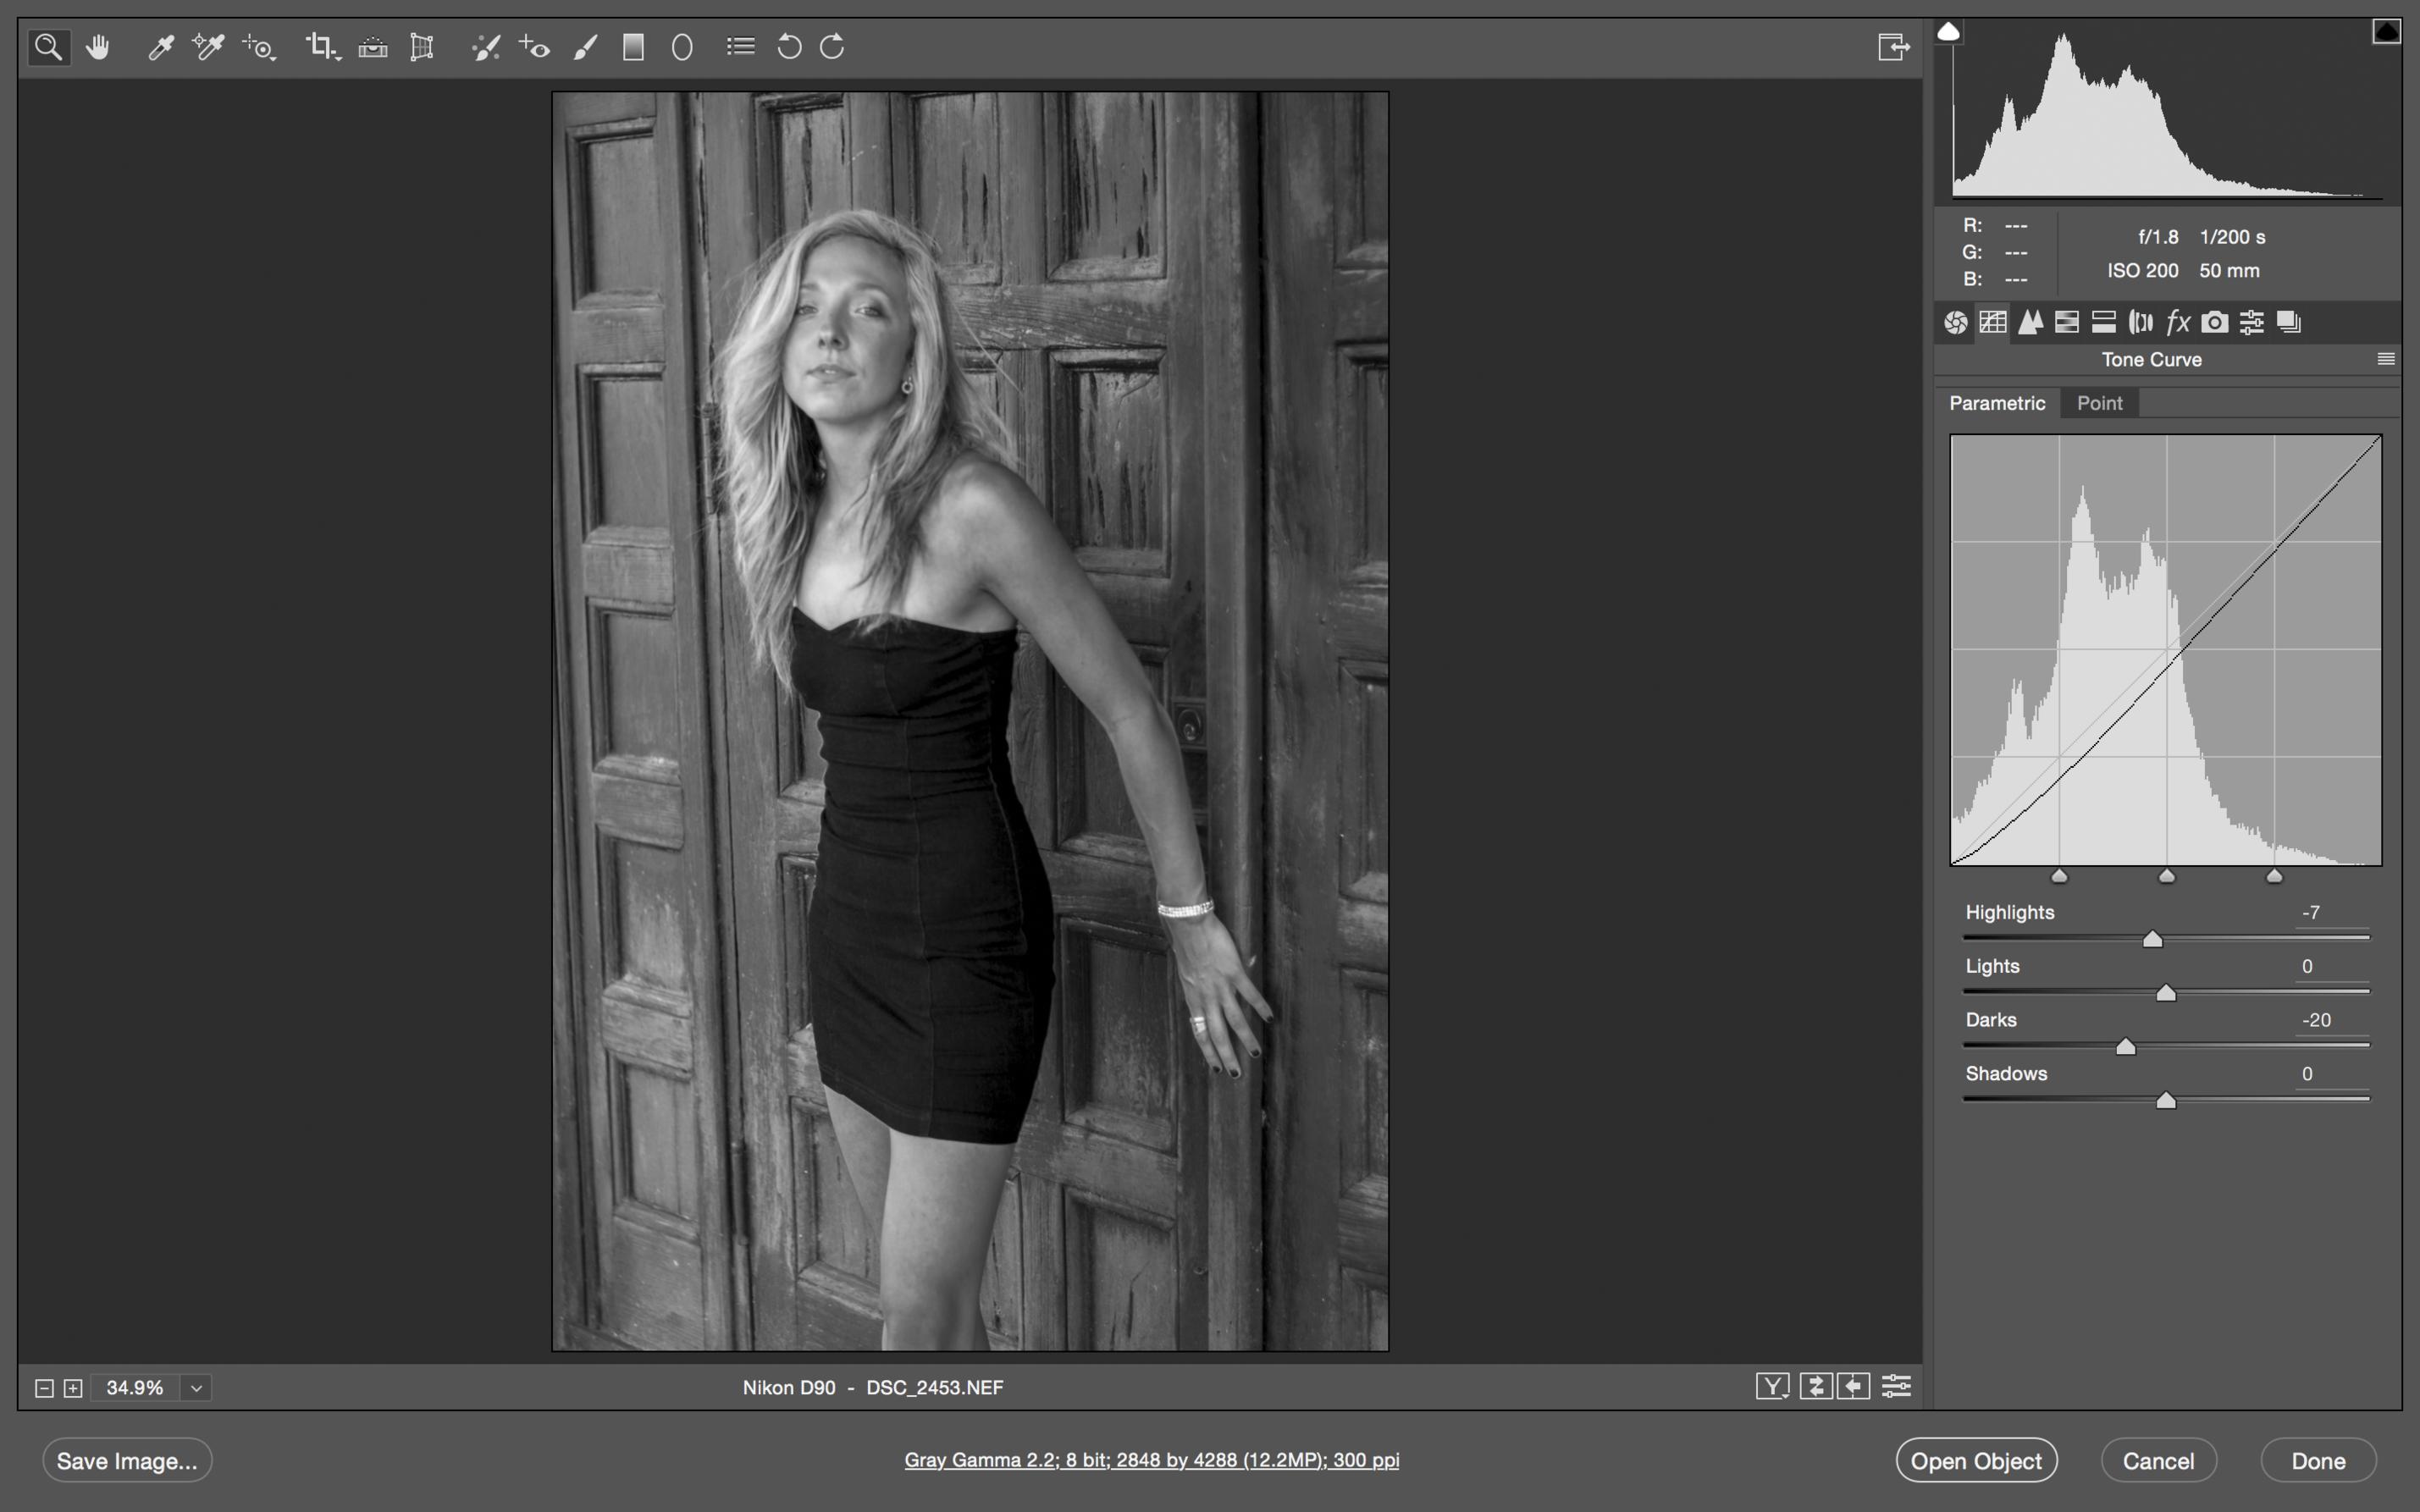
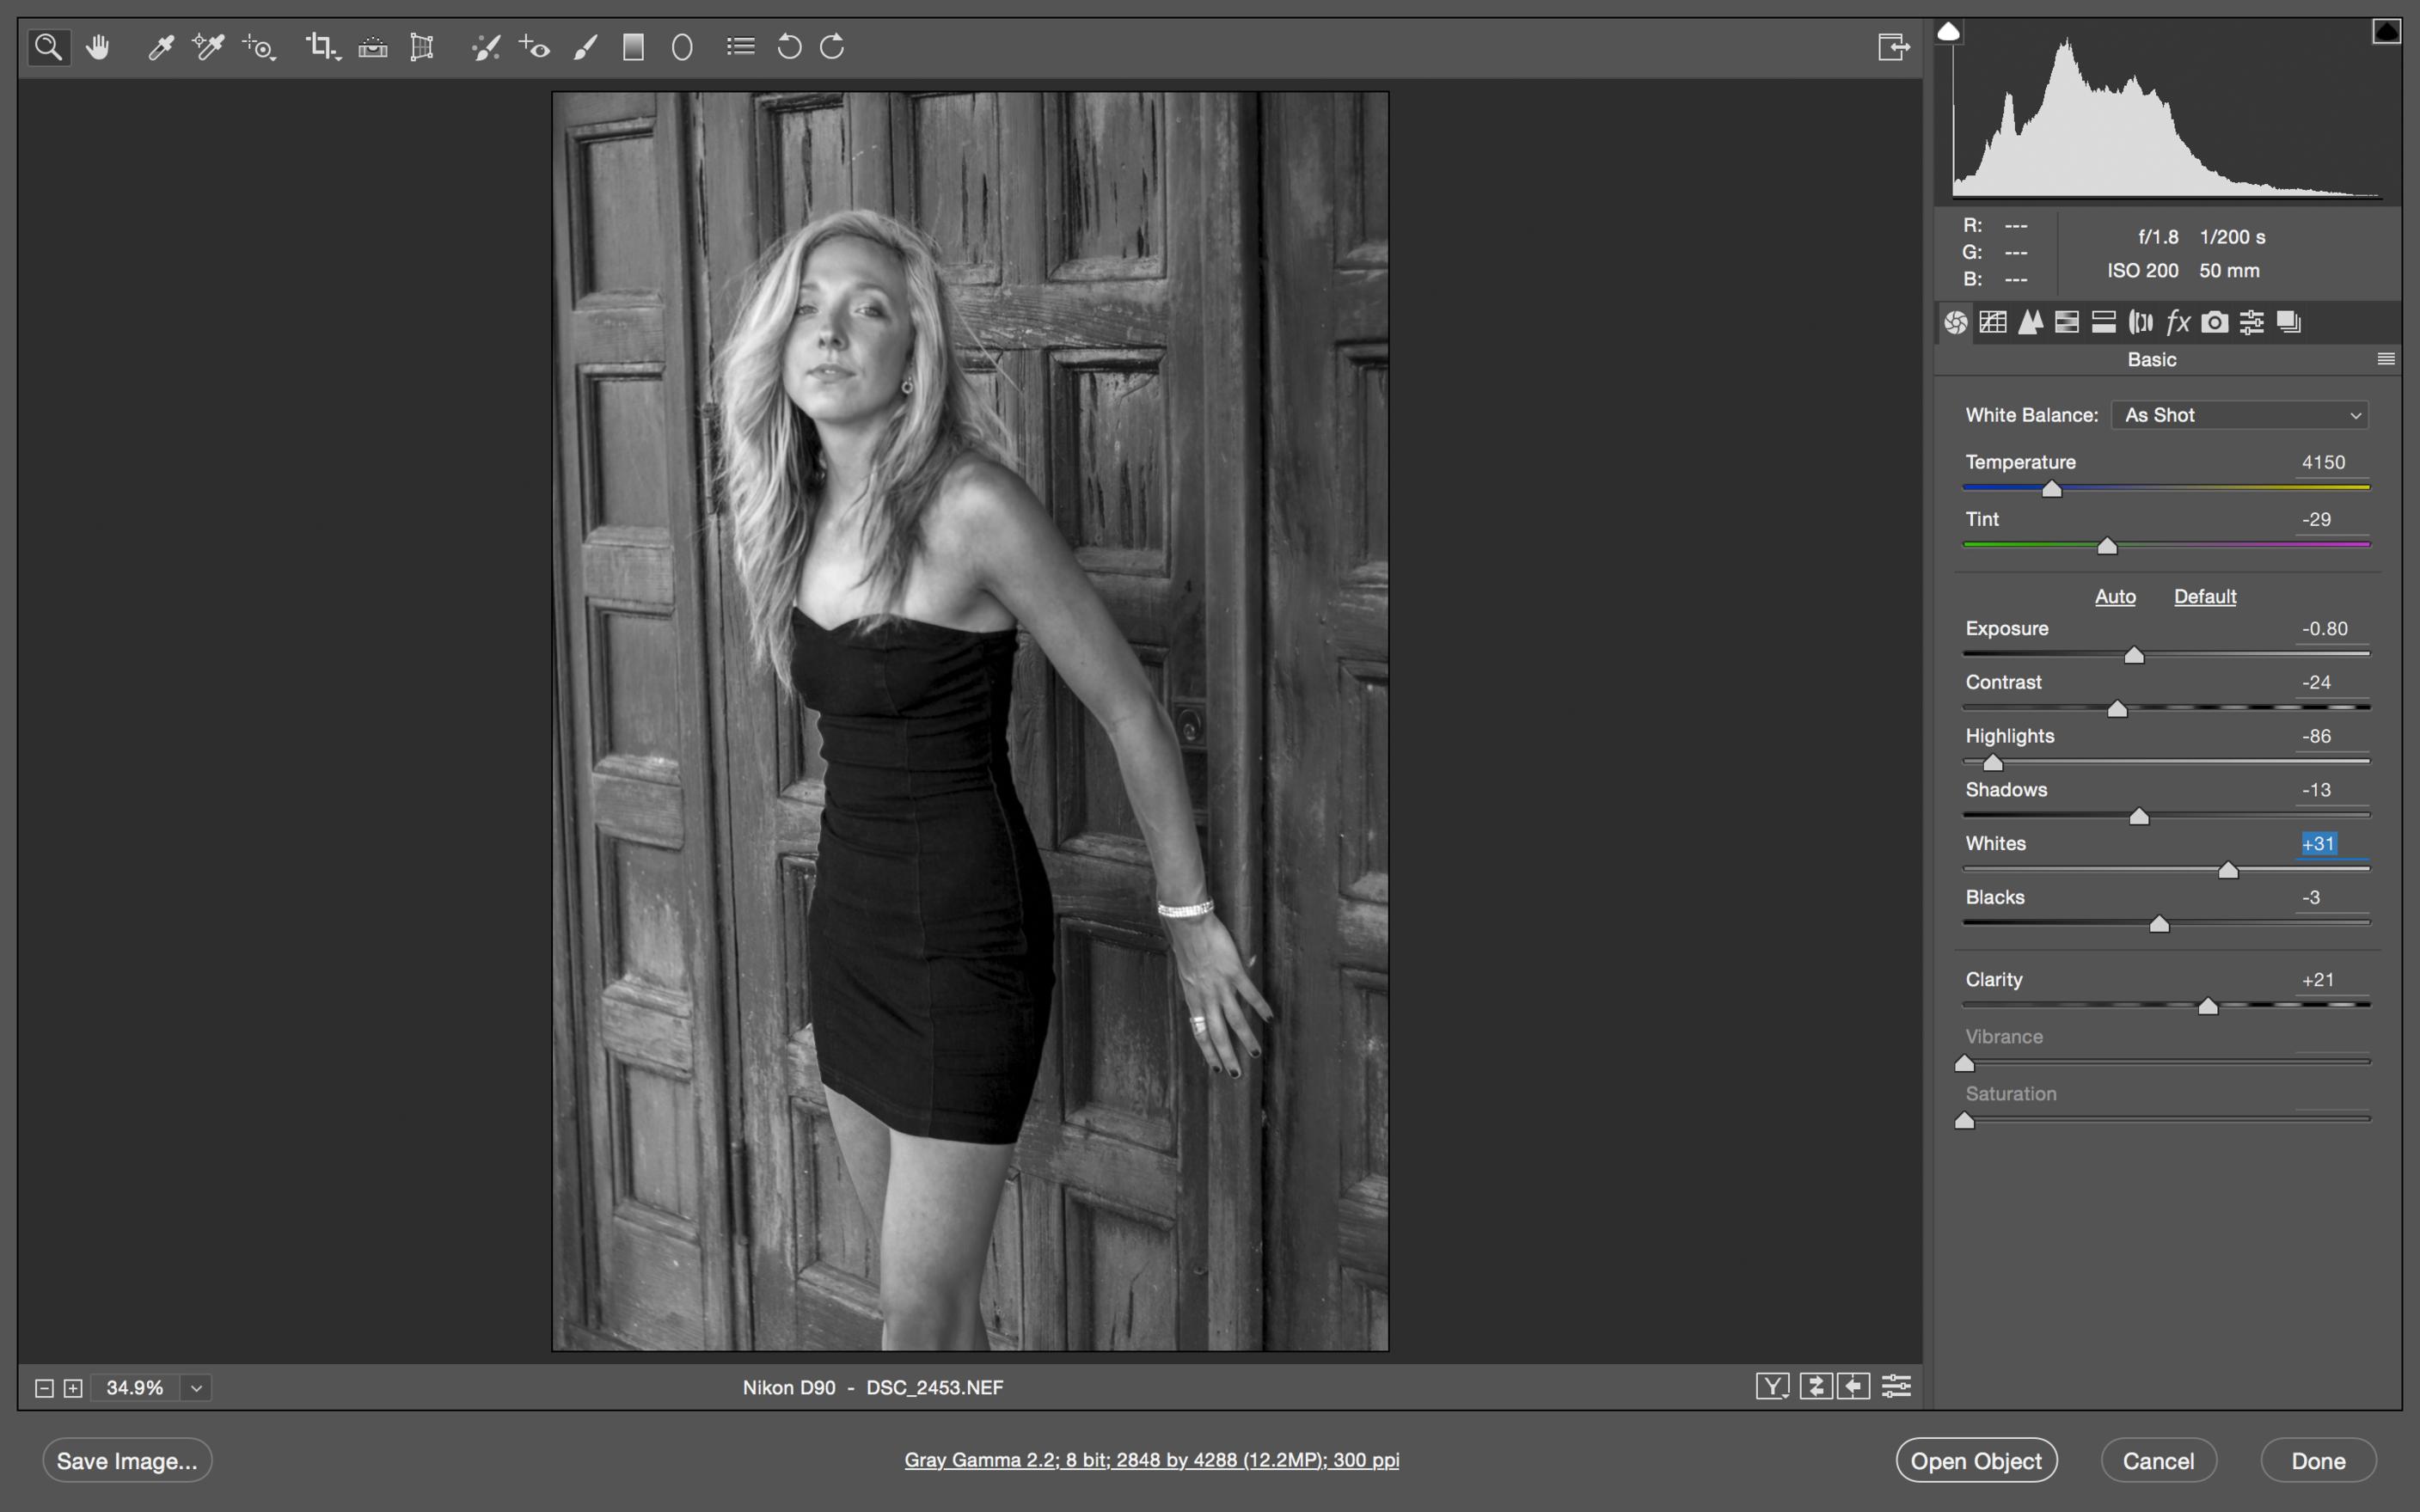
I also played a bit with the sliders in the Curves section (which I may have done prior to the screen grab), so here are screen shots for my Develop and Curve sections...


I'm not saying this is right or wrong, good or bad in terms of the final result. I'm merely pointing to the tools in Camera Raw/Lightroom Develop that allow you to do this.
You may also want to explore the various profiles in the Camera Calibration section as many of them can give you a higher contrast look to start. You can also play with oversaturating the color image before going to grayscale to give you more color in the areas you want to darken. To get what you're going after you're going to live in the HSL section more than anything else, I suspect.
It's slightly over-exposed so I set about getting a good exposure first (wound up pulling back the highlights 100% and some other stuff you'll see later). Once I had that I went to the HSL section and started playing with sliders. The key to this image is the blonde hair against the fair skin, so you want to isolate the skin tones while preserving the look of the hair. For me that was bringing the oranges to the dark side while boosting the yellows. This is what I got...
I actually could have isolated the effect of each slider better had I adjusted the hue of the oranges and yellows first, pushing oranges toward red and yellows toward green (makes for an ugly color photo, but that's why B&W film photographers rely on filters).
I also played a bit with the sliders in the Curves section (which I may have done prior to the screen grab), so here are screen shots for my Develop and Curve sections...
I'm not saying this is right or wrong, good or bad in terms of the final result. I'm merely pointing to the tools in Camera Raw/Lightroom Develop that allow you to do this.
You may also want to explore the various profiles in the Camera Calibration section as many of them can give you a higher contrast look to start. You can also play with oversaturating the color image before going to grayscale to give you more color in the areas you want to darken. To get what you're going after you're going to live in the HSL section more than anything else, I suspect.
