D500 USED WITH FLASH AND AUTO-ISO : problems ???

FLATSIX

New member
Dear Stan and Horoscope Fish,

You did help me a lot - I really am satisfied with your explanations to a "newbee" like myself.
The answer that I got from NIKON BELGIUM is the same - although they do not give that much information like you do...

I all makes sense when I change my thing for 100% : the shoot a few weeks ago was a malfunction of the camera - the D500 did show me the ISO-levels at which he would take the picture - the same a if I turned "off" the flash. Only he kept showing me those ISO-settings with flash to "on". I thought that it was the normal procedure and I was happy with it, because I could follow the ISO-levels and lower my speed or take a bigger aperture in order to get the ISO a bit lower to my taste.

But this behaviour at that time was not "normal" - now he acts normal by not letting me see the iso - only 4x the min.iso-setting (400) and this value does not change when I point to dark or bright areas. But I finally understood that this is the "normal" thing for the camera, I can set the flash-limit instead of 8000 or 6400 lower to let's say 3200 in order to prevent the machine to go in the too-high iso.

The stuff to go to manual : that is another thing - when I work in "M" then without flash I set the speed and aperture that I desire : camera takes automatically the ISO-level for that combination + shows it to me. Then if necessary I lower speed or take bigger aperture till I am satisfied. This is my way to do it (without flash). But when putting the flash to "on" then I do not have the iso-information like before without flash and I must say : then I am lost....

Do you know some good books - reading - about how to be able to become "a more professional photographer" and to be able to work manually with flash + compensation etc. etc.

Many thanks,
Jos
 

Horoscope Fish

Senior Member
Dear Stan and Horoscope Fish,

You did help me a lot - I really am satisfied with your explanations to a "newbee" like myself.
The answer that I got from NIKON BELGIUM is the same - although they do not give that much information like you do...

I all makes sense when I change my thing for 100% : the shoot a few weeks ago was a malfunction of the camera - the D500 did show me the ISO-levels at which he would take the picture - the same a if I turned "off" the flash. Only he kept showing me those ISO-settings with flash to "on". I thought that it was the normal procedure and I was happy with it, because I could follow the ISO-levels and lower my speed or take a bigger aperture in order to get the ISO a bit lower to my taste.

But this behaviour at that time was not "normal" - now he acts normal by not letting me see the iso - only 4x the min.iso-setting (400) and this value does not change when I point to dark or bright areas. But I finally understood that this is the "normal" thing for the camera, I can set the flash-limit instead of 8000 or 6400 lower to let's say 3200 in order to prevent the machine to go in the too-high iso.

The stuff to go to manual : that is another thing - when I work in "M" then without flash I set the speed and aperture that I desire : camera takes automatically the ISO-level for that combination + shows it to me. Then if necessary I lower speed or take bigger aperture till I am satisfied. This is my way to do it (without flash). But when putting the flash to "on" then I do not have the iso-information like before without flash and I must say : then I am lost....

Do you know some good books - reading - about how to be able to become "a more professional photographer" and to be able to work manually with flash + compensation etc. etc.

Many thanks,
Jos
I suggest you start here, on Neil Van Niekerk's website and his Flash Techniques Tutorial. His site is an excellent guide to most-everything regarding how to use flash.

If you want a full, almost University-level video course on using on-camera flash you should consider, DSLR Lounge - Lighting 101. It's not free, but you can watch a few videos for free to get a feel for the course and it's definitely worth investing in if you're serious about learning to use a single on-camera flash. They also have another course, Lighting 201 which delves into using off-camera flash.

For learning how to use off-camera flash, a great tutorial is this one from Strobist.com: Lighting 101. One of the best things about this tutorial is the inexpensive gear list. A simple setup, cost-effective setup for getting started using off-camera flash.

A great book for mastering most every aspect of flash is Picture Perfect Lighting: An Innovative Lighting System for Photographing People, by Roberto Valenzuela. This author has another book, Picture Perfect Practice: A Self-Training Guide to Mastering the Challenges of Taking World-Class Photographs that is fantastic. I highly recommend it.
 

spb_stan

Senior Member
Good that there is progress. By manual we mean manual M for exposure AND fixed ISO, not Auto ISO when using flash. It is not needed or desired with flash. Believe it or not, manual everything is more intuitive and simpler. When in M mode and fixed ISO, pressing the shutter half way show focuses(unless you use the back AF-On button to start the focusing independent of the shutter release) the view finder meter displays. That is your whole bypass around using auto functions, that meter tells you the exposure with your current settings. Try it and see how you can move the indicator to either side of the center long mark which is centered optimum exposure. Try it with Matrix metering mode and look through the VF without the flash and adjust any combination of shutter and aperture when using a fixed ISO.
As you know, speed needs to be appropriate for hand holding or subject movement and aperture is selected for the depth of field you desire, stopped down for scenes where both near and far need to be in focus and opened aperture for scenes that would benefit from shallow depth of field like portraits where you want the subject in sharp focus but foreground and background with a creamy blur to have the subject appear very distinct from the background, a desirable feature of fast primes and 2.8 zooms.
Looking at the subject, you probably know whether you want it to appear part of the scene or isolated from the scene, so your decision which aperture to set will be for artistic reasons, and not for exposure since the flash will compensate for the light needed to expose the subject properly.
The shutter speed will be set with a few points in mind, speed of objects in the background( but not you subject because the flash will turn on and off much faster than any shutter setting you might choose, flash pulses are very short in duration.

Try this set of experiments:
Set the ISO to some low value, to optimise signal to noise ratio, say 100 ISO. if at night at home when trying this you will notice at that low ISO value, the meter will show underexposure.
Take a shot, to verify that is it is under exposed by the number of stops shown on the meter. For this first experiment use 1/250 sec, and the widest(lowest aperture F number) and ISO 100. That is going to create an in door night time shot that is far under exposed. Now, mount the flash, set it to TTL mode. Take the shot again. The flash will try to exposure the subject under the focus point correctly. But the background if a large room with be dark, or black.
Now, decrease shutter speed to 1/125, and shoot again but notice where the meter indicates, it should be a little closer to center. Take that shot, and you will see the main subject is still the lit properly but the background is a little brighter,

Kept experimenting with that shutter speed, lowering and watching the meter as it gets closer to the center and each shot, the background gets brighter but the subject stays the same, provided the meter shows under exposed. The difference between the scene exposure, indicated by the meter and the subject exposure the flash automatically adjusts itself, and the the difference seen in the general scene background. If you decrease the shutter so the meter read at the center, the shot will be over exposed because centered means correct exposure before flash fires, so when the fires, even on a very low power it is still too much when combined with the correct pre-flash exposure.
With one simple setting change you can make the background fade into darkness or be equally exposed with the subject. If the subject is overexposed, you can dial in a little Flash Exposure Compensation. This method allow you to make simple setting changes for artistic reasons, which still getting full subject exposure.
 

FLATSIX

New member
Hallo again,

I just did some tests in my dark livingroom. I first took my D7000 : put it on "M" and set diafragm to 5.6 and then dialed the shutter speed till meter wasd in the middle.
I took the picture : iso taken was 6200 iso (without flash)
Then I put the flash to "on" (with auto-iso on)and made the same picture without changing anything = picture was made at iso 500 (my min.iso= set to 125 here...) - expore seemde good.

Then I took my D500 : did exactly the same : "m" and 5.6 dialing till meter in the center : took picture = iso 6400 - so OK
Then put flash to "on" (with auto-iso on) - took the picture and iso taken = 4000 !

Both camera's set to auto-iso - both with their max. iso setting at 6400. The 7000 takes the picture at 4x min.iso = 500 iso, my new machine takes picture at iso 4000 with flash ?

I know I should not work with auto-iso when using flash, but I expected both results from the 2 camera's +/- the same. It seems my D500 boosts the iso enormously in comparison of the older D7000.???

I don't get it.
 

FLATSIX

New member
Hallo again...
I changed the setting of flits (e..? - forgot) and set it to subject only instead of "background and subject". Took a few pictures and yes, here is a big difference as camera takes the shot at iso100 to iso320 (when very dark).Colours where also more pleasing, but indeed, background was darker.

So what I have learned: when you take setting "background and subject" the camera climbs high into the iso's to have the background well exposed and then goes a little lower in order to let the flash act as a "fillflash". Therefore the iso with this setting can be very high when not much light...

when you take setting "subject" in that e-setting: then the camera uses the lowest iso possible in order to take the portrait well lit - but the background is darker and not taken in consideration -.

WHICH ONE TO TAKE FOR EXAMPLE FOR A PARTY OR WEDDING INSIDE A ROOM ? PORTRAIT = which if the two?

I will also buy the suggested book and do my reading on the proposed websites - that will help me a lot I think.

I make progress...... :)
 

spb_stan

Senior Member
The work differently, with different programming,since no one has ever been happy with auto exposure and auto iso with flash they keep changing the function. Every camera Nikon made had a different philosophy and programming and we all still ignore is and use manual and have none of the problems you keep searching for. I take thousands of flash shots over any single month, about 1/2 are in daylight as fill flash and it works great and never use it the way you want to use it. I have never even tried or bothered with it since it is an illogical assumption that auto modes will guess what the reflected light level is accurately. The flash does because it generates a preflash and measures the reflected light and sets the flash power appropriately. As others have suggested, if you are not happy with your shots with your methods, and think the camera is broken, by all means sent it in for repair. . Or give it to your neighbor who has used flash before with Nikon to see if he has the same problem. My bet is that he does not because he will not use Auto ISO with TTL. Neither will anyone else on this forum so none of us can help you.....but you will see lots of well exposed images using flash, the best system in fact on any camera make. One of the reasons to buy Nikon is how well it iTTL and CLS works....yet none of those shots were taken in auto modes.
 

Horoscope Fish

Senior Member
Hallo again...
I changed the setting of flits (e..? - forgot) and set it to subject only instead of "background and subject". Took a few pictures and yes, here is a big difference as camera takes the shot at iso100 to iso320 (when very dark).Colours where also more pleasing, but indeed, background was darker.

So what I have learned: when you take setting "background and subject" the camera climbs high into the iso's to have the background well exposed and then goes a little lower in order to let the flash act as a "fillflash". Therefore the iso with this setting can be very high when not much light...

when you take setting "subject" in that e-setting: then the camera uses the lowest iso possible in order to take the portrait well lit - but the background is darker and not taken in consideration -.

WHICH ONE TO TAKE FOR EXAMPLE FOR A PARTY OR WEDDING INSIDE A ROOM ? PORTRAIT = which if the two?

I will also buy the suggested book and do my reading on the proposed websites - that will help me a lot I think.

I make progress...... :)
It's impossible to say precisely what settings will work for any particular example, what you need to do is learn what the different settings do and how they affect exposure. Since really good photography can't be reduced to simple sets of instructions that work perfectly all the time you, as the photographer, have to learn what your tools are and how to apply your understanding of those tools to get the effect you want under varying circumstances. There's really no way around this and yes, it can be difficult at first.

To even TRY and address a particular situation and what settings I'd use, I'm forced to make a lot of assumptions but I'll give you an example. I'm going to assume I'm using a single, on-camera flash where I, or the subjects will be moving around a lot and where there is some degree of ambient light (enough to read by) and while this light may be changing to some degree, it is is relatively constant, such as an indoor party in a well lit room (again, "well lit" to me means there is enough ambient light that I could comfortably read a book in it). In this situation I would choose a workable ISO (probably between ISO 100 and ISO 400 but specifics would depend on the amount of ambient light). Personally, I like using ISO200 with flash quite a bit, but that's just me; that's not any kind of suggestion and certainly not a Rule of any kind. Exposure mode would be Manual with a shutter speed of 1/125 and an aperture of f/4. Metering mode would be Matrix. You could also use Aperture Priority here. I'm simply accustomed to shooting in Manual but Aperture Priority would be the go-to semi-automatic mode for this, in my opinion.

Making the assumption I can bounce my flash off a ceiling, I would adjust the Flash Exposure Compensation (FEC) setting to -1.5EV. Flash would be set to use TTL. I'm not a huge fan, typically of TTL but in this situation I'd be willing to give it a go. Using TTL will keep exposure looking good even with minor changes in things like distance between the camera and subject and minor variations in the ambient light. Those settings would also allow me to blend the ambient light, yet still introduce some flash to soften and fill in shadows. If I thought I needed more flash power, I would reduce the FEC (to say, -1.0EV) and see if that got me where I wanted to be. If that wasn't enough, I'd probably bump my ISO or open my aperture a little. Under NO circumstances would I use Auto-ISO. Full stop.

Now someone else might approach such a situation entirely differently, but either way it is going to boil down to 1) Understanding the tools you have and, 2) Applying that understanding to the situation at hand and being able to make adjustments based on the exact circumstances in front of you.
 

spb_stan

Senior Member
This is a case where one just needs to experiment using a solid foundation of the Exposure Triad until it makes sense intuitively. Flash is simpler than you are trying to make it and a lot of assumptions are being made about what it SHOULD do versus what it actually does. The camera is pretty smart, very smart but it can't read your mind. The fewer variables permitted to be adjusted by the camera, the more any image will be as you set if for. Then any difference between what you set and your expectations can be seen and your expectations adjusted to closer fit what you told it to do.
Auto ISO and Auto WB, and any other auto function increases the deviation from what you took and what you expected.

Here is what I do in a little instant checklist:
What is my goal(mood of image, style, featured subject)
What do I want in exposure(High key, low key, realism etc)
Is the subject in optimum light, shadows, or do I need to fill or selectively illuminate)
Where is the scene light source coming from and what color temperature, and quality(quality is the ratio of light effective cross section to subject size...a bounce from a white rear wall and ceiling is a higher quality than a direct sun because although the sun is very large, its effective size is tiny and can be blocked by something smaller than the face. A closer light source would have a large cross section size) The answer to this one question might mean turning off the flash, or using multiple flash, gels, snoots etc
How isolated do I want the subject to me(isolation can by by tightness of shot,bokah or using low or high key to kill any detail of the background)
If shadows are to be filled by flash, where are new shadows going to be created and where to put the flash so shadows fall outside the frame or future crop.
How much action or movement needs to be frozen and what movement can be blurred(shutter dragging to increase room ambient light contribution for example can add motion blur to any background movement of streaks of light seen in background if very slow speeds are used to increase ambient contribution....even 1/6 sec shutter will work and still have subject sharp because subject illumination is mostly from the flash burst at 1/30,000 of a second or more.
Any scene or subject features to be minimized...a big nose or fleshy arms or pot belly or anything to be emphasised like bright blue eyes or striking hair style or color
How much ambient light should be captured and the ratio between ambient and subject brightness
And a few more variables that would be evaluated before making any settings or changes
Then set the camera, in manual mode and take the image.

Notice all these questions relate to the scene and not the camera. Those are the questions that need to be answered before even thinking about how to take the picture.
In manual mode all the question's answers are easy to satisfy in deliberate mode....what I call, manual mode.

This list seems long but I left out a few but they are just viewed and instantly answered without thinking with a little experience. If the same break down was down for getting from the driveway in your car to the nearest street corner the list would be 3 pages long. For a beginner driver it seems like too much is happening too fast and it seems overwhelming but after a week, it seems automatic, and with a few weeks very complex maneuvers getting from point A to point B is so automatic you can't even remember all the steps you took to get to the destination.
With photography, there are two basic modes, photography and snapshots. Snapshots are more a matter of faith, letting all the variables suprise us to see what we got after the camera did the deciding. When photography the result is the products of the photographers intentions. Both have their place but one is luck and the latter is deliberate...good or bad, it is what the photographer did. Flash photography is the same as any other deliberate photography but with the addition of a lot more control over the result. It is a very rare photo that is both successful and without augmented light control. You are entering this portion of photography where you have a much larger pallet of options to have an image that reflects your intent than regular ambient chance shooting.

It might seem overwhelming as it does to a beginning driver but with a little practice seeing the scene and deciding how you what the results to look, it becomes almost automatic. By adding an uncontrolled variable, like Auto ISO, the results are often not as you intended because the camera does not know what you intended and technically the camera might be right based on what it thinks you want, but is wrong. The camera is doing its job with the exposure, but it fails in guessing what you intended. If you don't want ISO to zoom up over a certain value, simple, don't let the camera make choices of ISO unless you have a way of convincing the camera of what you intend. I have not figured out how to convince the camera to guess my intentions unless I limit my intentions to those the camera prefers. That is what Auto modes are for, limiting your choices to those the camera prefers. With low light or darkness, or very bright light, what you want and what the camera prefers is often miles apart, neither is wrong, just different. In none of your shots with very high ISO was the exposure wrong, it did its job, for most casual shooters, that is a successful image. But you had other ideas that the camera did not know about.
 
Last edited:

spb_stan

Senior Member
What you experiences with the balanced background lighting is new for the D500. It is something we do automatically manually, and was one of the criteria in the list above in deciding the ratio of subject and background. As I mentioned in an earlier post, there are two metering systems that are independent, in the camera and in the flash. They are independent and come up with different results because they are looking at different things. The camera, in Matrix metering mode is looking at the whole scene with a little bias for the subject under the focus point and the flash is in spot metering mode which only looks at the point under the focusing point. The flash does what is has to to expose the point under the focus point correctly The subject is closer so any light falling on it will reflect more light to the sensor and expose well. The background will not be illuminated as well by the flash because for correct exposure of the subject requires less light than the background. Being further away, the fall off of life, the amount light intensity of light falling on a given area, say, per square centimeter, decreases at a logarithmic rate with distance or more accurately as the square of the distance from a point source. That means anything further back will be have lower amount of light illuminating each square centimeter than an object just ahead of it closer to the flash. The light reflected back to the sensor is attenuated the same way. The rate of fall off of light intensity is defined by the Inverse Square Law.
For a camera to try to decrease the illumination difference between a foreground subject and distant background it has a few options. One, is to bias expose calculations for the entire matrix meter reading so more ambient light is captured, by longer exposure, wider aperture, or higher ISO. To balance that increased sensitivity to ambient light the flash power must be turned down a lot. With background balance setting, a much higher ISO is used to get high ambient light, and flash power it turned way down because the subject and background are going to be exposed more before the flash is even introduced into the equation. The D500 has the feature others do not, and it automates what photographers do without thinking when they decide how much balance is needed between room light and subject light. It could be a cool feature but could also add a lot of confusion as it has done in this case. I still say, shot with all that turned off. For artistic reasons you might want the subject to be well exposed and the background blurred and dim for optimum subject isolation. Simple, lower ISO which will increase flash power in TTL mode, and that ratio of foreground and background gets greater. What more balance between the darker background and forward subject, easy, lower shutter speed. In full manual mode you have the meter reading telling you in real time what the ratio is. Perfect...no guessing. Watch the meter as you meter the scene, what background 1 stop under subject, rotate the ISO or shutter to move the meter 1 stop to the left. The flash does not care, it is going to adjust power to center the subject meter(under the focus point) but the Inverse Square law says the background will by a stop lower.
What the background to get very dark, almost black to isolate the subject from the room? Easy, move the meter far to the left and the flash will ignore that and increase power while the camera was lowered in sensitivity so backgrounds are almost black and the subject pops out as fully exposed.
Here are two examples, one taken in a cafe that was bright and crowded so my dinner companion would have been lost in background clutter so lowered iso to reduce the background but still have it relatively bright after opening the aperture to f/1.8. I wanted her to be less bright, and more dreamy so
dialed in 1stop lower flash compensation. Remember, this little cafe was full of people and as bright as a grocery store:
mar5-3359-1200.jpg

Here is another image also in manual where I wanted the bright restaurant to fade to cause the eye to focus on the bright reflective dress and lovely slight smile of my friend...lowered iso and increase shutter a little to drop the background 2 stops
DSC_8300_800.jpg


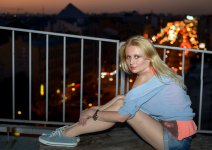
And here is one I took on the roof of the art center net to our home of my GF.
She is close and if left up to an auto mode, the dark cloudy night would be totally black. I wanted street lights to be 2 stops lower than Victoria, but the meter said it was 5 stops low so I dialed in higher iso and lowered shutter to get more exposure of the dim background.
artcenter-73_pp.jpg

Here is one I used longer shutter to increase the dark hotel room to normal day brightness so the meter on the room was 1/2 stop below center and lowered flash power to balance the room ambient level using FEC -1.3. All these are grab shots, 1 second to set up without taking my eye from the VF, just rotate the shutter speed wheel or the aperture wheel. It is faster to take than describe.
misc-430_pp.jpg
If I had left it up to the camera, exposure would have been fine but they would not the the same shot, not what I wanted and they would have been snap shots little different than my telephone would have taken.

Two last points
1: Your camera seems to be working great, better than any other crop frame camera in the world, nothing better or more capable.

2: It is going to be harder to learn the fundamentals of exposure because it has so many functions that automate much of the process. I suggest going back to basics, everyone off auto modes and shoot fully manual even without flash, in a few days the relationship between ISO, aperture and shutter will become intuitive and every shot will be more deliberate. Keeper rate increases and few are mysteries why they did not turn out as expected. After a few thousand shots in full manual exposure, you go to auto when you want quick snaps and manual when you have specific ideas of what you want the results to be. The experienced shooters use manual because it is easier, and because the shots are closer to what they intend.
 
Last edited:

FLATSIX

New member
Yes Stan, I see the difference between the photo's that yao make, and my snapshots.

I will do a lot of reading from now on on the subject = how to make the photo. And of course practice on the "M" stand.

I hope that I also will get the "feeling" with the camera. It will be a long learningcurve...

Thanks for your efforts to convince me to become more a photographer : I will do my best .
 

spb_stan

Senior Member
We all are beginners in some aspects of photography. I shot film for years, just recording life events and no serious intent, but did develop my B&W film. By luck made a lot of money from a few shots during album recordings processes of catching moody B&W images that were licensed to record companies for the album covers.
I got into Digital first when the D90 came out. Still have it and it has about 150,000 frames on it. My GF uses it so I don't see it much. The second photo should have been described better, a key in that was was trying to expose the background just enough to see what it was but it was very dark so used a very long shutter time but the flash froze her although she was moving. On the right side, her left arm...you can see ghosting because she moved her arm in my 1/2 second exposure. That works better when the movement is further in the background but I picked that one as an example of dragging the shutter, a term used to set a very slow shutter to get ambient, but set the flash to expose the subject with Rear Curtain(when the flash is set to trigger at the end of the shutter open period instead of the normal beginning of the opening. That shot was not a keeper, I did have that one jpg, because of the ghosting. The cameras are getting so feature rich that it can be distracting with so many options making it harder to learn the fundamentals. The fundamentals would be easier to master the important exposure Triad of speed, sensitivity and aperture if that is all one had to think about.
It is fun to experiment with flash because you do not have to wait for conditions to be right like you do with landscape or anything where natural light is all you have. After a little experience with it, flash becomes more useful than most of us thought, for example, mid-day sun was something you just did not shoot people in due to the harsh shadows but with powerful speed lights you can soften the hard high contrast shadows with flash or fill backlit scenes that normally would show the subject black and the background exposed correctly/
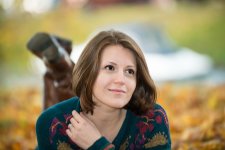
Here is an example of a shot that would not work without flash or a big reflector. I show this trying show a girl in the park trying to shoot her friend laying in autumn leaves. The sun was from the back, so her camera was exposing in auto mode, for the sunset and light reflecting of a canal and a white boat in the background. I suggested turning on her flash but it was just too weak as built-in flashes normally are. I stepped back 10 feet behind the girlfriend taking the photos and aimed my SB900 directly towards the subject and used Matrix metering which considers the whole scene but biases it towards the focus point. With so big a difference between the girl's face and the bright background Matrix let the background blow out a little and my external flash filled in foreground. That is the normal operation of flash when using Matrix metering, it switches the flash to TTL BL mode, balancing ambient with flash. This is the normal operation without me doing anything, All I did was turn on the flash power switch. While her friend tried 30 shots and nothing worked. The white boat and reflection from the water was about 5 stops brighter than the girl. I backed up because my 70-200 was on the camera so needed some distance. Without flash or large reflectors, the shot was impossible. With flash is was just automatic. That is why the Nikon flash/camera system is the best in the industry.
park-2.jpg
 

FLATSIX

New member
Hallo Stan,
I will go on holiday for 10 days starting 2-9 to Bulgarije. I take my "new baby" with me off course. There I will experiment with the "M" stand and the flash. When I come back I hope to have better photo's then my actual level....
I keep in touch.
You make very nice pictures by the way - really good.
 

FLATSIX

New member
I just did some test - I thought I had understood it : put it on "M" - dial shutter speed and diafragm till meter on "o".(Auto-iso off and put to 400.
I took a picture of a flower - everything well lit without flash , then with flash : everything fine

Then I said to myself : flower must be bright and well lit - background as dark as possible.

O.K. : put it on metering "0" - flash ttl bl to "on" - then compensation button +/- on camera fully to the left (underexpose) - I think the flash will make the balanced lighting for the shot through ttl bl: so flower O.K. and I said to camera : underexpose much (-5)
I took the picture : nada , njet , nothing = everything underexpose - flower very dark - background very dark.
Did some other test like that, but no dark background and no good lightened subject = all too dark , or with overexposure : all too bright.

How do you manage to take in bright light outside a picture of a flower with flash, so that flower is O.K. and background dark ???
Why does the flash follows the compensation that I did on the camera? I did not do a flash-compensation : no , only the +/- for camera.

It seems difficult?
 

FLATSIX

New member
I also noticed that if I do a camera-compensation +/- button of let's say -2 , then after taking the picture I see in the data that and the camera +/- = -2 and also the flash +/- = -2 ?

They should not work together - I wanted to darken the background and then add a properly exposed flashlightning (TTL Bl) so that my subject is well exposed by the flash, but my background is underexposed by -2.

Now I obtain -2 for my background, but my flash compensated also -2 - that was not the intention?

Is this a setting that is wrong - I don't understand this.....
 
Top