Chimp

Pretzel

Senior Member
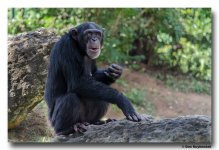
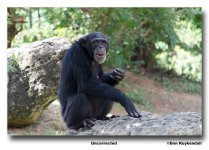
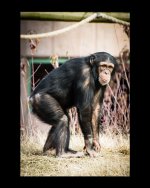
1/640 at f5.6, ISO 800, 70-300 VR at 300mm. Edited a bit for sharpness and contrast in LR5, and was cropped to portrait orientation from a landscape photo. The mat(border) comes from a script I was messing with in PS to make images printable in any size without actually cropping off parts of the pic, so just ignore it.

High ISO was due to just coming back outside and trying to catch these guys before they scampered off again.

Would LOVE to see what someone else would do with the pic, and am willing to send the raw file if ya wanna mess with it. :)
MattedChimp.jpg
 
Overall it looks pretty good. The only suggestion I have to to loosen up on the crop so that there is more room in front of him. Right now he is in a box with no where to go. Give him some nose room so it is not so centered. Post the horizontal image with some room in front so we can see the difference.

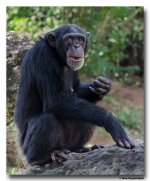
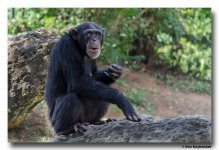
DSC_6450.jpgDSC_6450_1.jpg
This is the same shot with two different crops so you can see the difference. Even with the portrait orientation there is still more room in front of him than behind.
 
Last edited:

DraganDL

Senior Member
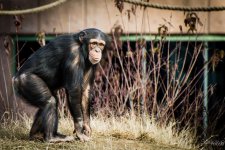
And what would you like to achieve, precisely? From what I can gather, the photo needs three alterations: 1. horizon/perspective correction (so that the left end of that greenish wooden pole gets lowered); 2. upper and lower portions (above the head and under the feet of the chimpanzee) should be slightly blurred - try using the iris blur, and maybe a tilt&shift blur tools; 3. the whole photo could be slightly darkened thus "masking" the brightest areas, especially the grass and the ropes which had been kinda burned out. All can be done in a few minutes using Photoshop...

edit: it just struck me that you could apply a little vignetting too, in order to emphasize the atmosphere of tension...
 
Last edited:

Pretzel

Senior Member
And what would you like to achieve, precisely?

In this case, just a better picture. I'd love to end up with a quality B&W out of it, but the main goal, in starting, is in sharpening up an ISO 800 image. Fixing up the contrast and feel to get a decent picture from the RAW. I'm a rookie LR5 editor, just picked up PS CC tonight, so no idea what to do with it yet.

Here's a quick crop closer to the original shot, tried a quick masked run-over with the adjustment brush to drop the exposure a bit on everything but the chimp.

Chimp2.jpg

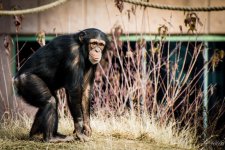
And another with the whole exposure dropped a tiny bit (-.25), and a little extra black and highlight clipping.

Chimp3.jpg

Just realized how much that black mat makes the picture pop a little more. I may start running with that as a normal thing. :)
 

dramtastic

Senior Member
One thing that is different between your crop Pretzel and Don's is that he's either taken the picture and cropped out the unnatural background that zoo's often have, or the chimp enclosure had plenty of natural surroundings anyway. I've always thought that zoo shots if they don't have natural surroundings like Singapore Zoo, should be more like portraits, with the background blown right out so you can't see metal bars, or ropes, cages etc. That way the focus is on the animal, not the distractions around it. As it is, with that background I just feel sorry for the chimp.
Maybe darkening out the background and leaving the lighter exposure on the chimp?
 

DraganDL

Senior Member
Yes, it looks much better now. Both variations. But it is too "wide" now. I think, the photo should be cropped at it's right hand side (just enough as to cut off that pole). You could also apply just a tiny little blur on the edges (iris or tilt&shift blur tool in Photoshop), and correct the horizon for about 0.40 degrees counterclockwise, but is is not a must... If you don't have anything against it, I could post a corrected, small sized .jpg version of the photo...
 
Last edited:

Pretzel

Senior Member
Dragan, edit away. Wouldn't mind seeing someone else's interpretation. I'll even send the RAW file if ya like... haven't touched it with PS, as that's still new and foreign to me, so all edits have been worked up in LR 5 at this point.
 
One thing that is different between your crop Pretzel and Don's is that he's either taken the picture and cropped out the unnatural background that zoo's often have, or the chimp enclosure had plenty of natural surroundings anyway. I've always thought that zoo shots if they don't have natural surroundings like Singapore Zoo, should be more like portraits, with the background blown right out so you can't see metal bars, or ropes, cages etc. That way the focus is on the animal, not the distractions around it. As it is, with that background I just feel sorry for the chimp.
Maybe darkening out the background and leaving the lighter exposure on the chimp?

Actually I shot is very carefully to avoid all unnatural items. I did shoot at the local zoo all the time till I broke my leg and I try to avoid certain backgrounds and the ones I can't I use a combination of content aware healing brush and the clone tool to remove it and put what I want in its place. I think it is worth the effort to get great animal pictures.
 
I used content aware fill healing brush to remove the green post and the rope. then I used Nik tools Vivesa to selective work on the brightness and saturation of the various sections of the photo. Google Nik Collection

Then I did a simple crop to remove a little of the top and the right side. I was limited in what I could do since I did not have the original file. Just in case you think that was a lot of work I only spent maybe three or four minutes on it. Had I had the RAW file and it was a photo I really wanted to have I might have spent a few more minutes on it getting it just perfect.
 

Pretzel

Senior Member
Since you said you would not mind seeing other interpretations here is what I would do.

View attachment 61461

YES! Now, would you be willing to share a bit of what you did so I can work on similar PS skills? :)

EDIT: Ahh, NM. Messing with the clone and content aware healing brush, I hit the same quick rough edit, pretty much... Fantastic seeing what someone else interprets and working to match it! Thanks!!
 
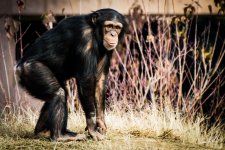
Here is my chimp picture with no edits other than resizing and then the corrected one.

DSC_6450.jpg DSC_6450.jpg

Kind of give you an idea of what I did to get it where I wanted. This was also before I got NIK collection.
 

Pretzel

Senior Member
Now, granted, I didn't use the NIK Collection, but I did use the content aware healing brush, a couple small patches of targeted cloning, and added a contrast layer. What ya think?

chimptesting.jpg

I think I'm going to like this PS business as I learn it in detail.
 
Now, granted, I didn't use the NIK Collection, but I did use the content aware healing brush, a couple small patches of targeted cloning, and added a contrast layer. What ya think?

View attachment 61468

I think I'm going to like this PS business as I learn it in detail.


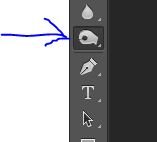
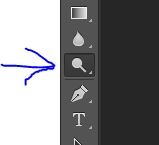
Now fine the Burn tool It will be on the left hand side and look like this Capture.JPG or this Capture2.JPG Right click on it and it will give you a choice of Burn (Darken) or Dodge (lighten) look up top and you will see a percentage. Start low and go over the area several time to get it where you want. Remember this tool like many others can be made any size.

Burn the grass!
 
Top