Astrophotograpy and Star Trackers

Moab Man

Senior Member
@Moab Man
is there an indication you got what you want or do you need to stack and process dozens of images before the Nebula and galaxies pop out? Do you take your shots in your yard or is there travel required? What kind of autotracker do you use? PHD2 for software? What about stacking and processing? How do you tote everything around if you do need to travel? Sorry for all the questions, thanks for sharing your shots.

1. is there an indication you got what you want or do you need to stack and process dozens of images before the Nebula and galaxies pop out?

To get the exposure needed you must look at your histogram. I want the meat of what I'm shooting, the big hump, to be centered on the 1/4 line on the left hand side. You will see it on the back of the camera, but for the actual edit the more images you have the better it gets. 3 hours of exposure is a lot better than 1 hour. It's the accumulation of data that gets compiled to extract the image.

2. Do you take your shots in your yard or is there travel required?

I travel about 40 minutes away for better images. However, I have shot from my driveway (suburban neighborhood). The best images are shot straight up as in overhead. Less atmosphere glow. Post #15 has Andromeda from my driveway.

3. What kind of autotracker do you use?

iOptron Skyguider Pro with an installed iPolar for more precise alignment.

4. PHD2 for software?

Once I'm aligned on Polaris the tracker moves at the same speed as the earth in a counter rotation. I'm not ACTIVELY guiding.

5. What about stacking and processing?

I am using Deep Sky Stacker.

6. How do you tote everything around if you do need to travel?

It's really not that much when it's all broken down. .

Camera with lens
Tripod
Laptop
Tracker box 12"x12"x6"
Camping chair
music
cooler
snacks

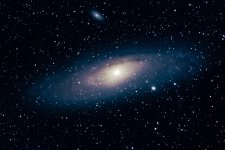
Here is the latest image. 2.5 hours of exposure at 800mm.

W_800mmAndromedaV2.jpg
 

TwistedThrottle

Senior Member
andromeda 8-20-20.jpg [MENTION=11881]Moab Man[/MENTION],
I have a lot to learn. This is my first attempt at a deep space object, also my first stack with Sequator. I did 39 stacked 30 second exposures which is not long enough but I got chased away by the incoming clouds. Also it looks like I need to work on focus. This is a crop from the original taken with a 100mm f2.8 lens on a crop camera. Looking forward to more opportunities of learning from my mistakes. It is frustrating the time required to shoot, stack and process then realize you would do things differently only to run out of time and have to wait for another clear night to try again. I am finding that it takes me much less time to get everything set up the more I do it. Practice, practice, practice!
Again, thanks for sharing your experience and taking the time to help others grasp the concept.
 

BF Hammer

Senior Member
TT: You are right in that it is all learning curve. You may be surprised how quickly those lessons will take. I have been finding that Sequator is not as good with the deep-space stacking and may leave the image looking just a bit fuzzy. I actually revisited 2 images I originally stacked with Sequator and make a new attempt at with DeepSkyStacker. One thing to remember is to look through all of your images being stacked and toss away the ones that have visible motion blur. They seem to sneak in to your imaging series no matter what. I also have RegiStax on the PC for doing work with planets. I restacked 50-odd photos of the moon from last February with RegiStax and I am much happier with the result.

I personally am settling in on Sequator for wide-angle, DeepSkyStacker for7 deep-space objects (and comets), and RegiStax for solar system objects (other than comets).

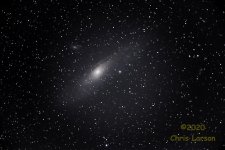
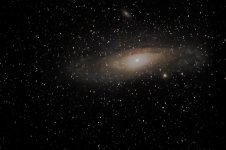
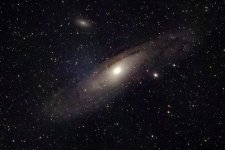
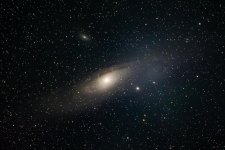
So my 7 months of learning curve with Andromeda goes like this:

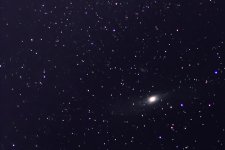
December 2019 right after buying my tracker.
PcV81YZ.jpg

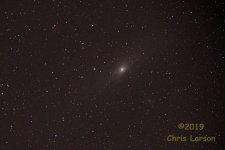
February 2020, still figuring it out.
UyVsJIQ.jpg

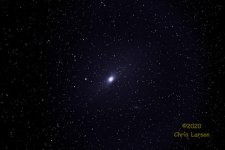
July, 2020 while photographying NEOWISE. Original stack attempt by Sequator
bgHJb2L.jpg

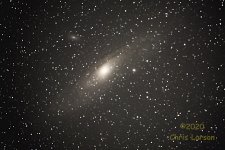
Then I threw out about 3 images from the pool and restacked with DeepSkyStacker (same series of photos)
EtJdASt.jpg

I'm tempted to edit each original photo and export as .PNG to stack in RegiStax just to see what more I can do with it. Not sure if I am that ambitious.
 

Moab Man

Senior Member
@Moab Man,
I have a lot to learn. This is my first attempt at a deep space object, also my first stack with Sequator. I did 39 stacked 30 second exposures which is not long enough but I got chased away by the incoming clouds. Also it looks like I need to work on focus. This is a crop from the original taken with a 100mm f2.8 lens on a crop camera. Looking forward to more opportunities of learning from my mistakes. It is frustrating the time required to shoot, stack and process then realize you would do things differently only to run out of time and have to wait for another clear night to try again. I am finding that it takes me much less time to get everything set up the more I do it. Practice, practice, practice!
Again, thanks for sharing your experience and taking the time to help others grasp the concept.

Hang in there. It is a big learning curve, but it comes pretty quick.

I have went between Sequator and Deep Sky Stacker. Like Hammer, I have decided to move away from Sequator. It doesn't do as clean of a job.
 

TwistedThrottle

Senior Member
andromeda.jpg
Making progress. This is what I came up with a couple nights ago. Swapped lenses from a Tokina 100mm f2.8 (Not long enough) and this was taken with a 70-300 AF-P 4.5-5.6E. There is still a lot more detail to be had but I am glad I can see some definition of the spiral. Still not ready to use the big guns yet. Every time I try to use the Bigma, my polar alignment gets all wacked out. Baby steps.
Thank you both for the heads up on Deep Sky Stacker, I will look into it. There's not a reason to not try both since they're free. I like Sequator since its so easy to use, I have heard DSS can be un necessarily confusing, but that's what most of this hobby is, LOL!
There's definitely two sides to astro. As important as in focus shots are at the proper exposure, (on clear, cloudless nights) I am finding it's all about the post processing and its like no other post processing that I have ever done before. Once I get a few more nights with Andromeda, I would like to see some nebula. Might need to shift my stay-up-late routine to get-up-early in order to grab the Orion Nebula. Are the techniques the same as for galaxies? Since there is less light coming off nebula, are the exposures longer? Are more shots required? Can you see anything in your shots indicating you are on point or are go-to mounts and computer software the only way to know for sure? Thanks for your help.

And what I came up with last night:
andromeda stacked.jpg
 
Last edited:

BF Hammer

Senior Member
Once I get a few more nights with Andromeda, I would like to see some nebula. Might need to shift my stay-up-late routine to get-up-early in order to grab the Orion Nebula. Are the techniques the same as for galaxies? Since there is less light coming off nebula, are the exposures longer? Are more shots required? Can you see anything in your shots indicating you are on point or are go-to mounts and computer software the only way to know for sure? Thanks for your help.

Orion Nebula is actually a lot brighter in the sky than Andromeda. It is naked-eye visible in a suburban setting, possibly urban too. It looks like a star until you use some magnification. You can treat it like Andromeda galaxy mostly, but definitely can turn down the ISO a bit to avoid over-exposing. I shot it at full 600mm available in my 150-600mm lens, but it takes up nearly 1/4 of the frame. In winter is the time it is typically photographed. And explore the area around Orion with Stellarium or SkySafari, there are many more nebulae of various magnitude. A couple are potential targets from a dark location with a camera lens. Look up the magnitude of the target. Higher real numbers mean dimmer. I think Polaris is the reference magnitude at about 0, and dimmer objects are higher numbers, brighter objects get a negative number. Dimmer means harder to locate, longer exposures and possibly higher ISO needed.

I sort of want to target Triangulum (the Spiral Galaxy, Pinwheel Galaxy) soon. It a bit east and down from Andromeda in the evening sky, Andromeda being magnitude 3.3, Triangulum is 5.8 so more ISO needed. I tried to find it my last night out at the end. My goto mount actually pointed at it perfectly, but I could not quite make out anything on my camera screen. I thought I may be pointed wrong. But when I reviewed the 3 test photos at home (15 seconds long) I could just make out something galaxy-like. I feel stupid now for having such a perfect alignment without a correction and not know it. I could have gone higher on ISO and set for 60 second exposures and I bet I would have had my image.
 

TwistedThrottle

Senior Member
Look up the magnitude of the target. Higher real numbers mean dimmer. I think Polaris is the reference magnitude at about 0, and dimmer objects are higher numbers, brighter objects get a negative number. Dimmer means harder to locate, longer exposures and possibly higher ISO needed.

This is very helpful, thanks!

but I could not quite make out anything on my camera screen

Thats frustrating. As much as I want to use my D800 rather than the D7500 for astro, the D800 is too dark on the camera screen for anything thats not f2.8. It's much easier to get good star points on the much brighter D7500 plus the tilt screen is so handy. I recently got a CamRanger specifically for this so I can see whats on the screen on the D800, but I had to send it back to swap it out and I am still waiting for the replacement. Only got to use it a little last week and it was great when it was working. Fingers crossed, it should be here this week.
 

BF Hammer

Senior Member
I have had a program on my laptop PC called DigiCamControl for a long time now, and I should try it again. An earlier version I tried had stability issues, but I upgraded and never gave it another chance. It can connect to most DSLR's via the USB data cable or with WiFi. It may only be able to do simple shutter releases on some older bodies, but most bodies made in the past decade allow much greater control. You can have the live-view preview on the PC screen. It has astrophotography intervalometer functions. My D750 works via WiFi and has most of the functions available except the exposure functions. Pretty much the same with my D7000 via USB data cable. It is sort of schizoid with the user interface.
 

TwistedThrottle

Senior Member
Andromeda stacked.jpg
D800
Nikon 70-300AF-P f4.5-5.6E

Still waiting on the CamRanger2 so I could only do 30 second exposures using the timer. I downloaded a surface level app on my phone and now leveling the tripod is much easier. Making progress!
 

BF Hammer

Senior Member
@TwistedThrottle:
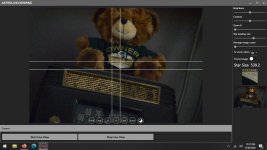
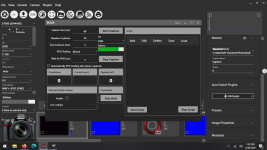
I got out to my backyard in the pre-dawn to attempt Venus, Mars, and Uranus this morning. Turns out my yard is a terrible location in summer with tree canopy issues. But I used this as an opportunity to revisit DigiCamControl. Connected to my D7000 via USB cable I could display the Live View screen on my PC and really control most everything on the camera. And yes there is an astrophotography mode where the camera can be set to Bulb on shutter speed and you can set any long-exposure time you want in even 1 second intervals. So it will take the place of a plug-in intervalometer and get around the 30 second limit. There is also a check box to allow external shutter release in case you want that. I found it was better to have it save to card only instead of transferring to PC immediately. And something I did not try in the dark but did after the sun rose is using manual control of the autofocus motor from the software. So you can have the camera in autofocus mode, get that infinity focus dialed in looking at a larger screen, and leave it there because you have to check a box to enable focus before shutter release. The only things that are not controllable are the exposure mode (M, A, S, P) and the autofocus on/off if controlled at the lens selector switch. This software is free, very unlike Nikon's Camera Control Utility (and far more features). The only issues I had was the USB cable getting tugged and losing connection while my goto mount was moving to target.

DigiCamControl 1.jpgDigiCamControl 2.png
 
Last edited:

TwistedThrottle

Senior Member
dss andromeda.jpg
The CamRanger2 replacement finally showed up, this one is defect free, so glad I decided to get one! Tons of features but the thing that helped me most is the timer works with bulb mode. I was able to extend my shutter times a little, restricted because my alignment was a bit off last night.

800_8614.jpg
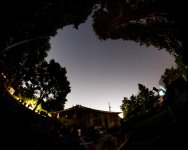
@BF Hammer I hear ya about the tree issues. Here's a shot of my yard, I can just barely see Polaris above the maple tree in the north and then have a limited viewing angle to the east before pine trees block my view. The above image of Andromeda was an hour worth of 1 minute exposures, the last 6 had tree branches in the right corner but it sure beats having to travel to get the shots. So far, I've shot Andromeda galaxy, Pinwheel galaxy, Pliades, and the North American nebula. The practice of getting the shots is coming along smoothly since I've been lucky enough for clear skies the last couple weeks, I am able to apply changes to my technique and learn from my mistakes quicker than if I only went out once a month. At this rate, lack of sleep is catching up with me but I can't resist a new toy and clear nights!
 

TwistedThrottle

Senior Member
Oh and also I got a chance to try Deep Sky Stacker and agree, the images seem to be cleaner than sequator but the program strips EXIF and it takes a lot longer to process. I had one stack I didn't dumb down the stars take 4 hours, (lesson learned)! Sequator is much quicker and I think I prefer it because of that but I'm sure there's parts of both programs I am oblivious to that may make a big difference in processing. More practice is needed.
 

hark

Administrator
Staff member
Super Mod
Orion Nebula
1 hour 20 minutes of exposure.

View attachment 347261

What body did you use to capture this? If it wasn't a Nikon body, what type of sensor? The reason I'm asking is because I'm under the impression that long exposures will heat up the sensor which can cause dead pixels. Have you ever encountered that problem?

Magnificent image! :cool:
 
Top