Carolina Photo Guy
Senior Member
Hi y'all doing? Well I hope!
My Main Squeeze and I traded our old travel trailer in for a newer, bigger and better travel trailer back in late April. This unit has double slides with a fairly substantial
living room and a butt load of cabinets! Well, it seems that I am incapable of leaving well enough alone! I wanted to make the "Hilton" a little more comfy.
So I gots me a plan and started last night and pretty well finished this morning.
Here is the "Before" picture.
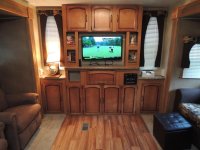
This is pretty well cookie cutter style, nothing you won't see in a thousand others. Definitely not me!
This is the next phase of the project.
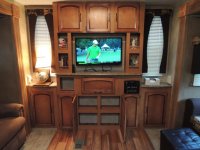
I opened up the doors, cleaned everything out and started to rip stuff out!
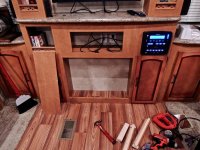
If you really want to be noticed, drag a jig saw into a new travel trailer and start ripping stuff out! You WILL get noticed! In this shot, I got the doors, door supports and the center shelf ripped out. It was just in the way anyhow! THIS is the reason it's called "demo"!
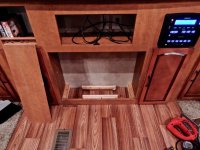
I used the pieces of the center shelf and door supports to make some sub-floor bracing. Mostly I was just too damn lazy to take it outside and throw it away.
Thats the center shelf laying up along the side of the cabinet.

The center shelf is now the floor to the cabinet, but it still needs something! Besides, I gotta hide them ugly screws somehow!

So I covered them up with Mastik. Now I have to hide the ugly Mastik! Is there no end?
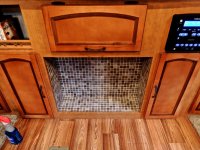
The end is very near. We now have a pretty nice tiled hole in my cabinet! Ascetically, it looks GREAT, but functionally it is a bust. So lets make it functional.
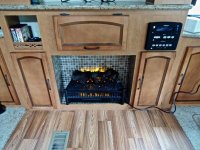
I took some pretty useless space and made our living room a lot more comfy by making a fireplace! I still have to grout the tile, re-route the fireplace wiring and add some maple trim around the opening, but the project will look like this at completion. We used recycled glass tiles so the flame from the electric fire would be reflected more realistically. This fireplace insert has an automatic fan that blows the heat out the front. The bottom, side and back heat is nearly nonexistent and what little heat there is is easily deflected by the glass tiles.
This is a pretty easy project that can be undertaken by just about anyone. This was fun!
Hope you enjoyed the read.
Talk at ya later.
​Pete
My Main Squeeze and I traded our old travel trailer in for a newer, bigger and better travel trailer back in late April. This unit has double slides with a fairly substantial
living room and a butt load of cabinets! Well, it seems that I am incapable of leaving well enough alone! I wanted to make the "Hilton" a little more comfy.
So I gots me a plan and started last night and pretty well finished this morning.
Here is the "Before" picture.

This is pretty well cookie cutter style, nothing you won't see in a thousand others. Definitely not me!
This is the next phase of the project.

I opened up the doors, cleaned everything out and started to rip stuff out!

If you really want to be noticed, drag a jig saw into a new travel trailer and start ripping stuff out! You WILL get noticed! In this shot, I got the doors, door supports and the center shelf ripped out. It was just in the way anyhow! THIS is the reason it's called "demo"!

I used the pieces of the center shelf and door supports to make some sub-floor bracing. Mostly I was just too damn lazy to take it outside and throw it away.
Thats the center shelf laying up along the side of the cabinet.

The center shelf is now the floor to the cabinet, but it still needs something! Besides, I gotta hide them ugly screws somehow!

So I covered them up with Mastik. Now I have to hide the ugly Mastik! Is there no end?

The end is very near. We now have a pretty nice tiled hole in my cabinet! Ascetically, it looks GREAT, but functionally it is a bust. So lets make it functional.

I took some pretty useless space and made our living room a lot more comfy by making a fireplace! I still have to grout the tile, re-route the fireplace wiring and add some maple trim around the opening, but the project will look like this at completion. We used recycled glass tiles so the flame from the electric fire would be reflected more realistically. This fireplace insert has an automatic fan that blows the heat out the front. The bottom, side and back heat is nearly nonexistent and what little heat there is is easily deflected by the glass tiles.
This is a pretty easy project that can be undertaken by just about anyone. This was fun!
Hope you enjoyed the read.
Talk at ya later.
​Pete
