Blending modes and DOF

J-see

Senior Member
Can someone explain what is happening here because I have no clue?

I was thinking about HDR and focus stacking and then wondered if I could affect dynamic range by blending two identical shots using different aperture/shutter.

I exported two shots to PS and started goofing around.

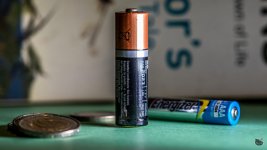
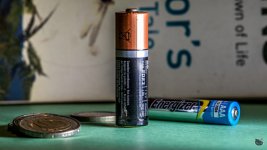
These are the two shots I blended. I used difference 50% fill.

044.jpg

045.jpg

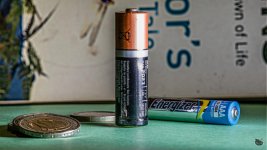
My result is this:

044-Edit.jpg

It's as if my DOF increased which should be impossible. I'm curious if anyone knows what triggers this effect?
 
Last edited:

J-see

Senior Member
I tried another shot but that didn't work as well so it has to do something with the angle of shooting or the where the center of focus is.

I think something cancels the other out when blending the f/16 aperture on top of the f/8 and it leads to an increased DOF effect. It'd be interesting if I'd really know what went on and how to replicate it since that would allow me to simulate focus stacking using only two shots.

I'll toy around with the shots later on to see if swapping makes any difference.
 

J-see

Senior Member
Your f-stop shows 8 on the first and 16 on the second, assuming the exif is correct.

Yes that was the intention. I wanted two different aperture shots. The strange part is the mix creating something that has a larger DOF. Parts look sharper that aren't in both original shots.
 

FastGlass

Senior Member
The shots 1 and 2 look almost identical other than the DOF. The resulting shot pulls the focused parts, overall exposure from the two images. The result you was given is what I would have expected. The software you used is taking information from two images and putting them together. The information combined gives enough information in the out of focus areas to make them a little sharper.
 

J-see

Senior Member
Ok, I tried another. It was the other way around, the wider aperture on top of the other.

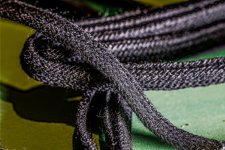
The two shots used:

001.jpg

002.jpg

The result:

001-Edit.jpg

All three are processed identical and then matched all exposures.
 

J-see

Senior Member
The shots 1 and 2 look almost identical other than the DOF. The resulting shot pulls the focused parts, overall exposure from the two images. The result you was given is what I would have expected. The software you used is taking information from two images and putting them together. The information combined gives enough information in the out of focus areas to make them a little sharper.

Something is creating sharpness indeed but it is still interesting that PS can compose sharpness out of two blurred shots. If that would work for all angles we shoot, there's be some possibilities when mixing apertures. The sharpness is not "true" sharpness in the sense it matches reality but that matters less.

Btw, the shots are identical, I'm using a tripod.

Also, all three shots are sharpened in post but that process couldn't pull the additional sharpness out of the original shots so maybe there's some method to use this as a better sharpening technique.

I tried another to check if angles matter. Apparently not. Two identical shots at different aperture is all that's required.


005.jpg

007.jpg


mix.jpg

Even if I can't so anything else with it, as an overlay to sharpen tripod macro shots it would serve a purpose.
 
Last edited:

J-see

Senior Member
Thinking it might have something to do with the blurred parts, I decided to try the same thing using a different approach.

I took one of my macro shots, copied the layer and applied a Gaussian blur of 20 pixels and then blended that one using difference 50% fill. Then I adjusted it a bit in post.

Original:

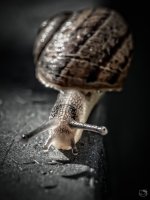
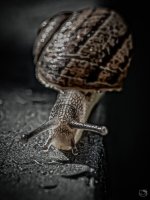
snail002.jpg

Mix:
snail002-Edit.jpg
 

Krs_2007

Senior Member
Yes that was the intention. I wanted two different aperture shots. The strange part is the mix creating something that has a larger DOF. Parts look sharper that aren't in both original shots.

my bad, read HDR and didn't even see you said stack.
 

J-see

Senior Member
I'm fine-tuning this blur-blending as a sharpening technique. It's very simple to apply but will probably be harder to get perfect.

This is a shot I took before I had the Tam. It's about as good as it got when I processed it.

199.jpg

Now I simply copy the layer and blur-blend it using difference. All I need to do is up the exposure some since the blending darkens it.

199-Edit.jpg

It's not perfect yet but in my opinion, an improvement when it comes to details.

Another.

Here I could salvage the head which was just out of focus in the original.

258.jpg

258-Edit.jpg

And more:

057-5.jpg

057-5-Edit.jpg
 
Last edited:

J-see

Senior Member
I'm fine-tuning it more.

The best method is to copy the layer, directly apply the difference blend and fill 50% and only after that use Gaussian Blur. That enables you to see exactly what happens when you in or decrease the pixels it applies to. In some way it works like the high-pass filter where you have to use the right pixel size to avoid the aura that otherwise appears.

I'm still not sure how exactly this works but it enables me to get more out of a shot I could by solely using LR sharpening. It can also recover an area slightly out of focus.

DSC_8735.jpg
DSC_8735-Edit.jpg


DSC_8735-2.jpg
DSC_8735-Edit-2.jpg

Only downside is it also magnifying ever issue with the image like the contrast fringe in this one.
 
Last edited:

J-see

Senior Member
It seems to have a similar effect as increasing the Clarity ever so slightly.

It does something similar indeed but while in LR I can up clarity or sharpen, I usually can't do much about out of focus parts. Both here are processed identical but the one suffering some blur remains like that. It frequently happens with bird shots that I lacked the required depth and some part is slightly out of focus. With this it might make the difference between keeping or deleting.
 

BackdoorArts

Senior Member
Big question - do you understand what each of the blending modes actually does? Blending is all about math, and without applying masks it's going to do what it's going to do with no concern over DoF or anything else photography related.

Here's a chart from a Lynda.com course that shows what goes on mathematically for each blending mode (if you're not math-minded, don't even bother, just skip past it)...

Blend-mode-math.jpg


(mods, you're concerned with my showing this IP here then please delete it - everyone else, I can't recommend enough that you take the time to enroll in Lynda.com at some point and watch this course, Photoshop Masking and Compositing - Advanced Blending, it will open your eyes regarding what blending does)

A is the 0-255 value of the active layer pixel, B is the 0-255 value of the background pixel value, each taken as the percentage of 255 (i.e. if the A value is 100 then you divide 100 by 255 and get 0.3921) as using the actual value will almost always yield something outside the 0-255 range). You simply plug the values into the formula, with anything > 1 being represented as 1 and anything less than 0 as 0, and then reinterpret the result by multiplying by 255 again.

(The mathematically challenged can pick it up here again...)

Most of these are very harsh and need to be tamed in some way to be usable, so I almost always use layer masks to limit the effect in specific areas or adjust the Opacity/Fill. The use of the Opacity and Fill sliders will fine tune just how much of an impact the blend mode has. In most situations Opacity and Fill do the exact same thing, but in the chart above you will see exclamation points next to some of the modes - these are the modes where Opacity and Fill operate differently. When blending in those modes, try reducing Fill instead of Opacity as it tends to have a much more pleasing result.

So, J-See, with your photos what you're getting is a pseudo-focus stacking effect that has none of the advantages of focus stacking. Each pixel value is mathematically determined with absolutely no consideration given to the pixel next to it. If you used a focus stacking technique then the PS engine would consider that and you would not get the bizarre combination of blurred and sharp pixels. I have to be honest and say that I didn't read the entire thread with an eye to understand precisely what you're trying to accomplish, only the first post. I hope the explanation of precisely what blend modes do has helped at least explain why you're seeing what you're seeing. In every case there's a crossover where the math in the blend mode yields something more akin to the sharper photo pixel, and then toggles back, looking like a sharpened image, but leaving a soft halo around it. Whenever you have 2 very similar, and yet distinctly different images to blend you can never tell precisely what you're going to get. I've never had great success using images like that and instead prefer to blend different treatments of the exact same image - and even the same image with itself, more times than not with a mask on certain portions.

Hope this helps folks.

 

wornish

Senior Member
I use high pass filtering quite often to bring out selective areas of the photo.

Got this from a video on YouTube

But basically this is the technique for those with PS.

High Pass Filtering for different levels of detail in PS

Duplicate Layer

Select the top layer the new copy


From top menu
Select Image - Adjustments - Brightness & Contrast
Adjust contrast slider -50 and click OK


From Top Menu
Select Filter - Other - High Pass


For general use Set radius between 0.5 - 1.5 pixels and click OK
Set Blend Mode on top layer to Vivid or Hard Light


In order to select area that you want to adjust.


Create all black layer mask for the top layer and brush in using white brush.


If you want to address specific things in your image then alternatively


For Small details Set radius between 8.0 - 15.0 pixels
Set Blend Mode to Soft Light or Overlay


For Large areas of cloud or water
Set radius to 100.0
Set blend mode to Soft Light.


Can have all three by using three copies of original and individual all black layer masks for each
 

J-see

Senior Member
So, J-See, with your photos what you're getting is a pseudo-focus stacking effect that has none of the advantages of focus stacking. Each pixel value is mathematically determined with absolutely no consideration given to the pixel next to it. If you used a focus stacking technique then the PS engine would consider that and you would not get the bizarre combination of blurred and sharp pixels. I have to be honest and say that I didn't read the entire thread with an eye to understand precisely what you're trying to accomplish, only the first post. I hope the explanation of precisely what blend modes do has helped at least explain why you're seeing what you're seeing. In every case there's a crossover where the math in the blend mode yields something more akin to the sharper photo pixel, and then toggles back, looking like a sharpened image, but leaving a soft halo around it. Whenever you have 2 very similar, and yet distinctly different images to blend you can never tell precisely what you're going to get. I've never had great success using images like that and instead prefer to blend different treatments of the exact same image - and even the same image with itself, more times than not with a mask on certain portions.

Hope this helps folks.

I didn't try to stack the shots, two different DOF with an identical focus point would overlap the other and defeat the purpose of focus stacking. I was only wondering what would happen when trying to blend two different aperture shots. My curiosity was more in regards to the tones. What I stumbled upon when using blend modes was accidental but I didn't understand what was happening and why it was happening.

By now I have a much better idea what goes on and that it isn't as much the different apertures as the different "blurs" that trigger the effect. In a way it is a sharpening technique. A similar effect happens when using the same image twice. Put Gaussian blur on a copy and then blend it with the other. I've been experimenting until I got sidetracked by some computer issues. The Gaussian blur blend works well but only to a degree. The aperture stacking does better in regards to sharpening. I assume it has to do with the difference between the one blur being equally distributed while the other is directional.

I've been trying the PS lens blur because it also allows me directional blur but it's a rather clumsy filter in my version. I'll have to test it more.

I've been using the highpass to sharpen in PS but Gaussian/Difference seems to work as well. It's possible both are based upon the same principle.

Thanks for the information.
 

BackdoorArts

Senior Member
By now I have a much better idea what goes on and that it isn't as much the different apertures as the different "blurs" that trigger the effect. In a way it is a sharpening technique. A similar effect happens when using the same image twice. Put Gaussian blur on a copy and then blend it with the other. I've been experimenting until I got sidetracked by some computer issues. The Gaussian blur blend works well but only to a degree. The aperture stacking does better in regards to sharpening. I assume it has to do with the difference between the one blur being equally distributed while the other is directional.

I've been trying the PS lens blur because it also allows me directional blur but it's a rather clumsy filter in my version. I'll have to test it more.

I've been using the highpass to sharpen in PS but Gaussian/Difference seems to work as well. It's possible both are based upon the same principle.

Thanks for the information.

I realize you weren't trying to focus stack, I was just saying that (without the addition of blur and whatnot, which you did later) your original experiment could only be seen as something of that sort.

The use of blur with blending modes can indeed be something to bring out details in an image. I would recommend doing it on a copy of a single image rather than bringing in copies of various apertures, because face it, once you add blur the impact of the greater DoF is almost moot. Jimmy McIntyre has a set of free Photoshop actions that he uses and one of them is called a Detail Enhancer which is a combination of blurs and inversions of the original image and various blending modes and opacity levels. It takes a while to run but it is brilliant in what it can do to make portions of an image pop, particularly with landscapes.
 

hark

Administrator
Staff member
Super Mod
Contributor
@BackdoorHippie thanks for the information. I wondered what was going on to create this effect, and the chart from Lynda.com definitely offers valuable info (as does your own info). Thanks for the detailed explanation! :)
 
Top