BackdoorArts
Senior Member
OK, so I was taking a picture this morning, a picture I'd done before and one that I'd planned and set up for - a chess board taken from above and lit from the sides. The one thing I didn't do, even though I thought in advance that I should, was once again take into account that I needed the camera squarely over the board. I'd though about propping up once side of the board so I could be at a partial angle, but only after I'd gotten all set up and laziness dictated I just go ahead and try it. I'm a fairly big guy, standing on a stepstool, and every time I leaned over I came pretty close to toppling head first into furniture. So I said, "screw it", just help the camera over top and fired away, figuring I was bound to get something, because I knew I was OK with the lighting and the rest could be done in post. Hey, we all have our vices.
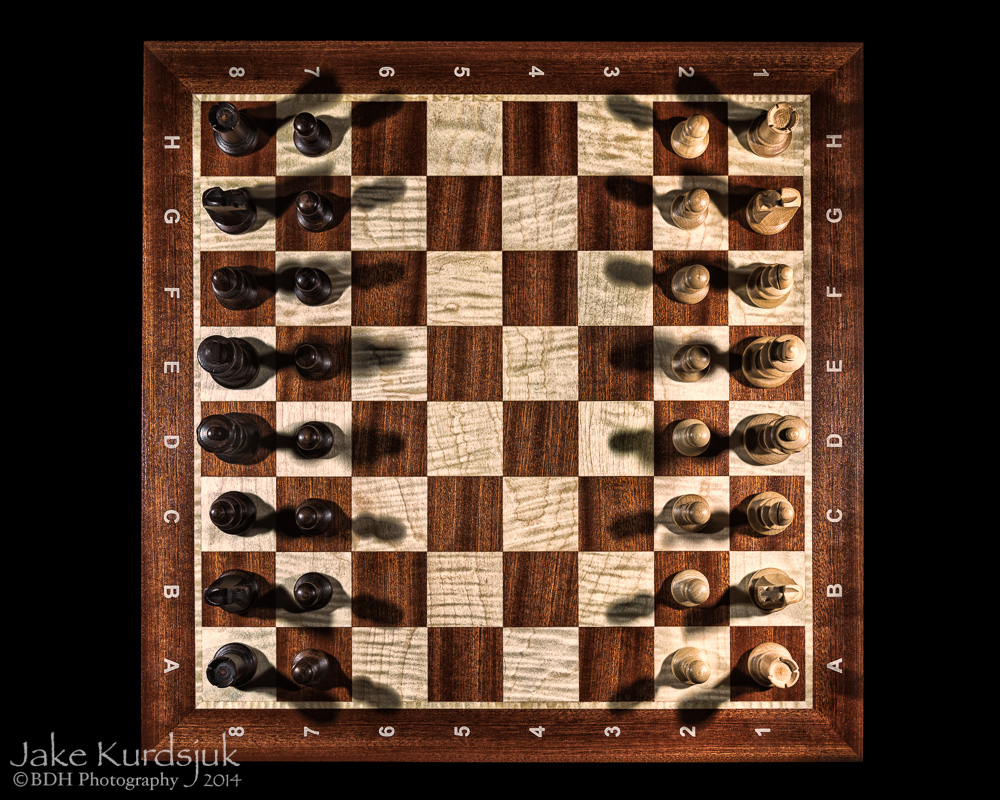
Here's the final shot, from my 365-ish thread...
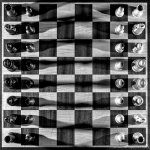
...and here's how it looked when it came into Lightroom...
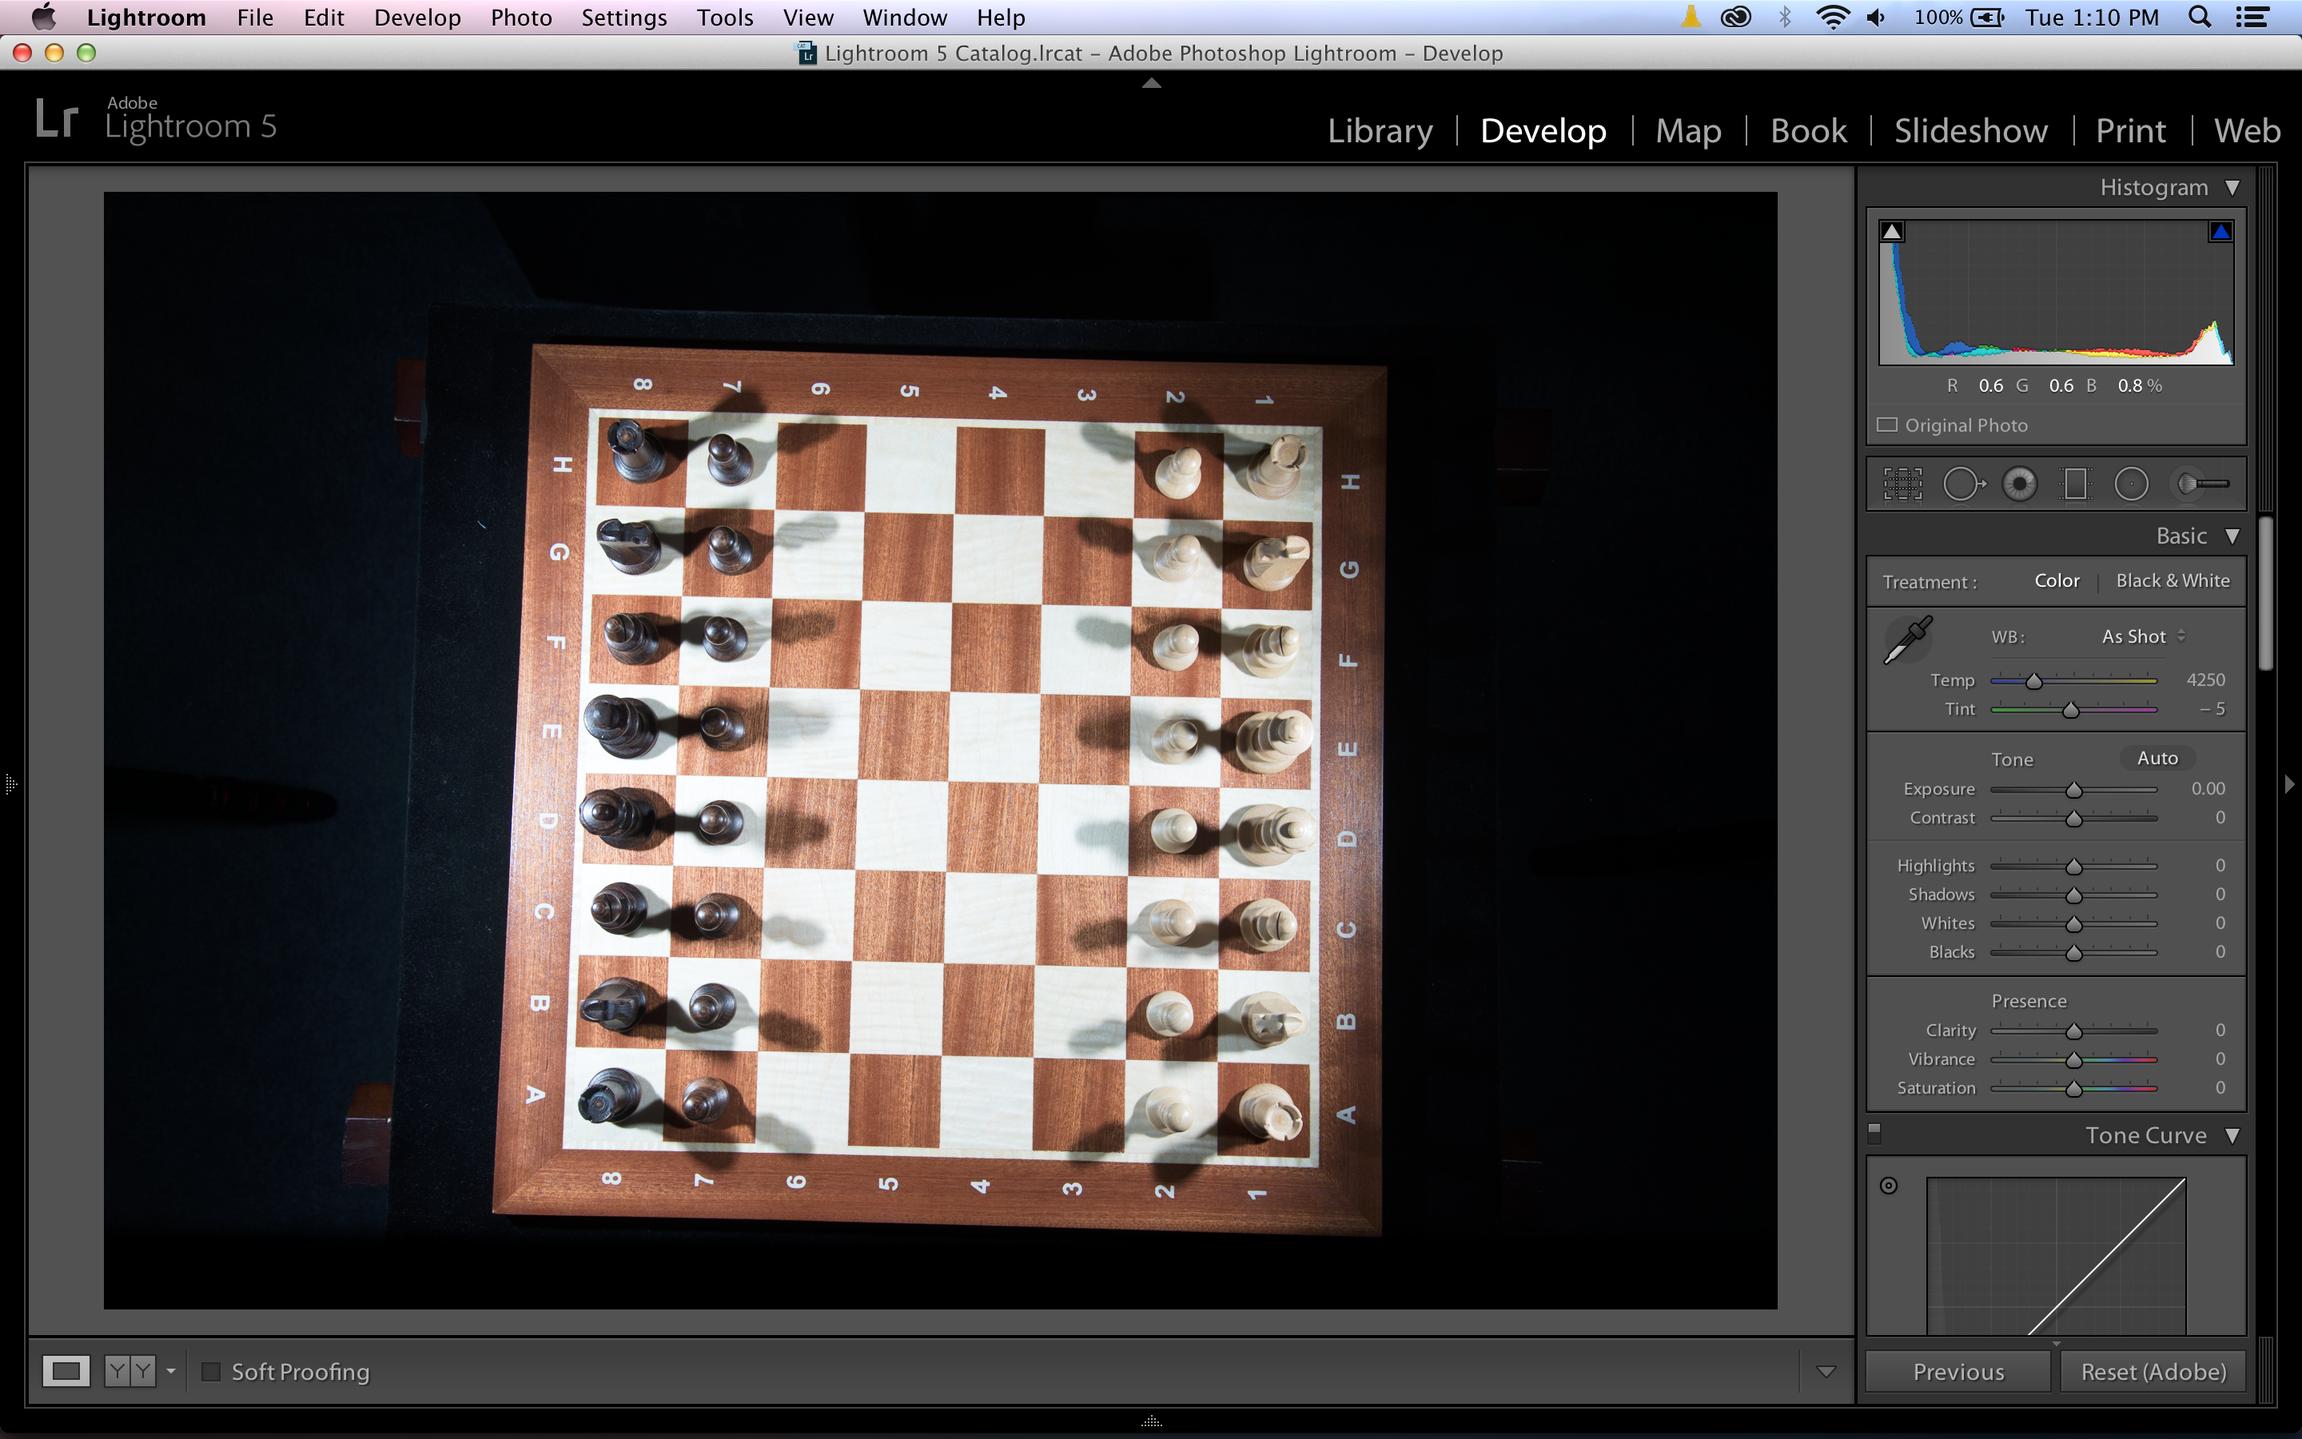
Pretty horrifying, no?!
So, right off the bat, I apply lens correction and use the "Auto" button in the perspective correction and that gets me straight. I then decide to crop down to 4:5 ratio and frame it the way I want it. That's the easy stuff. Now I need to fix these lighting hot spots (never light something at 6:30AM when you have to be on a call by 8).
Given that I've got 2 flashes on either side, raised slightly, I'm not surprised to see hot spots on the edges. So, I use the Gradient Adjustment tool and apply two gradients, one right to left (1st photo) and one left to right (2nd photo) with the adjustments you see. The idea here was mainly to even the light on each 1/2 of the board. (Note: the next three adjustments are all applied together in LR and so you cannot see the impact of each, but I will display each one separately)
(R-to-L gradient)
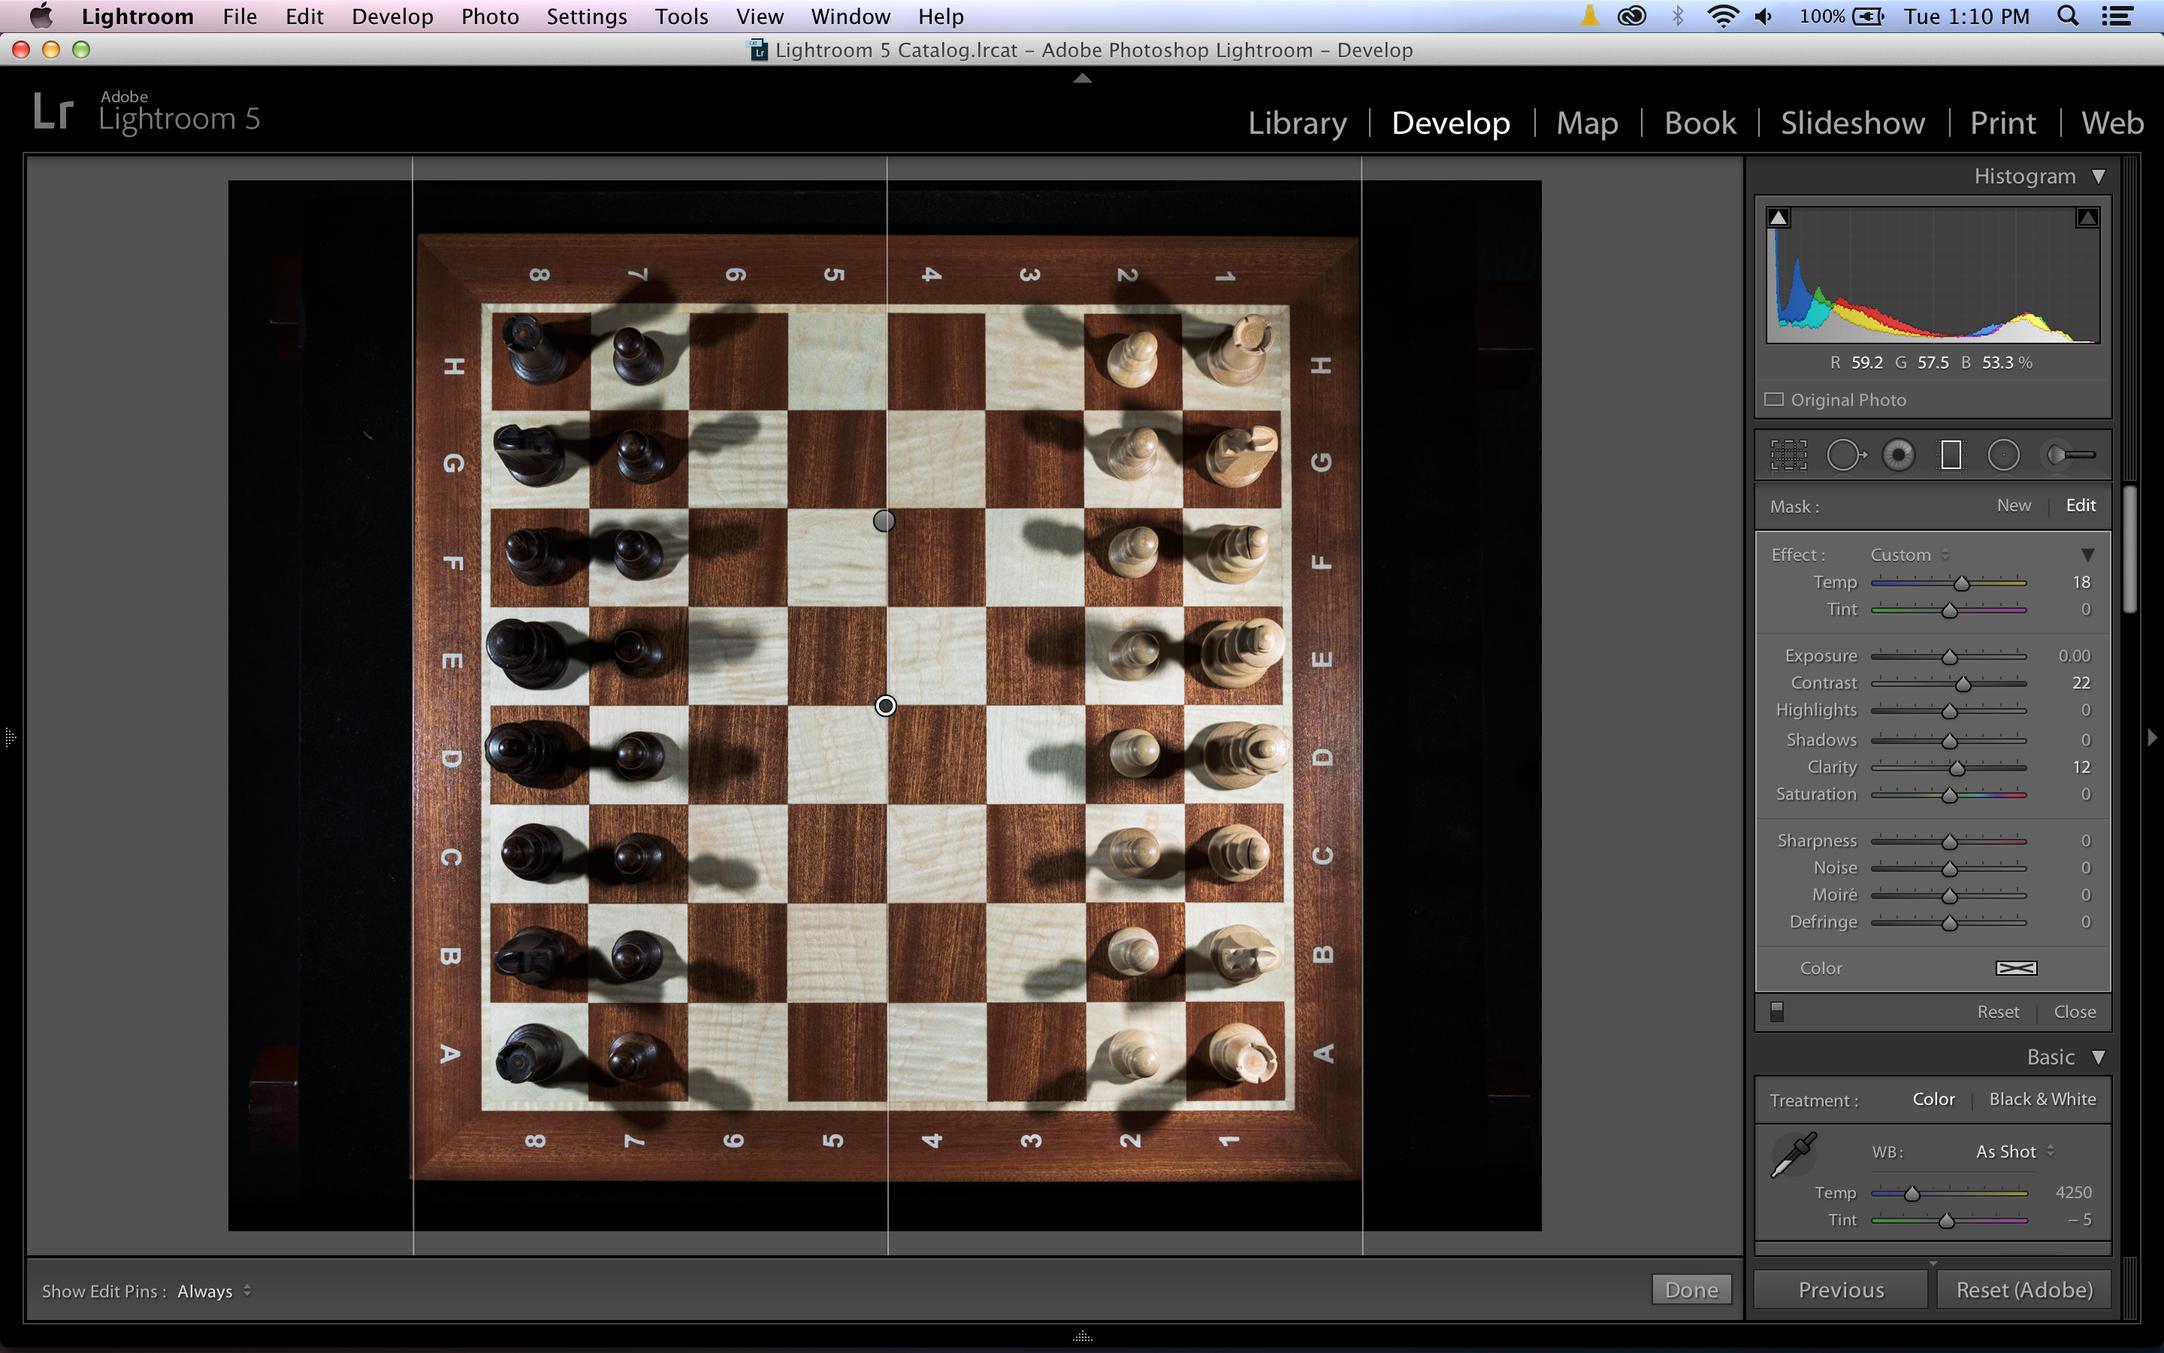
(L-to-R gradient)

...and you should note that the temperature of the light from the flashes changes as the light dims, so I needed to apply a white balance adjustment via the gradient tool.
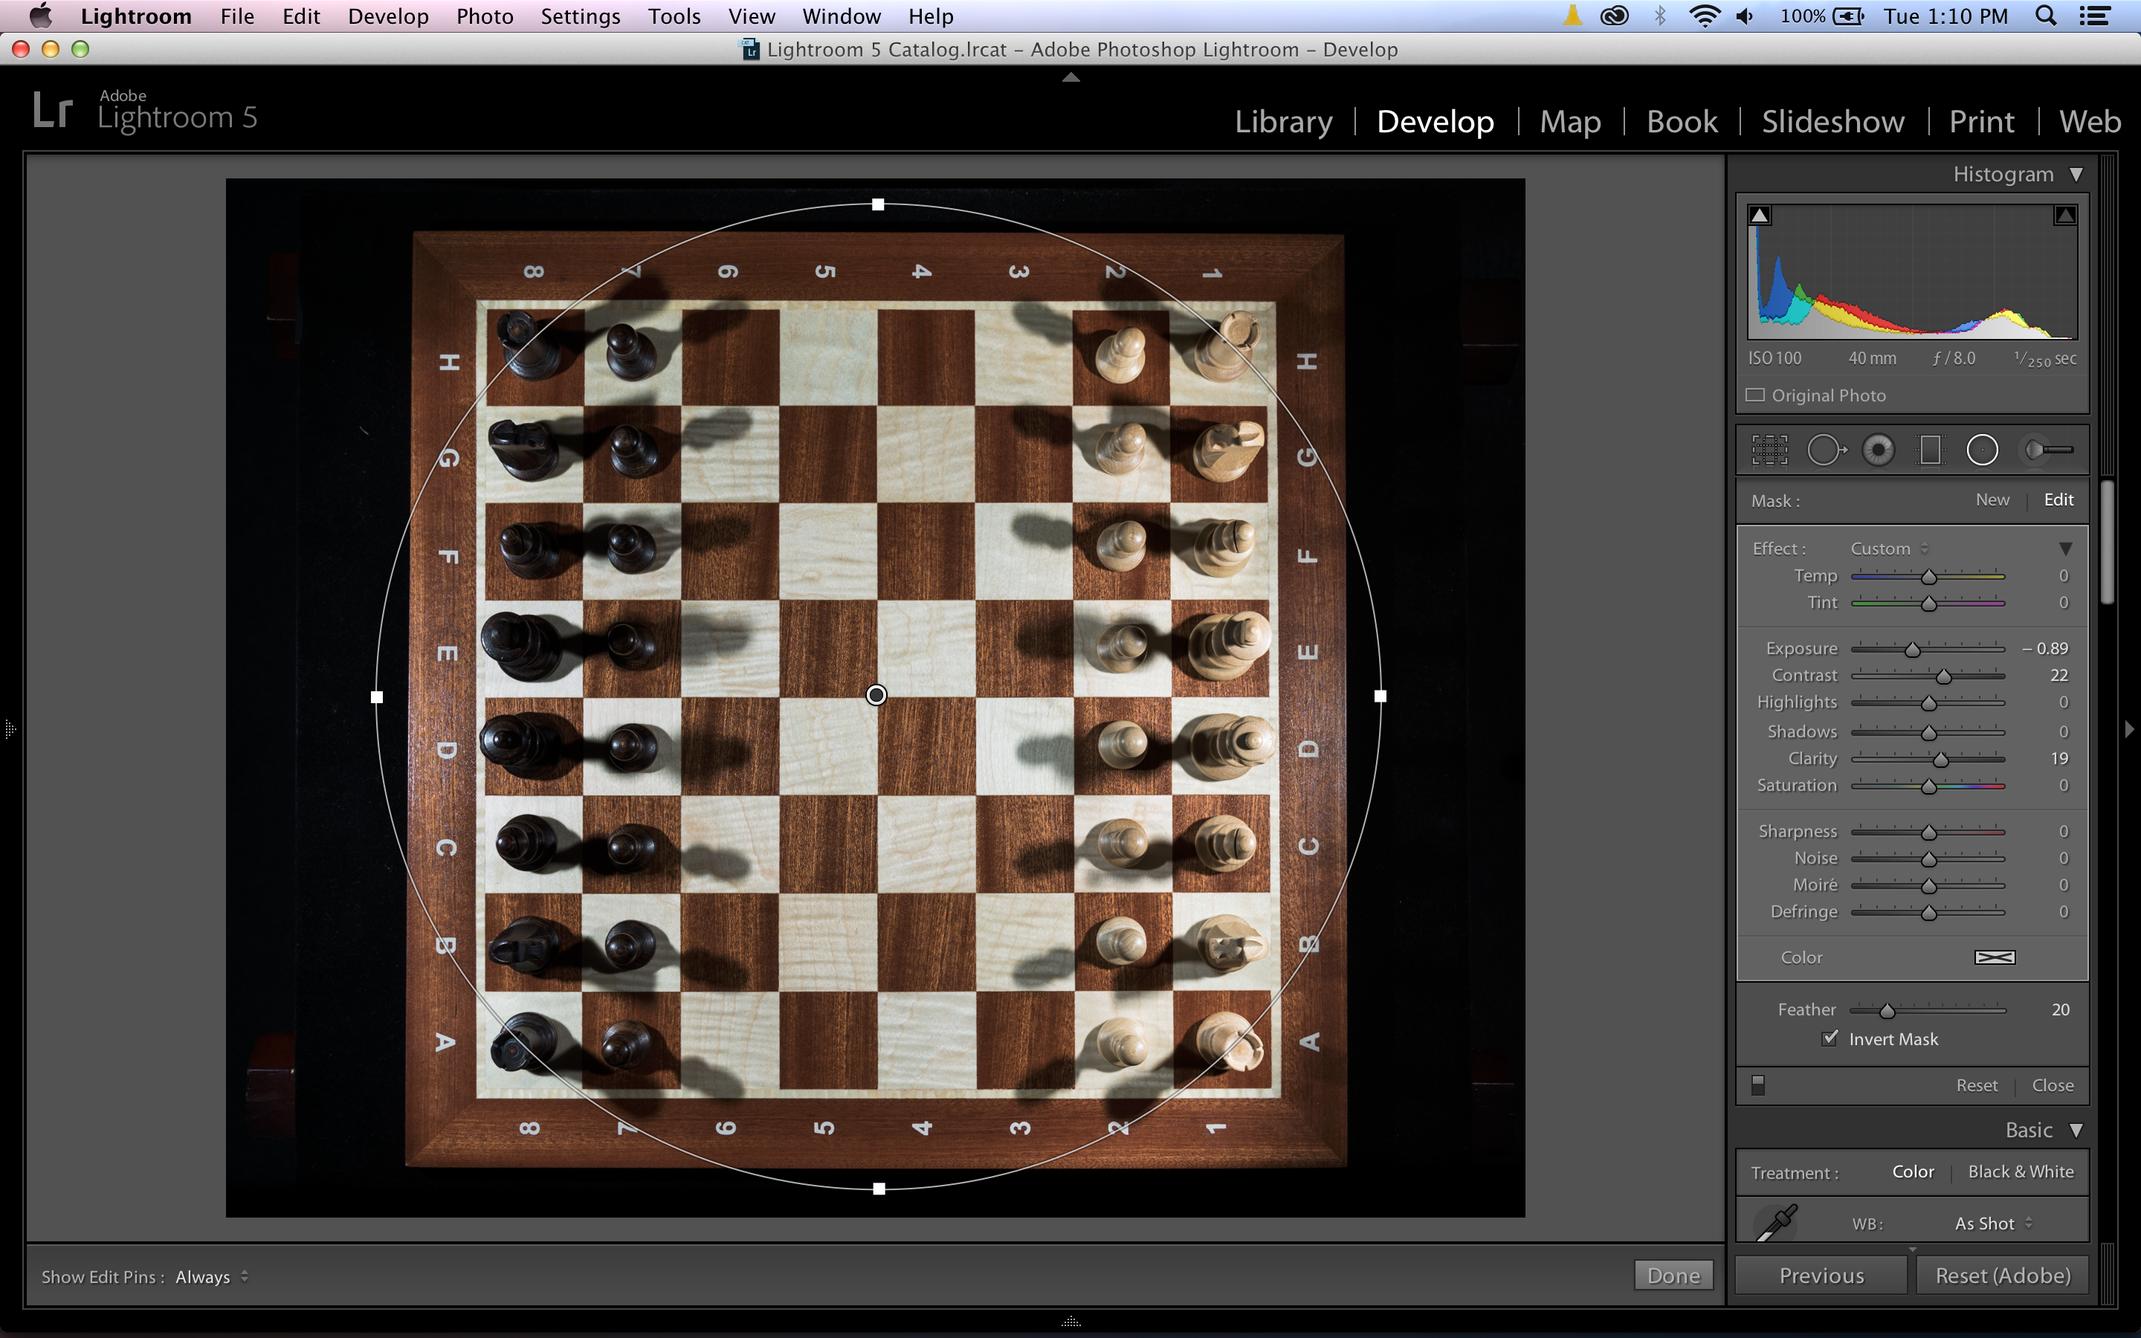
But I was still left with darkish corners and a hot center. Radial Adjustment tool to the rescue. What I love about this tool is that it starts from the center of the circle and works out, so I could easily pin-point it at the center of the board. The strange thing about this tool, for me anyway, is that it thinks it wants to be a vignette tool, so it affects everything outside the circle, feathering inward. Thankfully there's an Invert Mask box that swaps that function and once clicked I was able to balance the light across the entire board fairly well - knowing that I still wanted to show that it was lit from 2 sides.
OK, so now I'm done with my LR adjustments and it's off to Photoshop to finish. This was shot at ISO 100, so there was no need to do an NR step, so the first step, as always, was to duplicate the original image in a work layer and do a Levels adjustment. My LR adjustments left me a little dark, so I pulled in the highlight marker and then adjusted the center until it looked OK.
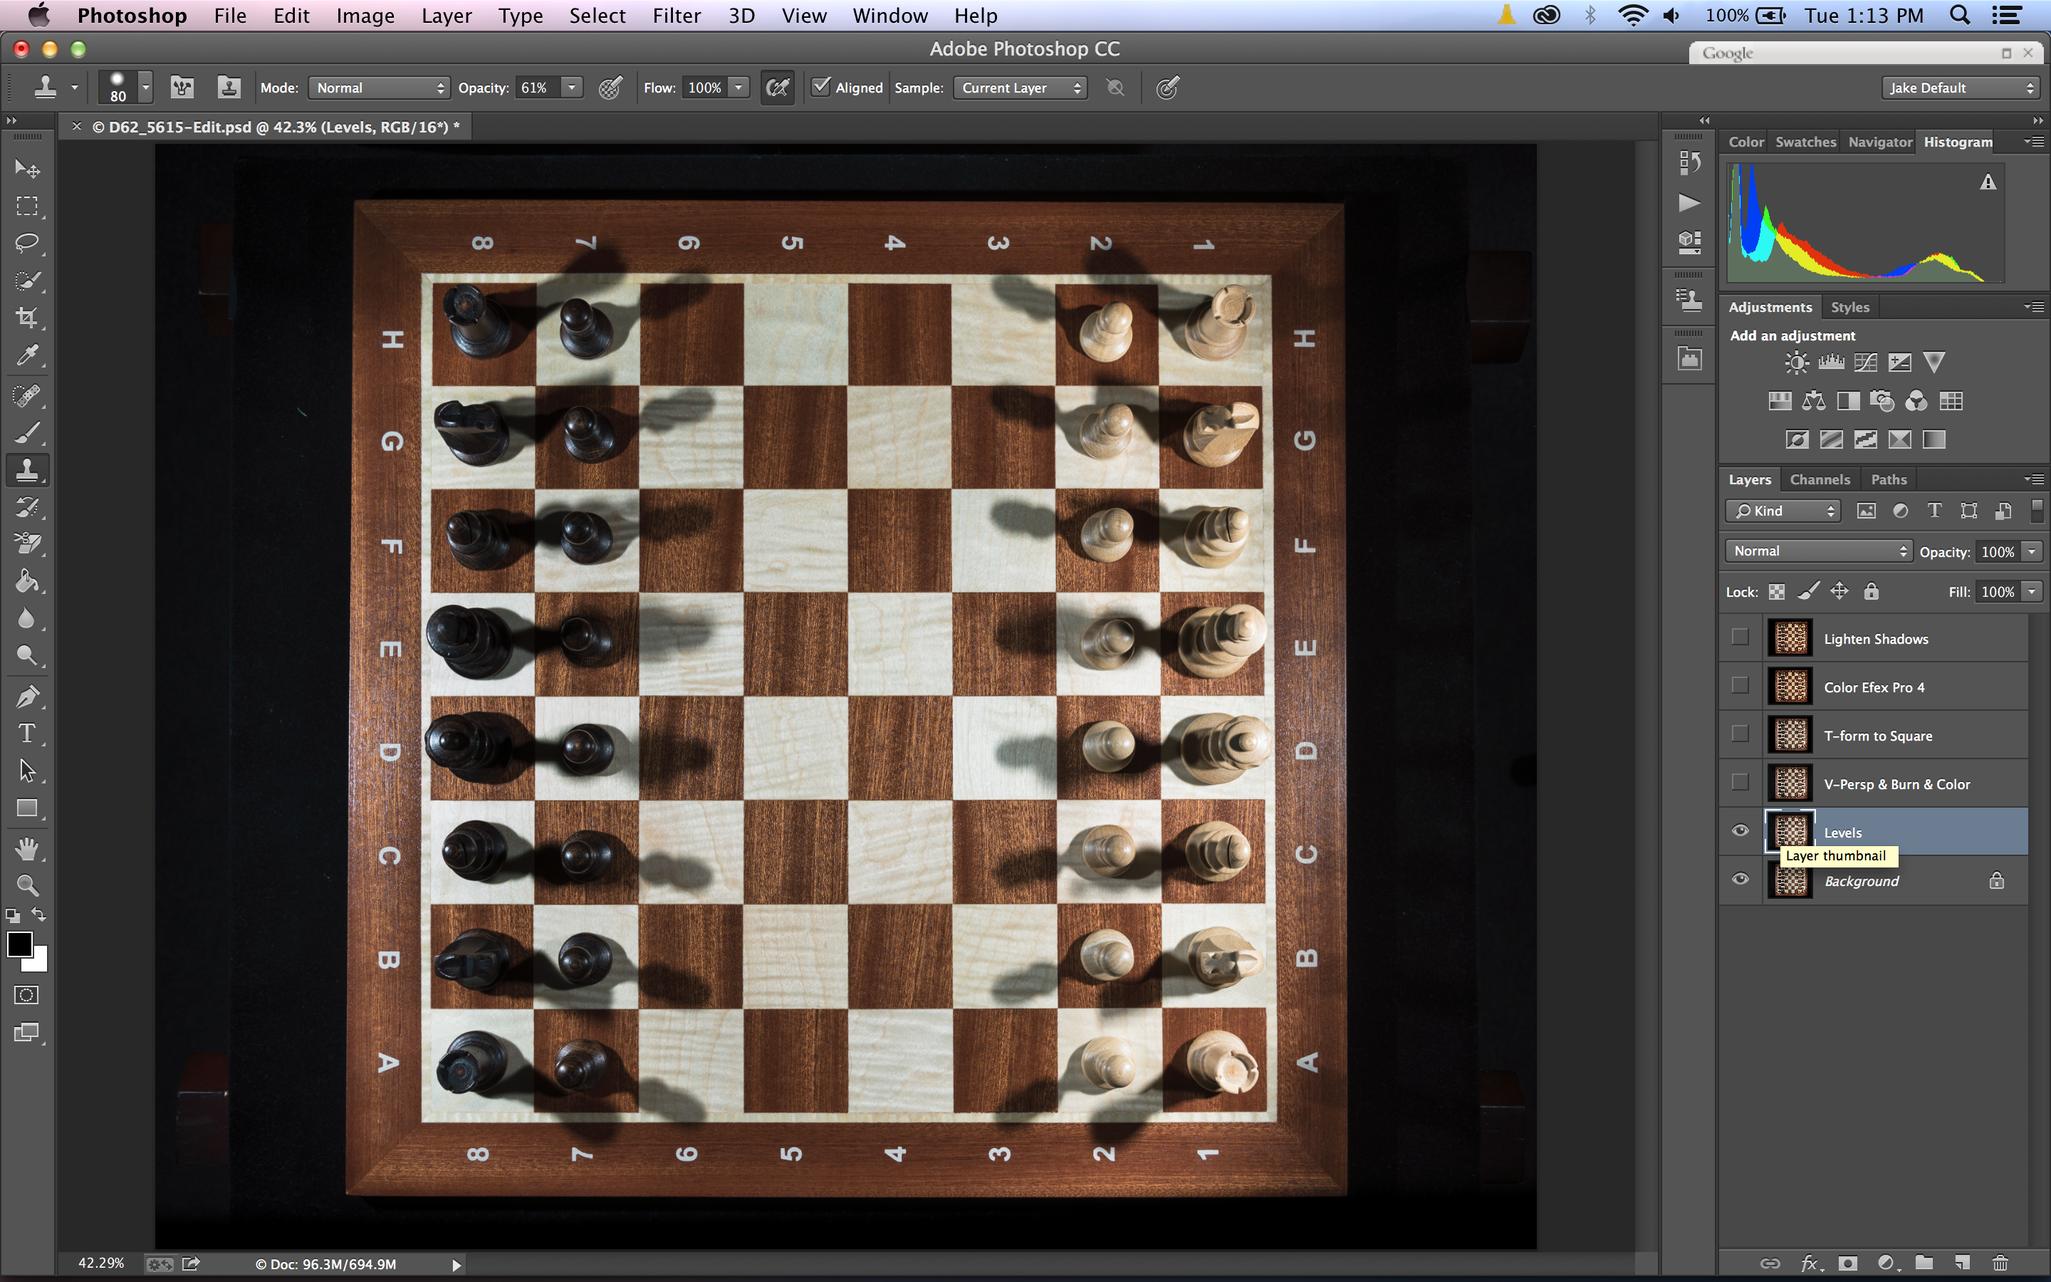
I created a new layer from that (Cmd-J) I wasn't sure if my eyes were seeing things clearly, but the board didn't seem to look square to me, so I checked it with the crop tool and sure enough, the top was a little smaller than the bottom. So, I used Free Transform to pull out the left and right top corners a bit (< 0.5 degrees each) and it looked better. I knew a couple of the center white squares had a strange blue-ish tint to them, so I used the Quick Select tool to grab the offending squares and create a layer mask, and then applied hue and lightness adjustments using an adjustment layer until I was happy. I then merged the adjustment down and applied the mask. I also used the burn and dodge tools to even out some of the lighting on the edges and between the pieces.
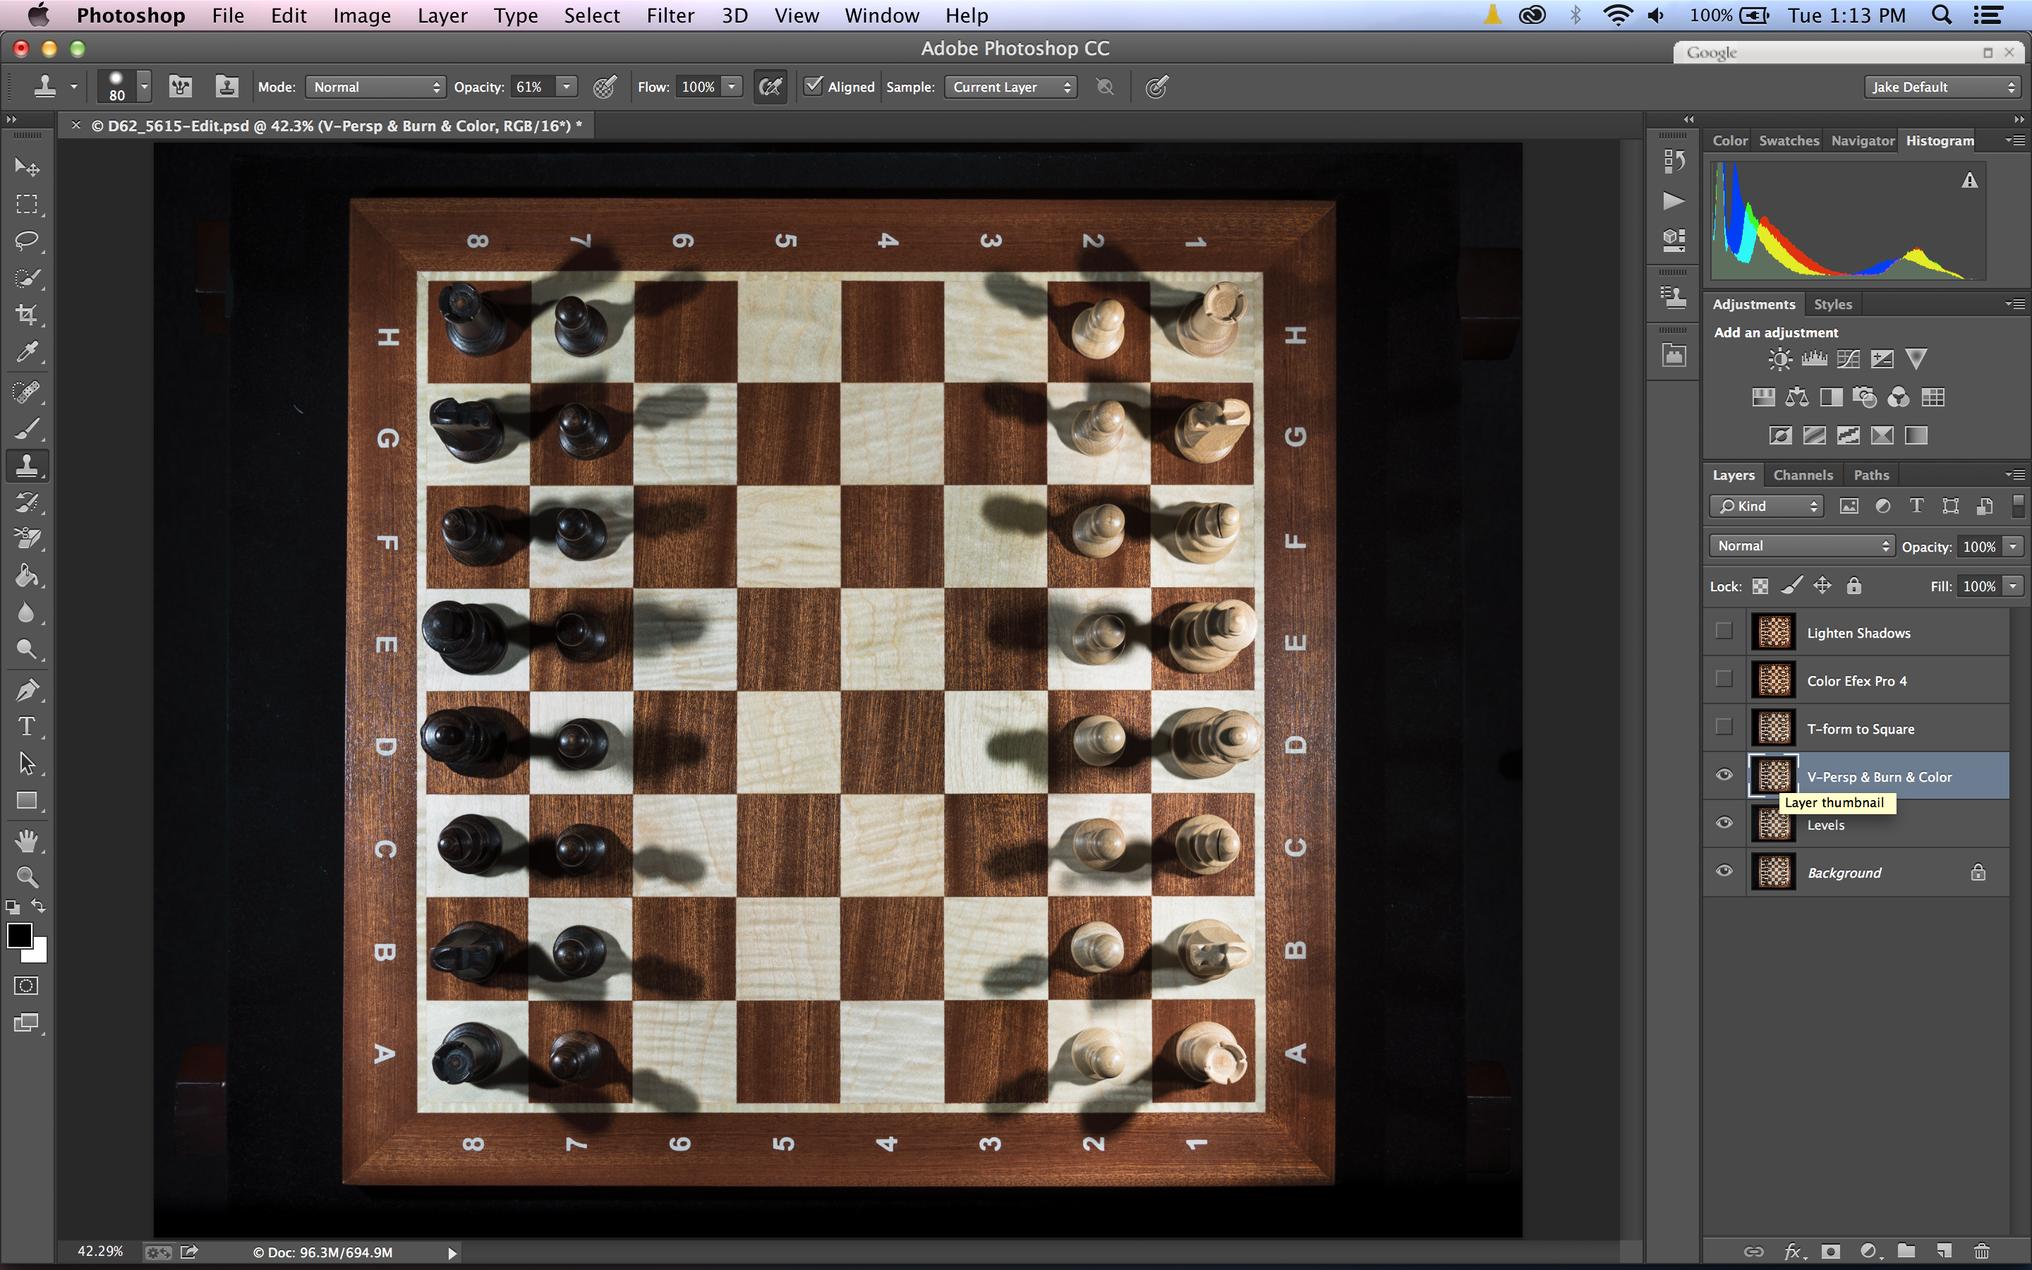
Alas, it still didn't look square, and when I checked, sure enough, the bottom left had kicked out a bit. So again I used Free Transform against a copy layer to square it. Once that was done, I used the square selection tool to select the board, inversed the selection and isolated just the dark areas, which I wanted to make sure were completely black before sending it to Color Efex. I applied a chain of adjustment layers that sucked all the "brightness" out and was ready to move on.
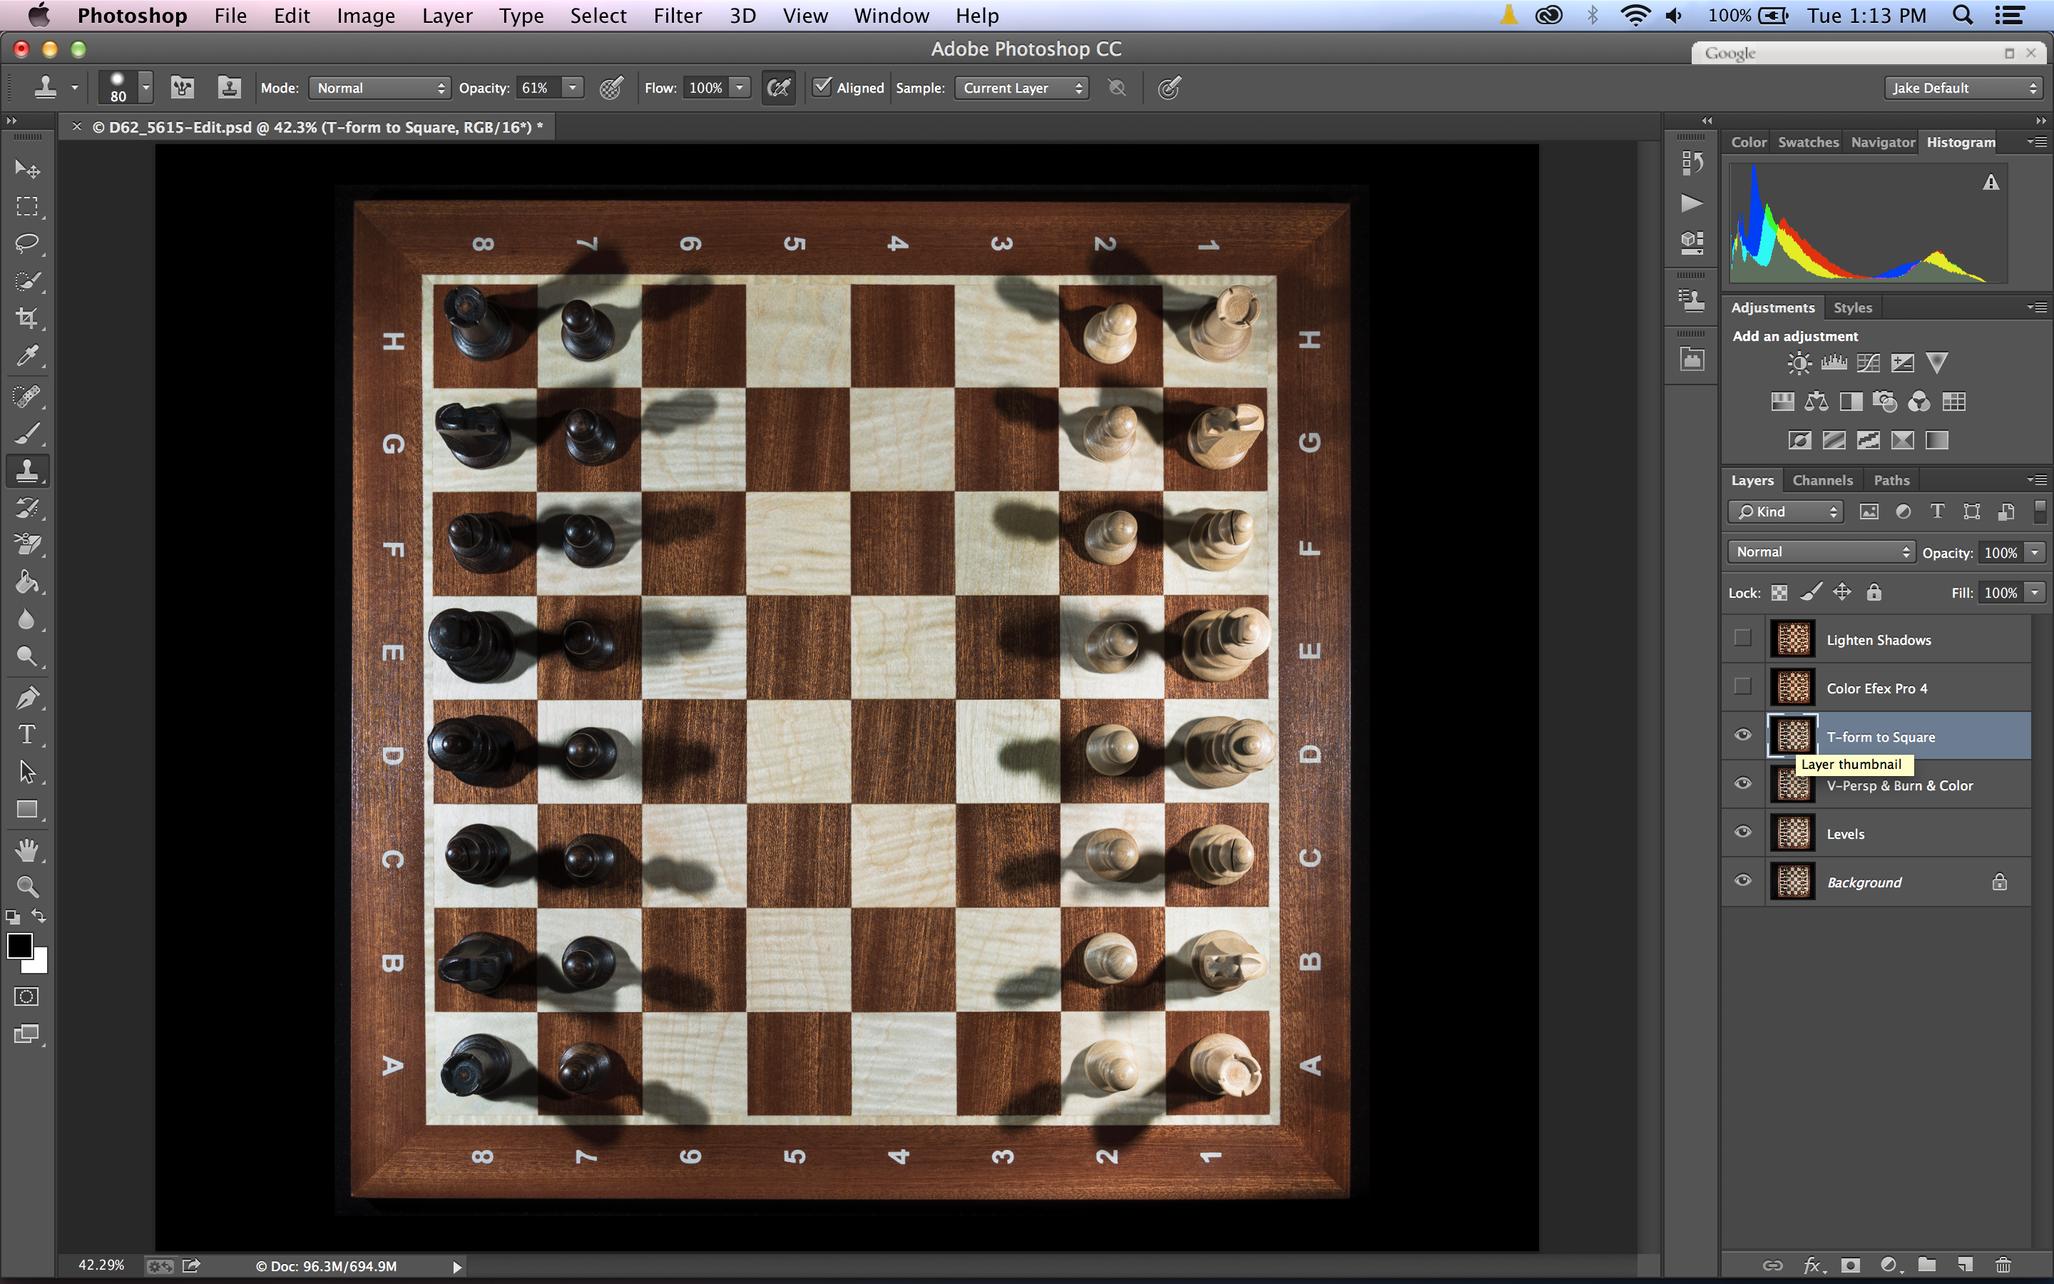
I had done another chess shot a couple months before, and fortunately saved the recipe, which was a combination of the Detail Extractor (~40% on Fine), Low Key and Brilliance and Warmth filters. I applied the recipe, tried tweaking it here and there without liking it, so I went back to the plain recipe and got back out to Photoshop.
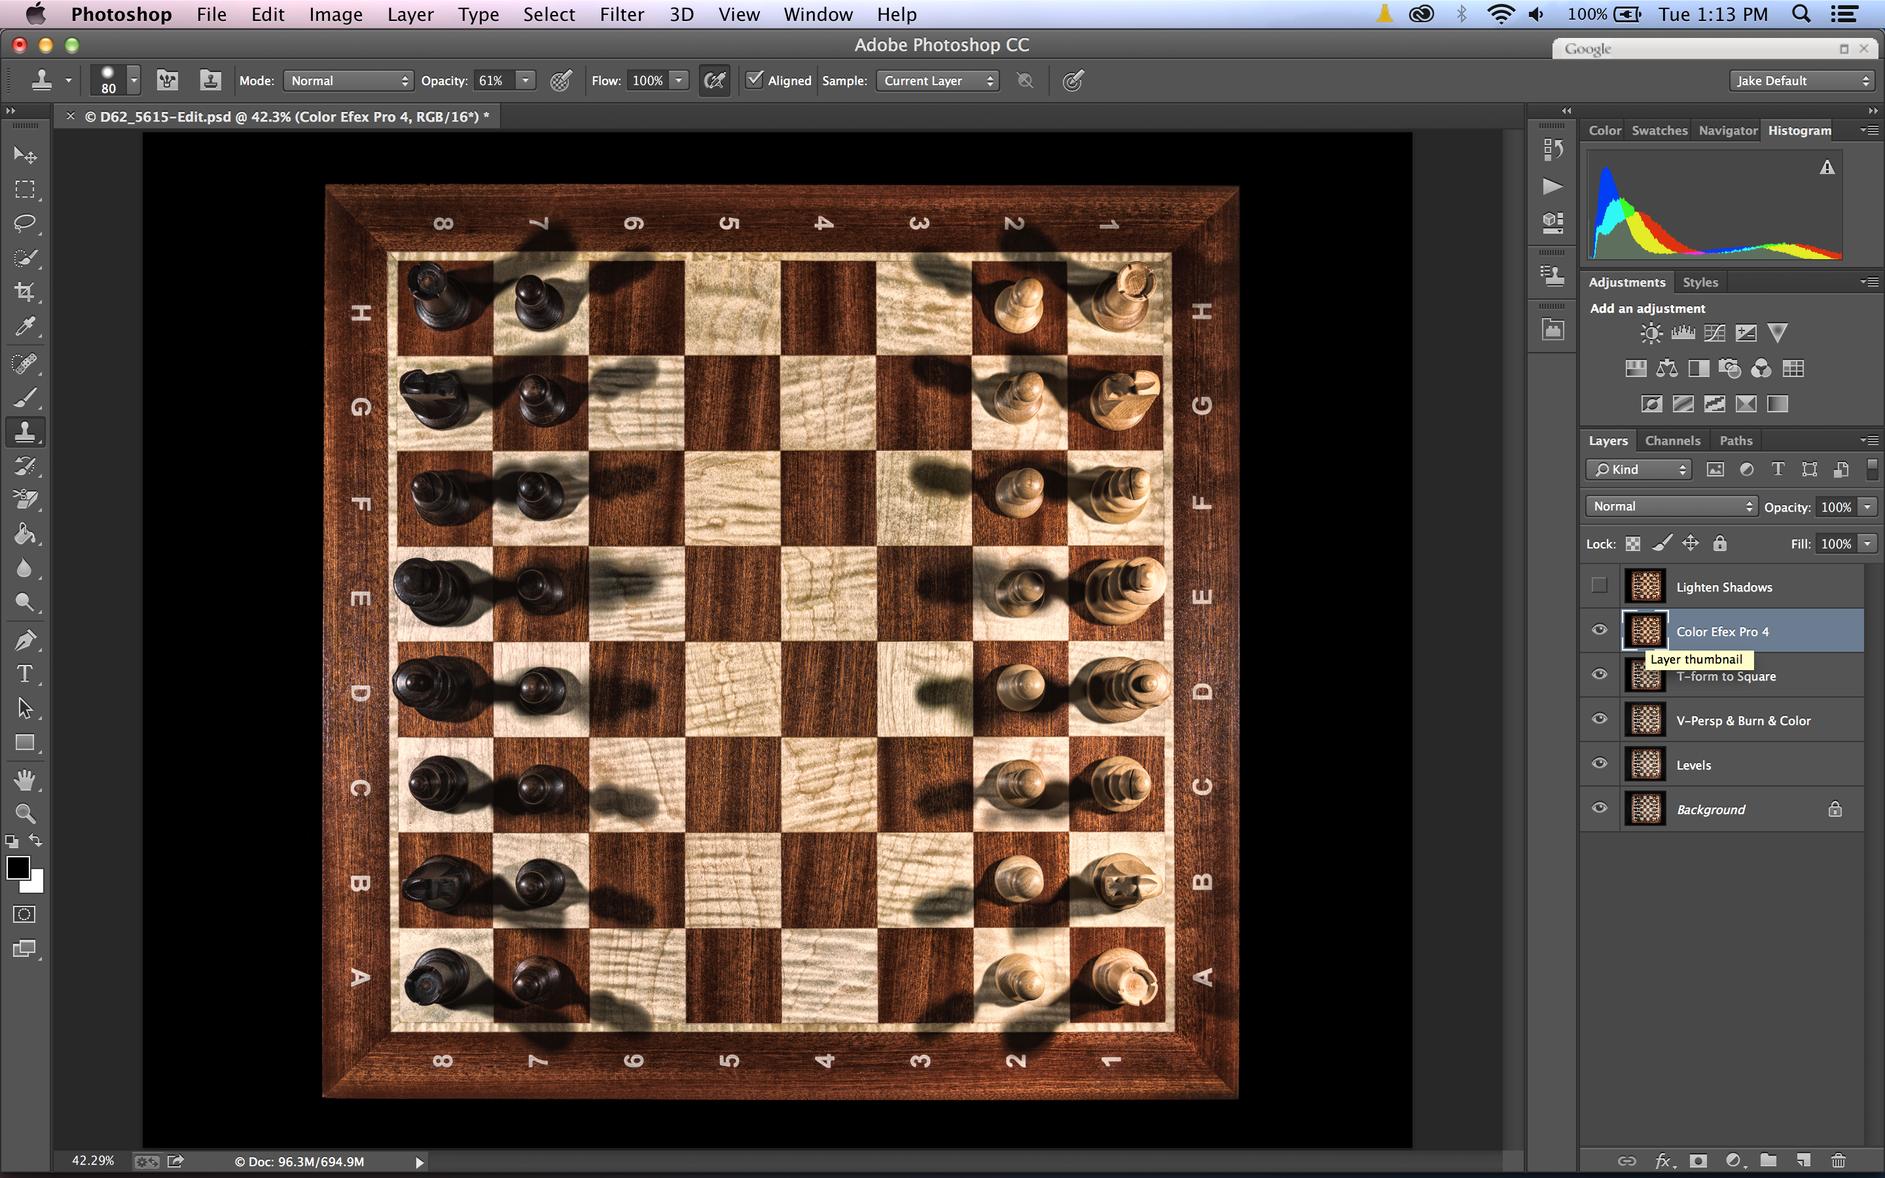
It's now pretty close to done, but I see some dark areas in the black pieces that could use lightening, so I use the Dodge tool on Shadow to lighten up a few areas.

And that's it. I wanted to use some Smart Fill to remove the letters, which I later did, but in checking the rules I found that removing them was potentially crossing a line of sorts. So, I let her be.
I'm not sure if any of this will help anyone in any way, but I just wanted to show that what comes out of your camera doesn't necessarily have to be spot on if you know that the details you need are there. I don't like doing this level of editing, but to be honest, outside of the initial Lightroom work to straighten and balance the light (my work with artificial light is currently approaching amateur level, at best), the rest was pretty straight forward and expected.
Here's the final shot, from my 365-ish thread...
...and here's how it looked when it came into Lightroom...
Pretty horrifying, no?!
So, right off the bat, I apply lens correction and use the "Auto" button in the perspective correction and that gets me straight. I then decide to crop down to 4:5 ratio and frame it the way I want it. That's the easy stuff. Now I need to fix these lighting hot spots (never light something at 6:30AM when you have to be on a call by 8).
Given that I've got 2 flashes on either side, raised slightly, I'm not surprised to see hot spots on the edges. So, I use the Gradient Adjustment tool and apply two gradients, one right to left (1st photo) and one left to right (2nd photo) with the adjustments you see. The idea here was mainly to even the light on each 1/2 of the board. (Note: the next three adjustments are all applied together in LR and so you cannot see the impact of each, but I will display each one separately)
(R-to-L gradient)
(L-to-R gradient)
...and you should note that the temperature of the light from the flashes changes as the light dims, so I needed to apply a white balance adjustment via the gradient tool.
But I was still left with darkish corners and a hot center. Radial Adjustment tool to the rescue. What I love about this tool is that it starts from the center of the circle and works out, so I could easily pin-point it at the center of the board. The strange thing about this tool, for me anyway, is that it thinks it wants to be a vignette tool, so it affects everything outside the circle, feathering inward. Thankfully there's an Invert Mask box that swaps that function and once clicked I was able to balance the light across the entire board fairly well - knowing that I still wanted to show that it was lit from 2 sides.
OK, so now I'm done with my LR adjustments and it's off to Photoshop to finish. This was shot at ISO 100, so there was no need to do an NR step, so the first step, as always, was to duplicate the original image in a work layer and do a Levels adjustment. My LR adjustments left me a little dark, so I pulled in the highlight marker and then adjusted the center until it looked OK.
I created a new layer from that (Cmd-J) I wasn't sure if my eyes were seeing things clearly, but the board didn't seem to look square to me, so I checked it with the crop tool and sure enough, the top was a little smaller than the bottom. So, I used Free Transform to pull out the left and right top corners a bit (< 0.5 degrees each) and it looked better. I knew a couple of the center white squares had a strange blue-ish tint to them, so I used the Quick Select tool to grab the offending squares and create a layer mask, and then applied hue and lightness adjustments using an adjustment layer until I was happy. I then merged the adjustment down and applied the mask. I also used the burn and dodge tools to even out some of the lighting on the edges and between the pieces.
Alas, it still didn't look square, and when I checked, sure enough, the bottom left had kicked out a bit. So again I used Free Transform against a copy layer to square it. Once that was done, I used the square selection tool to select the board, inversed the selection and isolated just the dark areas, which I wanted to make sure were completely black before sending it to Color Efex. I applied a chain of adjustment layers that sucked all the "brightness" out and was ready to move on.
I had done another chess shot a couple months before, and fortunately saved the recipe, which was a combination of the Detail Extractor (~40% on Fine), Low Key and Brilliance and Warmth filters. I applied the recipe, tried tweaking it here and there without liking it, so I went back to the plain recipe and got back out to Photoshop.
It's now pretty close to done, but I see some dark areas in the black pieces that could use lightening, so I use the Dodge tool on Shadow to lighten up a few areas.
And that's it. I wanted to use some Smart Fill to remove the letters, which I later did, but in checking the rules I found that removing them was potentially crossing a line of sorts. So, I let her be.
I'm not sure if any of this will help anyone in any way, but I just wanted to show that what comes out of your camera doesn't necessarily have to be spot on if you know that the details you need are there. I don't like doing this level of editing, but to be honest, outside of the initial Lightroom work to straighten and balance the light (my work with artificial light is currently approaching amateur level, at best), the rest was pretty straight forward and expected.
Last edited:

