Exposure

JJM

Senior Member
Hi there,
I have taken a bold step and trying to use S, A & M Mode.
The main command and sub-command dial seems to work well and I can see the resulting change in aperture/shutter speed on the top screen. I started with the Sunny 16 Rule (f16 - 1/500) and then down the scale to f4 - 1/8000. ISO sensitivity is set to Auto Max 400 as I understand above that figure will produce too much noise. My problem is that most of my test photos are underexposed. It was a bright sunny day with clear blue sky.
Should I take the max limit off ISO? Any advise would be appreciated.
Thanks in advance
 

evan447

Senior Member
take a look at the segmented bar in the viewfinder, ( - ...0...+). for correct exposure you should be on o. if you are on - open your aperture or lengthen your shutter speed until you are on o.
dont worry too much about iso speeds, the notion that going above 400 iso will give too much noise is more relevant to a 35mm film camera. the d7000 is pretty good well above this figure.
more importantly, read the manual, this is available as a pdf download if you do not have one. also, try a book on basic photography principles.
 
I basically just discovered how to use the exposure meter ( -.....0.....+) in my cameras viewfinder and learned to turn the command or sub-command dial to get the indicator dead on the ( 0 ) part of the meter. Makes the fine tuning of the exposure so much easier.
 

JJM

Senior Member
Many thanks evan447 & WileyCoyote - I will take off the Max ISO400 and attempt to play around with the + & - exposure compensation in the viewfinder. It is probably quicker & simpler to adjust aperture/shutter speed? Does the exposure compensation scale visibly alter as the aperture/shutter is adjusted. I do read the manual & a guide by Simon Stafford but I find talking to one who has been there/done that is often more informative and understandable.
Once again many thanks.
 

evan447

Senior Member
in s mode, adjust shutter speed, the camera will select the aperture for correct exposure.
in a mode, adjust aperture, the camera will select shutter speed for correct exposure.
in m mode either shutter or aperture can be altered for correct exposure but keep an eye on the segmented bar.
​the segments on the bar will change (as long as you half press the shutter before doing so).
what lens are you using?
 

WayneF

Senior Member
Hi there,
I have taken a bold step and trying to use S, A & M Mode.
The main command and sub-command dial seems to work well and I can see the resulting change in aperture/shutter speed on the top screen. I started with the Sunny 16 Rule (f16 - 1/500) and then down the scale to f4 - 1/8000. ISO sensitivity is set to Auto Max 400 as I understand above that figure will produce too much noise. My problem is that most of my test photos are underexposed. It was a bright sunny day with clear blue sky.
Should I take the max limit off ISO? Any advise would be appreciated.
Thanks in advance

ISO 400 is extremely ample for a bright sunny day with clear blue sky. ISO 100 will work fine. Even less can work fine. Early Kodachrome film was speed 10. :)

Sunny 16 says at ISO 400, this bright sun would be f/16 at 1/400 second (or equivalents, which are even faster shutter speeds). It is very difficult to imagine this is not sufficient ISO.

But... the light meter is not always correct. Or rather, our use is not always correct.

If you point it mostly at bright sky, then shady foreground objects will be dark (underexposed).
If you point it mostly at dark shady scenes, then the bright sky will be overexposed.
There is a little skill involved with aiming it. :)

It would help much to see one of these problem photos, posted here, along with info about aperture, shutter, ISO, exposure mode, and metering mode. This exact information is recorded in the Exif data in every image. I think hosting the image at this site strips it out, so you will need to tell us.
 
Last edited:

Horoscope Fish

Senior Member
Many thanks evan447 & WileyCoyote - I will take off the Max ISO400 and attempt to play around with the + & - exposure compensation in the viewfinder. It is probably quicker & simpler to adjust aperture/shutter speed? Does the exposure compensation scale visibly alter as the aperture/shutter is adjusted. I do read the manual & a guide by Simon Stafford but I find talking to one who has been there/done that is often more informative and understandable.
For learning to shoot in Manual, I suggest you pick an ISO and work with it, just for starters... You're going to have two additional variables to work with which is, in my opinion, enough for now. So set your ISO to, say 100 or 200 for a typical bright sunny day, 400 if overcast, or what have you. The point here is pick your ISO and lock it down.

From here, what I used to do while learning to tame Manual was to cheat a little by framing my shot and then switching from "M" to "Auto" or "A" mode and pressing the shutter button half-way to allow the camera to meter the shot and suggest a shutter speed. I would then dial those in myself in "M" mode and then take the shot. It might seem silly to let the camera do the work and then dial it in myself but it was a process of learning to "see" and think in terms of what I was seeing and subsequent exposure. Once I started to get a feel for exposure by eye, I would try and guess the correct exposure and then either double check my settings against the meter in "A" mode or bracket my shots. Between bracketing, and keeping an eye on the exposure meter, I think you'll be surprised how quickly you'll develop a feel for getting the right exposure. And don't be afraid to bracket. Start adding in the variable of ISO when you feel comfortable with it. It's like adding one more ball to your juggling act but once things start to "click" for you adding ISO to the equation is a snap.


.
 
Last edited:

jwstl

Senior Member
Hi there,
I have taken a bold step and trying to use S, A & M Mode.
The main command and sub-command dial seems to work well and I can see the resulting change in aperture/shutter speed on the top screen. I started with the Sunny 16 Rule (f16 - 1/500) and then down the scale to f4 - 1/8000. ISO sensitivity is set to Auto Max 400 as I understand above that figure will produce too much noise. My problem is that most of my test photos are underexposed. It was a bright sunny day with clear blue sky.
Should I take the max limit off ISO? Any advise would be appreciated.
Thanks in advance

Since you are using Auto ISO you need to take a look at the images and see what ISO was selected. Your Sunny 16 settings are fine only if 400 was selected. If anything lower than that was selected then your images would be incorrectly exposed. And on a sunny day I imagine a lower ISO was selected.
 
Last edited:

JJM

Senior Member
Many thanks all. I will try to upload one of the photos. The Exif info should show what ISO was selected as I had it on Auto Max 400.
Horoscope Fish - That's what I call an idea! At least it will get me started if I sneak a look in the Auto or A Mode for a while to see what shutter speed the camera would select.
I think I am beginning to realize if I point the camera too much toward the sky then foreground will be dark but I try to divide the frame into three parts with the sky as 1/3 but I will to be conscious of the effect the bright sky has.


File type: JPEG
File size: 7,782.4 KB

Make: NIKON CORPORATION (Nikon | Home)
Camera: NIKON D7000
Lens: AF-S DX VR Zoom-Nikkor 18-200mm F3.5-5.6G IF-ED
Software: Ver.1.03
Dimension: 4928 x 3264 px (16.1 MP, 3:2)
Focal length: 120 mm (equiv. 180 mm)
Aperture: F8
Exposure time: 1/2000" (+1 EV)
ISO speed rating: 400/27°
Program: Manual
Metering Mode: Center-weighted average
White Balance: AUTO1
Focus Mode: AF-S

[Camera]
Exposure time: 1/2000"
F number: F8
Exposure program: Manual
ISO speed rating: 400/27°
Exposure bias: +1 EV
Maximum lens aperture: 4.9 Av (F5.5)
Metering mode: Center-weighted average
Lens focal length: 120 mm
Exposure mode: Manual exposure
White balance: Auto
Gain control: Low gain up
Contrast: Normal
Saturation: Normal
Sharpness: Normal
Subject distance range: Unknown
Lens Type: D, G, VR
Lens: 18-200mm F3.5-5.6
Used Lens: AF-S DX VR Zoom-Nikkor 18-200mm F3.5-5.6G IF-ED

I've edited this list to a more manageable size. You had WAY too much listed.....totally unnecessary information. Basic EXIF is all that is needed. Even THIS list is too long, but you get the idea. :)
 
Last edited by a moderator:

JJM

Senior Member
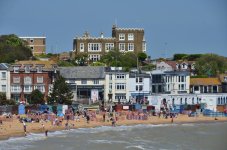
M Mode - f8 2000 ISO400 120mm +1.jpgI think this is the image only it did not appear to have posted with the Exif info. Sorry about that.
 

WayneF

Senior Member
Sorry, I missed that you were using Sunny 16 with Manual camera mode. Sunny 16 certainly can be ballpark correct, but a couple of things should be noted.

Sunny 16 was used very many years ago, before electronics and light meters. It was all we had back then, and it was great then, and such instructions were packaged with every roll of film. We used Negative film then. Negative film has much more exposure latitude than slides or digital positives, so it mattered much less. Because, it was normally easy to correct negative film exposure in the dark room, so we never realized the exposures were not precisely accurate. The photo-finisher guy took care of it for us. Slides and digital positives are much more critical than negative film, we have to use the actual result.

Sunny 16 works sort of in full stops, from bright sun to hazy or slightly cloudy, to cloudy, to overcast, etc. This involves decisions. The main trick is to learn to judge the density of the shadows cast, much easy to judge the shadows than the light. Pay full attention to the shadows cast.

Wikipedia:

ApertureLighting ConditionsShadow Detail
f/22Snow/SandDark with sharp edges
f/16SunnyDistinct
f/11Slight OvercastSoft around edges
f/8OvercastBarely visible
f/5.6Heavy OvercastNo shadows
f/4Open Shade/SunsetNo shadows


Sunny 16 is a still great thing to know, as a check for reasonableness about what our stupid light meter is doing. :)

But technology improved, and then we invented light meters, which easily have third stop resolution. Plus, the meter literally measures the light actually present. There is much to be said for light meters (but there is a skill involved in using them).

However, the camera meter is a Reflected meter. It does not see the Incident light, it is not measuring "the light". The Reflected camera meter only sees the light reflected from the subject, which is not very much reflected from dark subjects, and a lot more reflected from more reflective subjects, etc. (a black dress or white dress for example, gives very different readings, neither of which is actually correct for exposure). If we meter on the black dress, it comes out middle gray. If we meter on the white dress, it comes out middle gray. But instead, we want it the original shade, either black or white. So, we have to think about what we are doing.

So there is still thinking involved with determining exposure by metering. How light meters work
 
Last edited:

Horoscope Fish

Senior Member
Many thanks all. I will try to upload one of the photos. The Exif info should show what ISO was selected as I had it on Auto Max 400.

Horoscope Fish - That's what I call an idea! At least it will get me started if I sneak a look in the Auto or A Mode for a while to see what shutter speed the camera would select.

I think I am beginning to realise if I point the camera too much toward the sky then foreground will be dark but I try to divide the frame into three parts with the sky as 1/3 but I will to be conscious of the effect the bright sky has.
Learning to shoot in Manual will also teach you how your camera's meter can be fooled into under or over-exposing shots with significantly differing levels of intensity. You've heard of Sunny 16, right? You want a super-simple version of Sunny' that just works? Here it is:


  • ISO 100, f/8, 125th

Using those settings on a bright sunny day will yield good to excellent exposure. Use that concept as your starting point and go from there. Is it cloudy out? Double your ISO to 200 and try f/8 at 125th, OR open your aperture one full stop, OR cut your shutter speed in half (1/60th)... You get the idea.

Shooting in manual was really got me looking at my camera as a bag of tools that I could control and not just some miraculous point-and-shoot picture taking machine that would frustrate the hell out of me half the time. The deeper understanding and subsequent feeling of control you gain is just awesome. Have fun and good luck!
 
Top