B&W Adjustment Layer

hark

Administrator
Staff member
Super Mod
Lately I've been watching some Joel Grimes' videos on portrait editing where he first adjusts a color layer then duplicates it, turns the duplicate into a B&W layer, adjusts the saturations of orange and yellow within the B&W layer, then changes the blend mode. The process adds contrast especially by altering the yellows and oranges within the B&W layer. Unfortunately I can't find a link (I paid for a Creative Live class).

When I saw this article which uses a B&W adjustment layer, it sounds like a similar editing process but is used for landscape images.

https://fstoppers.com/photoshop/how-create-depth-color-images-using-black-and-white-573981
 

hark

Administrator
Staff member
Super Mod
Cindy, have you tried it yet? I would be very interested in seeing a before/after comparison.
Andy

I haven't tried it yet for landscapes and don't have any portraits that would work for this particular style. Joel uses this technique for what he describes as gritty portraits.

But I want to try Joel's style on a landscape - however, I'm not sure his editing style is quite the same as the one described in the fstoppers article. He used to shoot B&W film (which I also did), and he mentioned when doing the conversion in Camera RAW, it allows the individual color sliders such as red, yellow, or orange to make a visible change to those specific tones as darker or lighter despite the image being in black and white. He compared it to using color filters on black and white film the way B&W film shooters did.

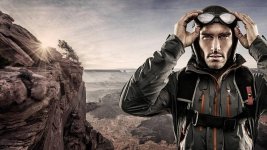
When the blend mode is changed in Photoshop, it alters the color layer that is beneath the B&W layer to come up with an usual type of colorization. Here is one of Joel's images:

dEiwC3OSXyaAm0jFytqR_joel-temp.jpg
 

hark

Administrator
Staff member
Super Mod
Here is a memorial bench image I edited earlier this year.

_10K3496 low res.jpg


My method below is based on Joel Grimes' - not the one described in the fstoppers article.

First I made a duplicate layer in PCC then took it over to Camera RAW. I converted the image to B&W, then under the HSL tab, I lowered the saturation for blue and orange and increased the saturation for green.

I took the image back to PCC where I set the blend mode to soft light and lowered the opacity of that layer to 82%. If I had wanted, I could have masked out the bench so the effect wouldn't be applied there...but I chose not to do that. It definitely adds contrast to the second image.

_10K3496 with B&W blended low res.jpg
 
Top