You are using an out of date browser. It may not display this or other websites correctly.
You should upgrade or use an alternative browser.
You should upgrade or use an alternative browser.
Noob-Leaves - Too Bright
- Thread starter oneniner
- Start date

Clovishound
Senior Member
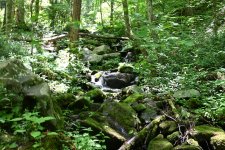
Just because the meter says it's the correct exposure, doesn't make right. When you have a scene that has a large difference between the lightest parts of the scene, and the darkest, there will be portions that are either under or overexposed. In this case you have a lot of the scene that is in deep shade, and part of the scene that has brightly lit leaves. The meter tries to balance those, but since the majority of the scene is darker, it averages out to being close to the darker part.
Now comes the problem of how to fix it. If you expose for the highlights, the rest of the scene may be way too dark. Something in the middle may be the answer, but you will likely have to balance things in post processing (editing). As a general rule, over exposed highlights are more of a problem than underexposed shadows. Those are routinely referred to as "blown out highlights" They can look rather awful. Deep shadows can often still contain a fair amount of detail that can be brought out in post editing. Dark shadows also don't look as bad as blown out highlights.
I normally "fix" this kind of problem by underexposing the scene by 1 to 3 stops based mainly on experience. The good news is that with a mirrorless camera, the viewfinder will be able to clue you in to overexposed highlights, or underexposed shadows. With a little practice, you should be able to bring your exposure down until you start to see some detail in the highlights, and still retain detail in the shadows, if the difference is not too great.
If you have the luxury of time, you can always bracket your exposures. This is a technique where you take a series of images of the same subject using progressively more and/or less exposure from that indicated by the camera. Your camera also has an auto bracketing feature where you can program the camera to take a series of exposure with a single press of the shutter button. You can choose the number of shots and increments of exposure compensation. For example: you can set it to take 5 shots at 1 stop increments. It will automatically take one at the meter setting, one at 1 stop over, one at 1 stop under, one at 2 stops over, and one at 2 stops under. You can then choose the best exposure later, when you can look at them on your computer. Another option is to make an HDR merge from the bracketed images. If you have software capable of doing that it will take the best exposure of parts of the scene from each image and (hopefully) seamlessly merge them into one well balanced image. Obviously, this doesn't work well with moving subjects, but can yield great results with landscapes and other static scenes.
Thank you for the this excellent explanation. I will have to familiarize myself with auto bracketing. So much to learn, I'm certain I'll be back here for more advice.Just because the meter says it's the correct exposure, doesn't make right. When you have a scene that has a large difference between the lightest parts of the scene, and the darkest, there will be portions that are either under or overexposed. In this case you have a lot of the scene that is in deep shade, and part of the scene that has brightly lit leaves. The meter tries to balance those, but since the majority of the scene is darker, it averages out to being close to the darker part.
Now comes the problem of how to fix it. If you expose for the highlights, the rest of the scene may be way too dark. Something in the middle may be the answer, but you will likely have to balance things in post processing (editing). As a general rule, over exposed highlights are more of a problem than underexposed shadows. Those are routinely referred to as "blown out highlights" They can look rather awful. Deep shadows can often still contain a fair amount of detail that can be brought out in post editing. Dark shadows also don't look as bad as blown out highlights.
I normally "fix" this kind of problem by underexposing the scene by 1 to 3 stops based mainly on experience. The good news is that with a mirrorless camera, the viewfinder will be able to clue you in to overexposed highlights, or underexposed shadows. With a little practice, you should be able to bring your exposure down until you start to see some detail in the highlights, and still retain detail in the shadows, if the difference is not too great.
If you have the luxury of time, you can always bracket your exposures. This is a technique where you take a series of images of the same subject using progressively more and/or less exposure from that indicated by the camera. Your camera also has an auto bracketing feature where you can program the camera to take a series of exposure with a single press of the shutter button. You can choose the number of shots and increments of exposure compensation. For example: you can set it to take 5 shots at 1 stop increments. It will automatically take one at the meter setting, one at 1 stop over, one at 1 stop under, one at 2 stops over, and one at 2 stops under. You can then choose the best exposure later, when you can look at them on your computer. Another option is to make an HDR merge from the bracketed images. If you have software capable of doing that it will take the best exposure of parts of the scene from each image and (hopefully) seamlessly merge them into one well balanced image. Obviously, this doesn't work well with moving subjects, but can yield great results with landscapes and other static scenes.
Clovishound
Senior Member
Here is an example:
This image was shot in early morning. The light was fairly even, as opposed to harsh daylight. The tree behind the birds is in shadow, this would make the meter try to even things out and expose just a little under for the shadows, and a good bit overexposed on the bright birds. Later in the day this difference would be even greater. I underexposed the scene by 1 stop from experience with white birds. This is roughly what the scene would have looked like in the viewfinder, or on the backscreen of the camera.
Notice the background has very little detail, and the lighter whites in the birds are on the edge of being too white with just a tad of detail. That means I should have enough leeway to bring out detail in the whites. If in doubt, give it a little more underexposure to keep from blowing out highlights.

Here is the same image taken into Lightroom and just hitting the "auto" button, to quickly bring it close, prior to fine tuning. This feature will normally get you near a good exposure for the highlights and the shadows, although personal preference can differ from what the program decides.

As you can see, it brought out a lot of detail in the shadows, which were very dark straight from the camera. The highlights still are too bright and lacking in detail.
Here is the image after I cropped it down and brought levels to my personal preferences. While I could have easily lightened the background shadows to a more "normal" level, I felt the dark background added drama to the scene. I also felt the third bird in the original was a distraction, and cropped out most of it, and used the removal tool to get rid of the rest of the "bird butt" intruding into the image. I ended up entering this in a local contest that did not allow the use of removal tools, so I just brought the exposure of the "bird butt" selectively down rendering it effectively unnoticeable. In hindsight, I probably should have underexposed this by 1.5 to 2 stops as opposed the 1 stop I used.

Bottom line is that by underexposing this by one stop, I retained enough detail in the highlights to work with, and still have plenty to work with in the shadow. Also note, that even if I had underexposed it a good bit more, I could leave the shadows dark, and it would still be an acceptable image. Dark shadows generally look OK, whereas blown out highlights look unnatural. On a side note, later in the day, when the light differences are greater, I would probably have underexposed it more on the order of 2 to 3 stops under. Modern digital images are typically very forgiving.
This image was shot in early morning. The light was fairly even, as opposed to harsh daylight. The tree behind the birds is in shadow, this would make the meter try to even things out and expose just a little under for the shadows, and a good bit overexposed on the bright birds. Later in the day this difference would be even greater. I underexposed the scene by 1 stop from experience with white birds. This is roughly what the scene would have looked like in the viewfinder, or on the backscreen of the camera.
Notice the background has very little detail, and the lighter whites in the birds are on the edge of being too white with just a tad of detail. That means I should have enough leeway to bring out detail in the whites. If in doubt, give it a little more underexposure to keep from blowing out highlights.
Here is the same image taken into Lightroom and just hitting the "auto" button, to quickly bring it close, prior to fine tuning. This feature will normally get you near a good exposure for the highlights and the shadows, although personal preference can differ from what the program decides.
As you can see, it brought out a lot of detail in the shadows, which were very dark straight from the camera. The highlights still are too bright and lacking in detail.
Here is the image after I cropped it down and brought levels to my personal preferences. While I could have easily lightened the background shadows to a more "normal" level, I felt the dark background added drama to the scene. I also felt the third bird in the original was a distraction, and cropped out most of it, and used the removal tool to get rid of the rest of the "bird butt" intruding into the image. I ended up entering this in a local contest that did not allow the use of removal tools, so I just brought the exposure of the "bird butt" selectively down rendering it effectively unnoticeable. In hindsight, I probably should have underexposed this by 1.5 to 2 stops as opposed the 1 stop I used.
Bottom line is that by underexposing this by one stop, I retained enough detail in the highlights to work with, and still have plenty to work with in the shadow. Also note, that even if I had underexposed it a good bit more, I could leave the shadows dark, and it would still be an acceptable image. Dark shadows generally look OK, whereas blown out highlights look unnatural. On a side note, later in the day, when the light differences are greater, I would probably have underexposed it more on the order of 2 to 3 stops under. Modern digital images are typically very forgiving.
BF Hammer
Senior Member
It helps to shoot this when the sun is low in the sky. The light is softer, less intense.
But the short version is that the meter in the camera is averaging the too-bright Sun and too-dark shadow and unable to resolve it intelligently. You can also use the exposure compensation to lighten or darken the metering. Just don't forget it's on later.
But the short version is that the meter in the camera is averaging the too-bright Sun and too-dark shadow and unable to resolve it intelligently. You can also use the exposure compensation to lighten or darken the metering. Just don't forget it's on later.