BackdoorArts
Senior Member
In the interest of full disclosure, I learned this method reading an issue of Photoshop User magazine in an article about doing better landscapes. It's extremely simple, and while I am using Photoshop to demonstrate this the technique is applicable to Elements as well, though with some exceptions that I'll note in the process below.
Vignettes are a great way to focus attention on the subject of your photo. But there are times when that subject isn't located in an area that makes it convenient for the regular vignette tool to accent. I also tend to find that the graduated changes in the typical vignette often go too far when the subject of the photo is small compared to the total size of the photo. In other words, by the time I accent the subject the edges are too dark. With this technique, using layers, adding strategic vignettes can make your photo subjects pop, and most people won't even know that you did it.
I'm going to start with a photo that could probably be done with the typical vignetting tool given that it's location is in the center of the frame, and it takes up most of the frame.
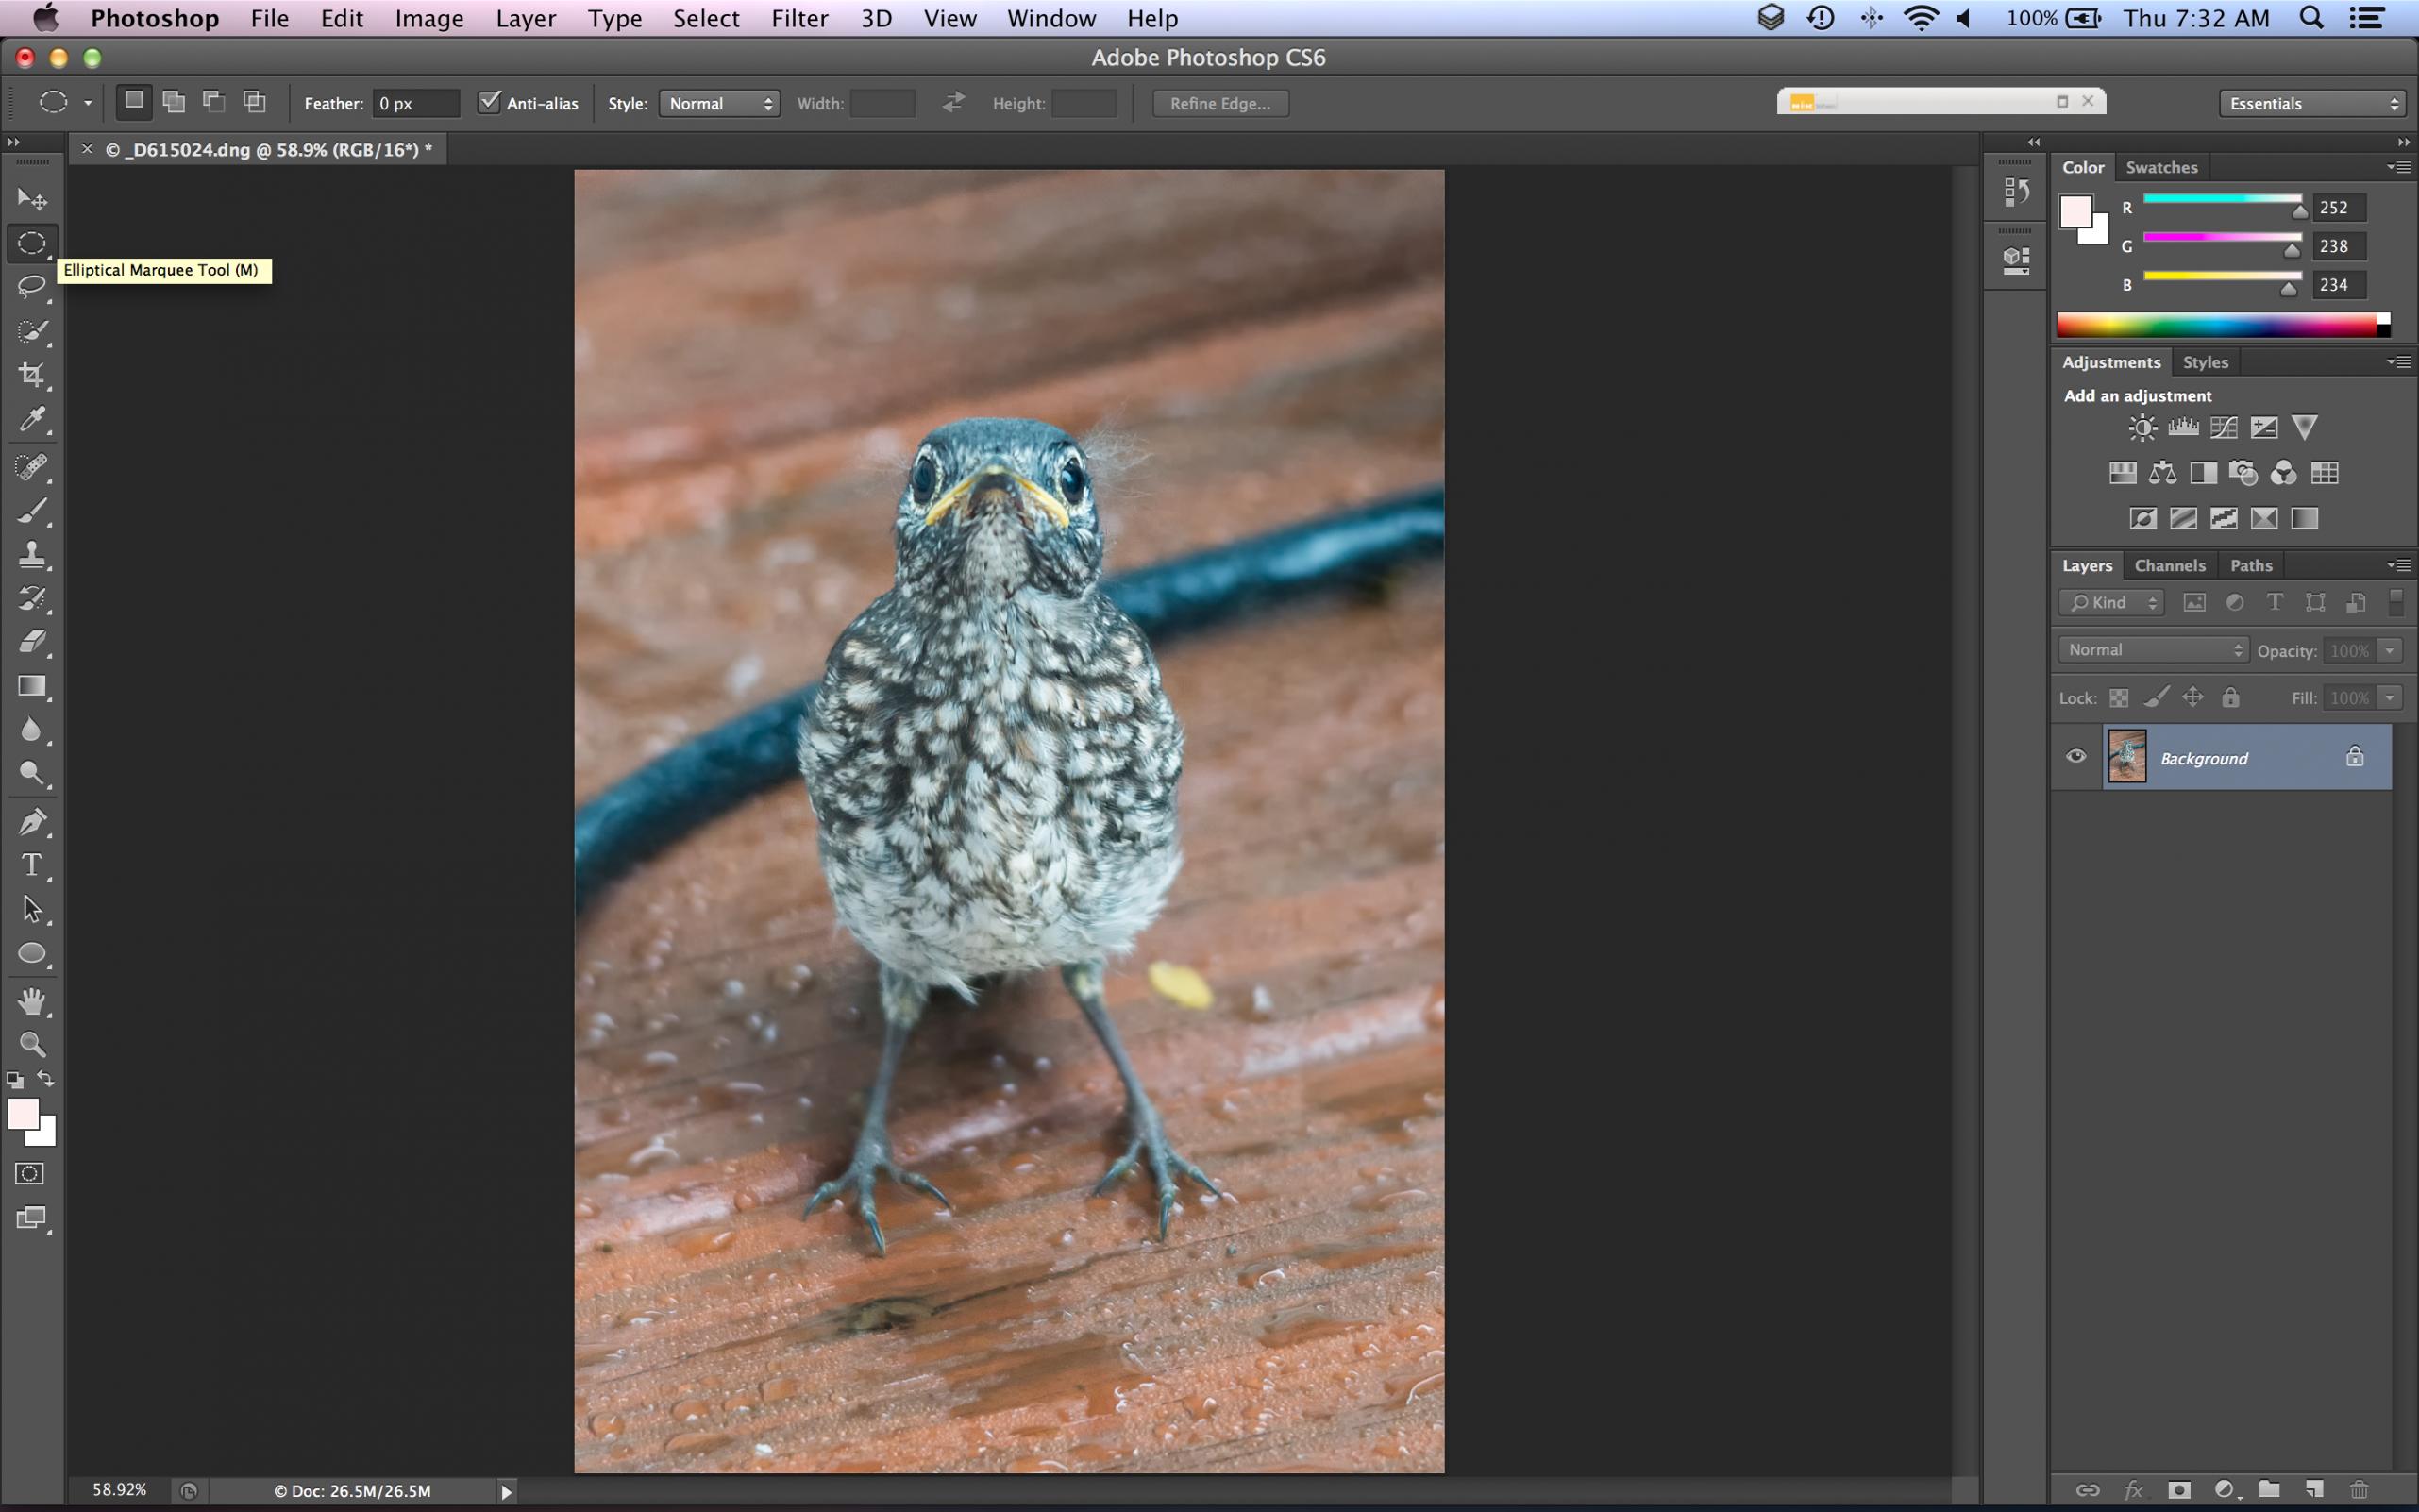
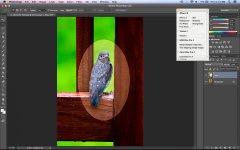
Using the selection tool in the Oval shape, I'm going to make a selection around my subject to choose the area of the photo I want vignetted. Note, I want to select a slightly larger area due to one of the next steps.
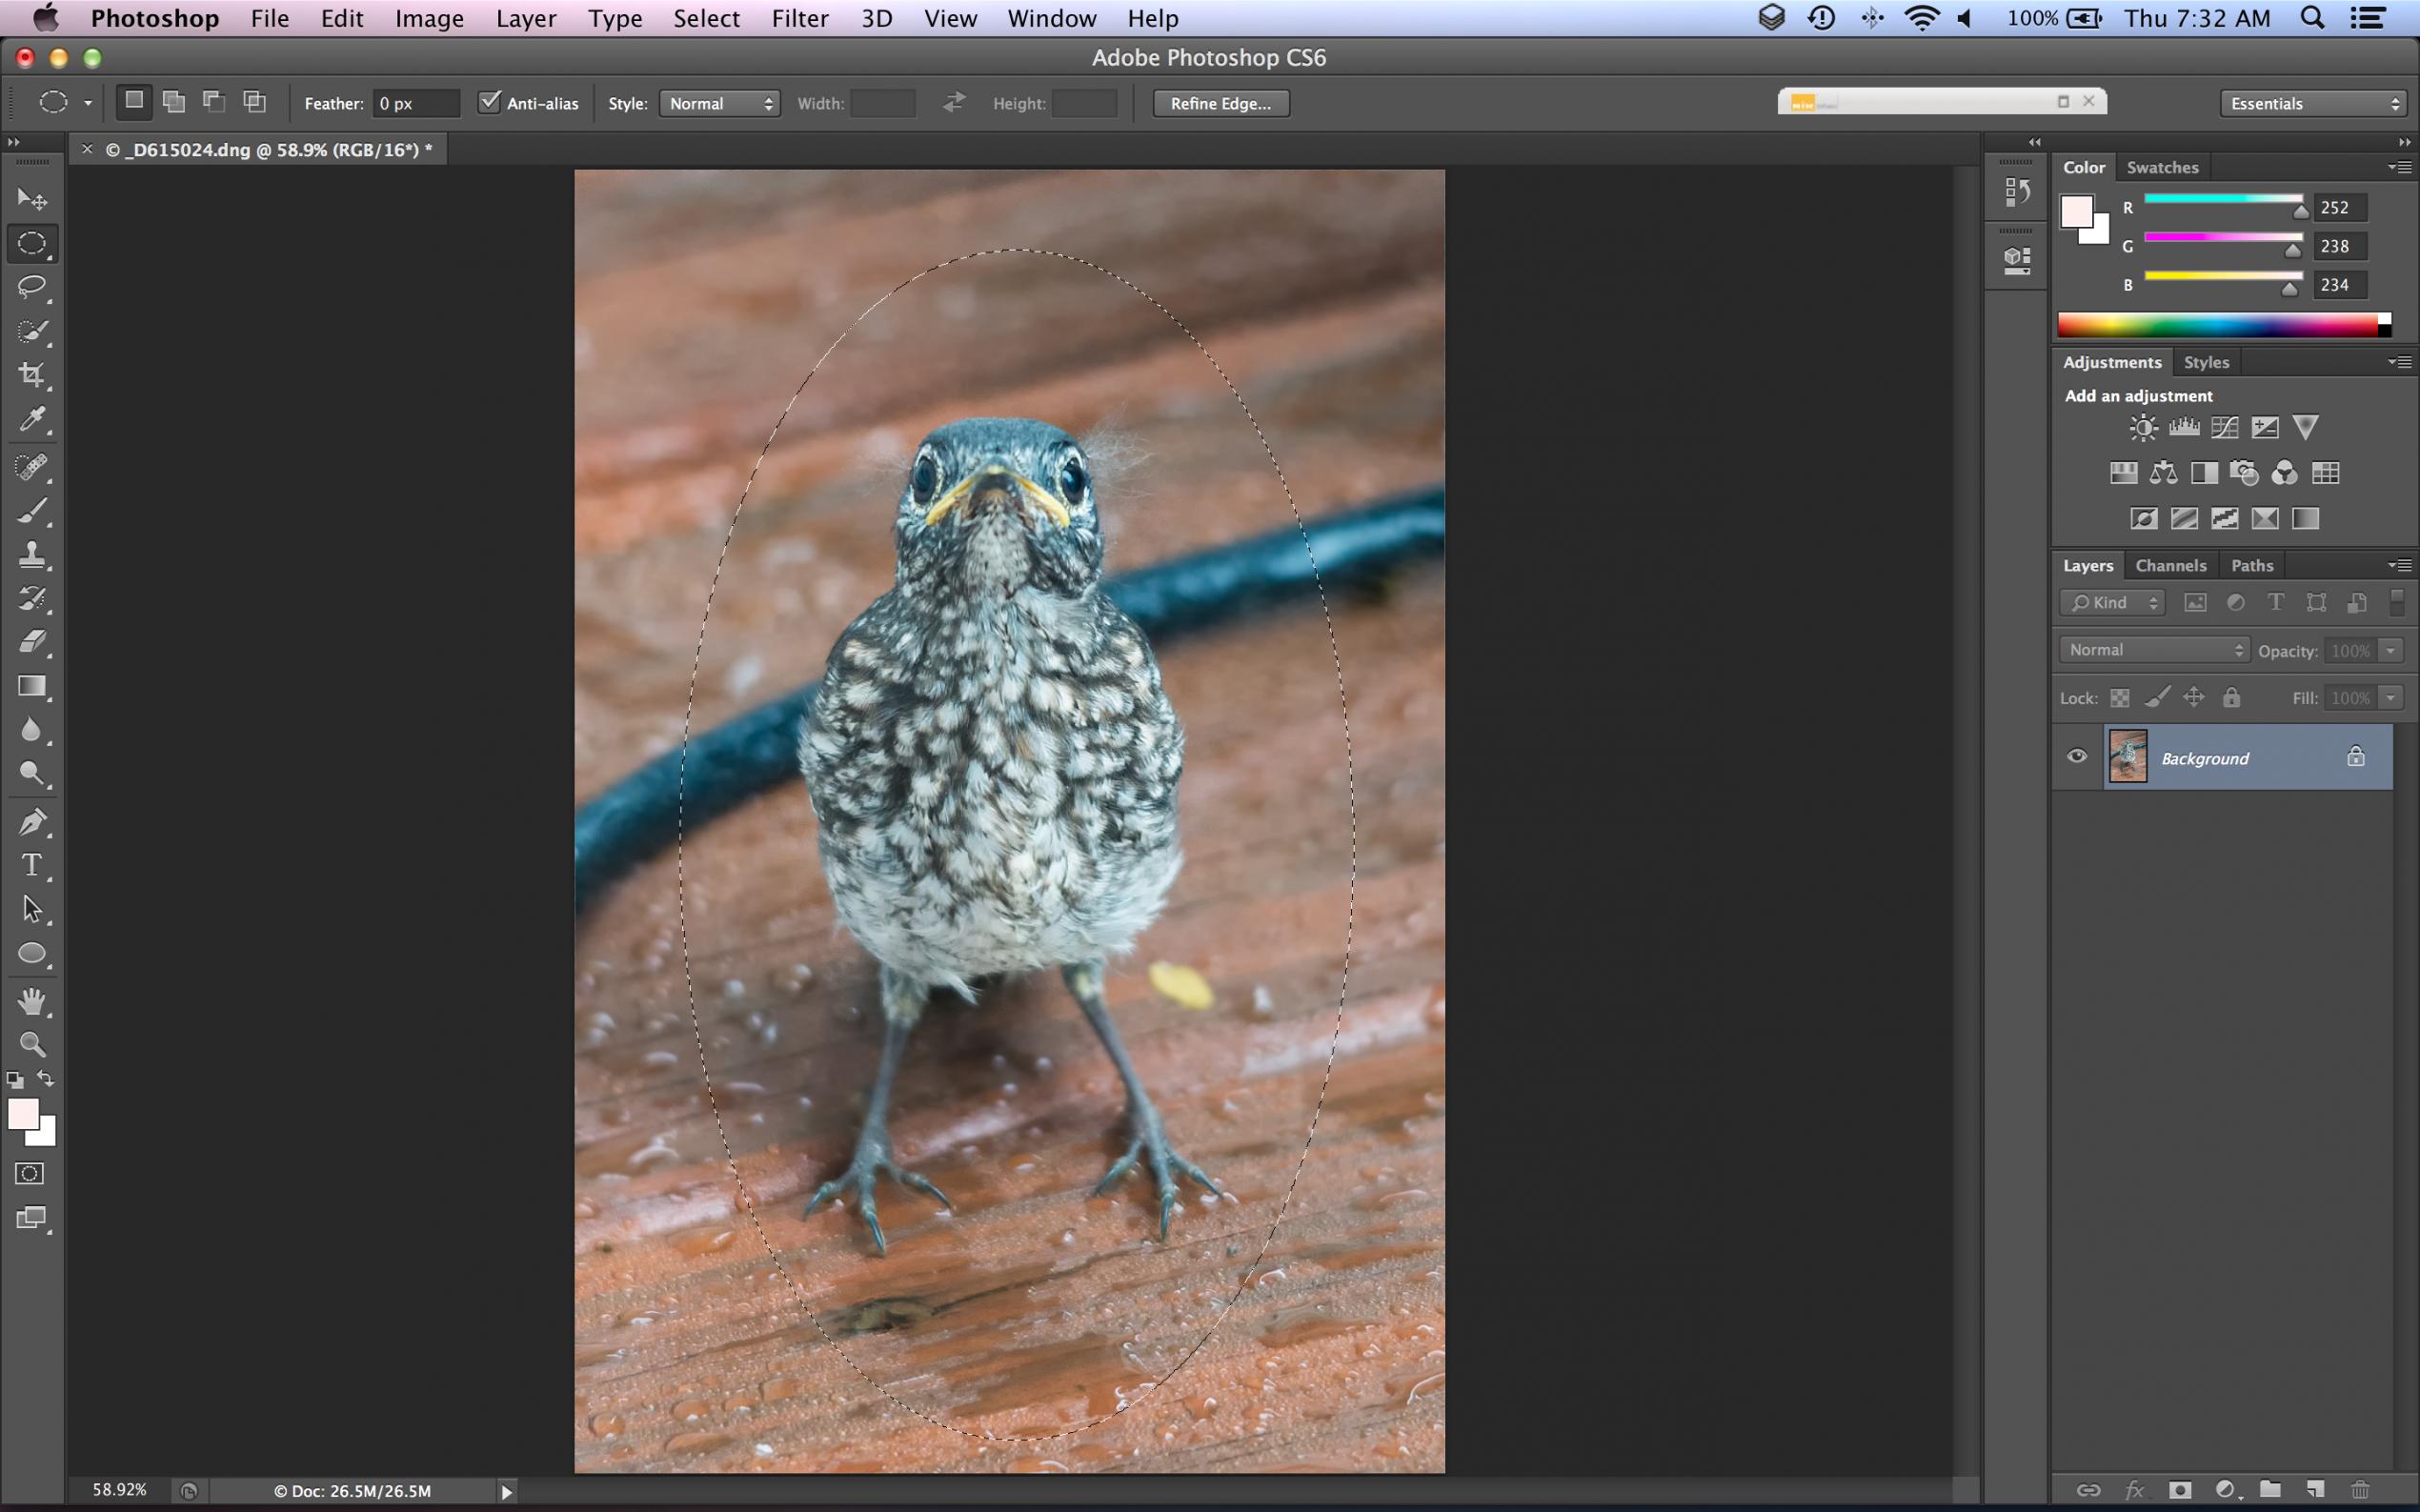
Now that I have my selection, I Right-Click in the center and select the Feather option. I typically use a number between 300 & 500 for this, depending on how large the image is, and how much of a gradient I want. Note, Photoshop Elements limits Feather amount to 250.
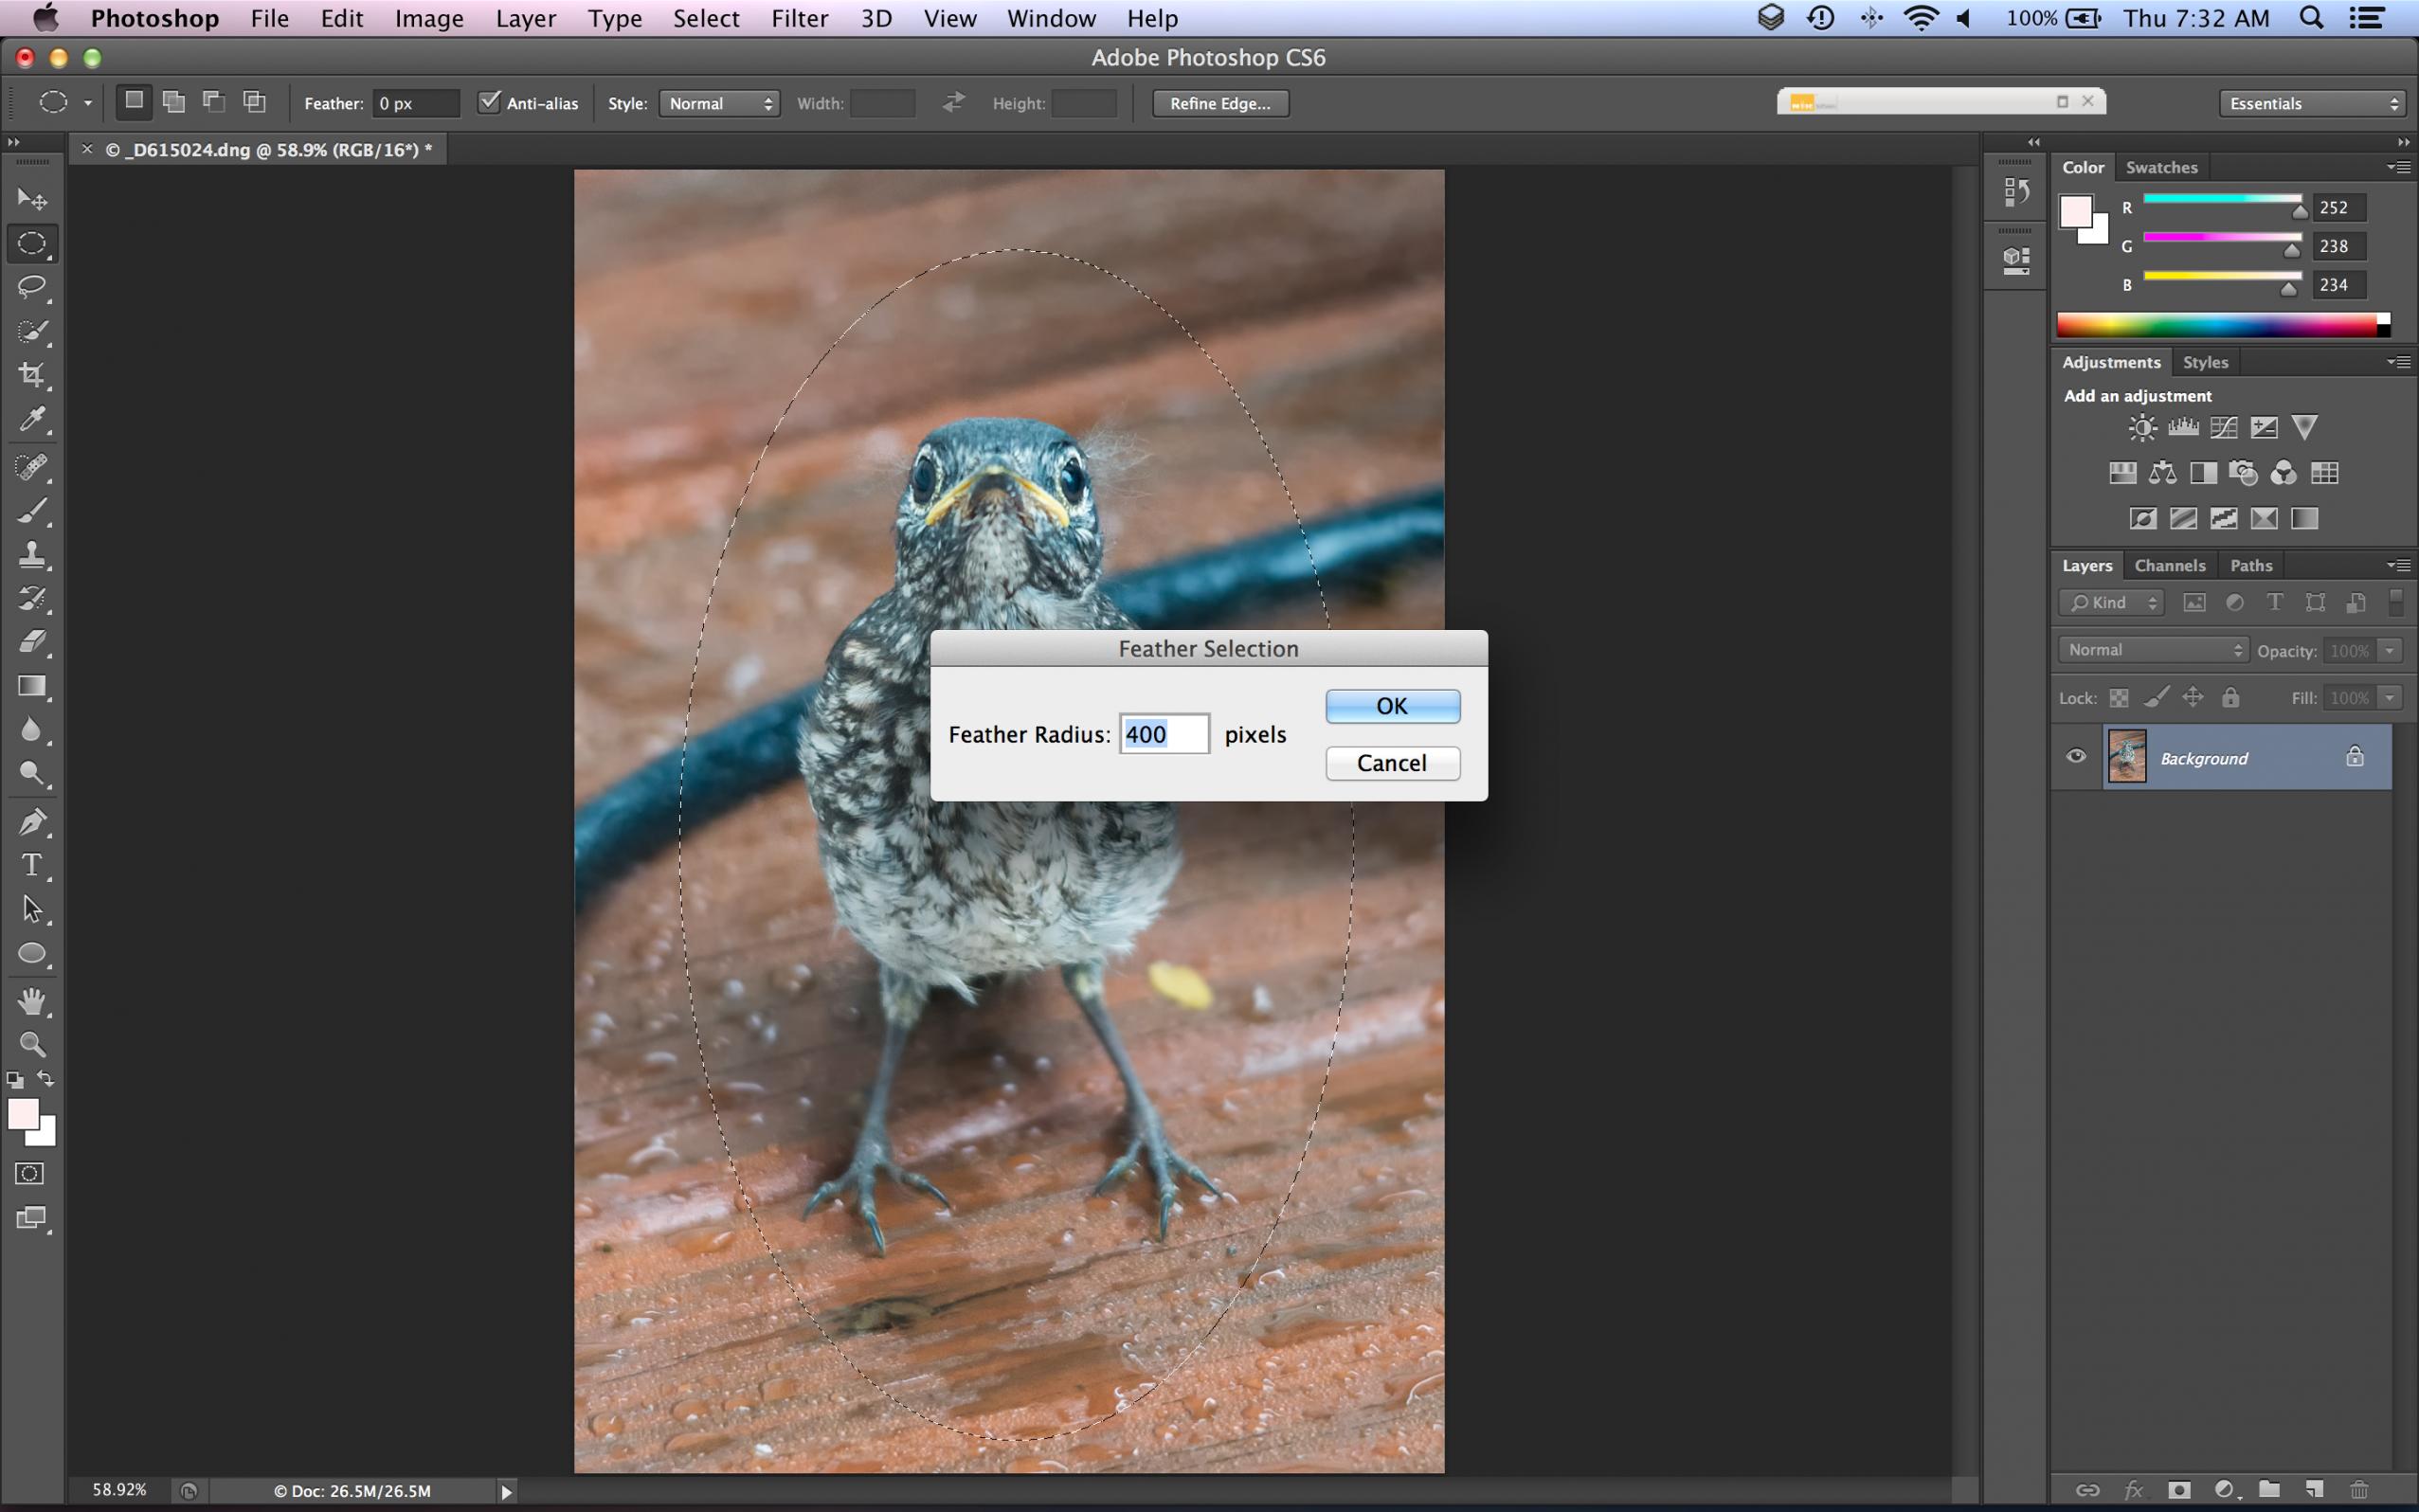
Now that I've applied feathering, I now need to invert my selection so I can choose the area to which I want to apply the vignette. Right-click on the selection and choose Select Inverse.
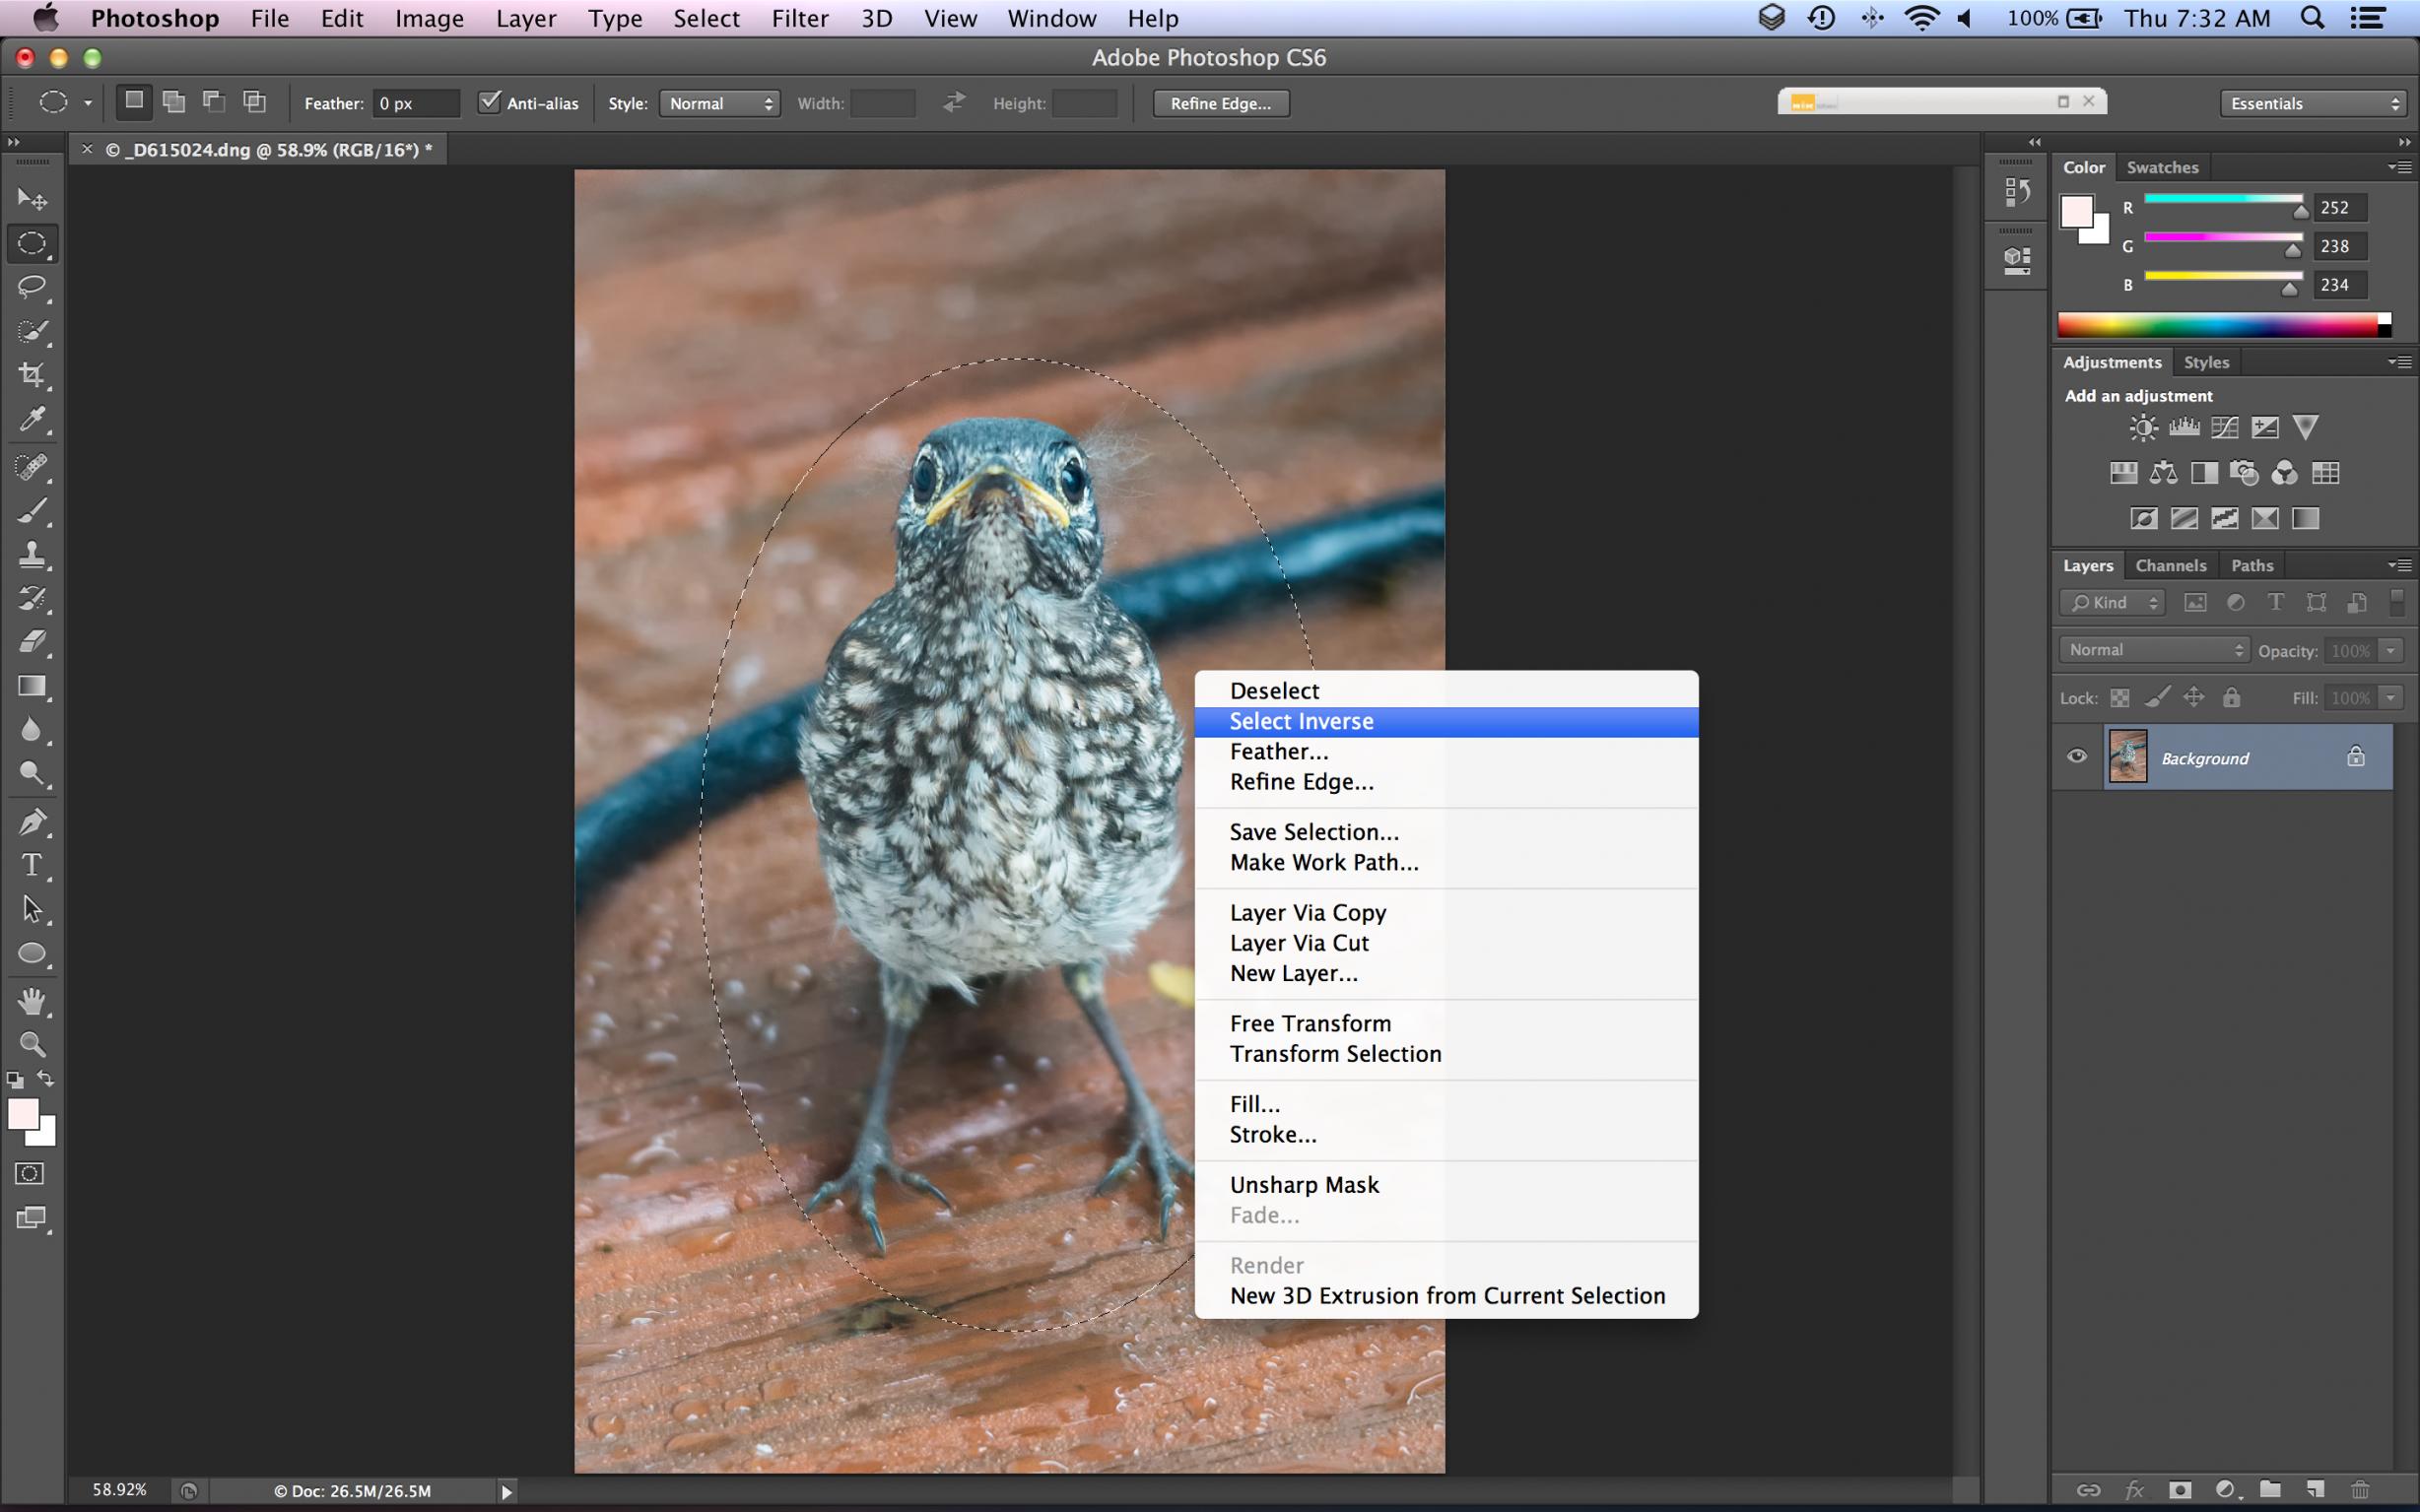
Now that I have my selection, I hit Command-J (Control-J on a PC) to create a new layer from the selection (you can also Right-Click and choose Layer Via Copy). Nothing will appear different in the image since I'm simply stacking a portion of the image on top of itself. But when I go to my layer blending method (Normal by default) and choose Multiply it will darken the area comprised by my selection, with the feathering effect evident by the gradient effect created. Note: If you want to lighten instead of darken, choose Screen from the blending menu instead.
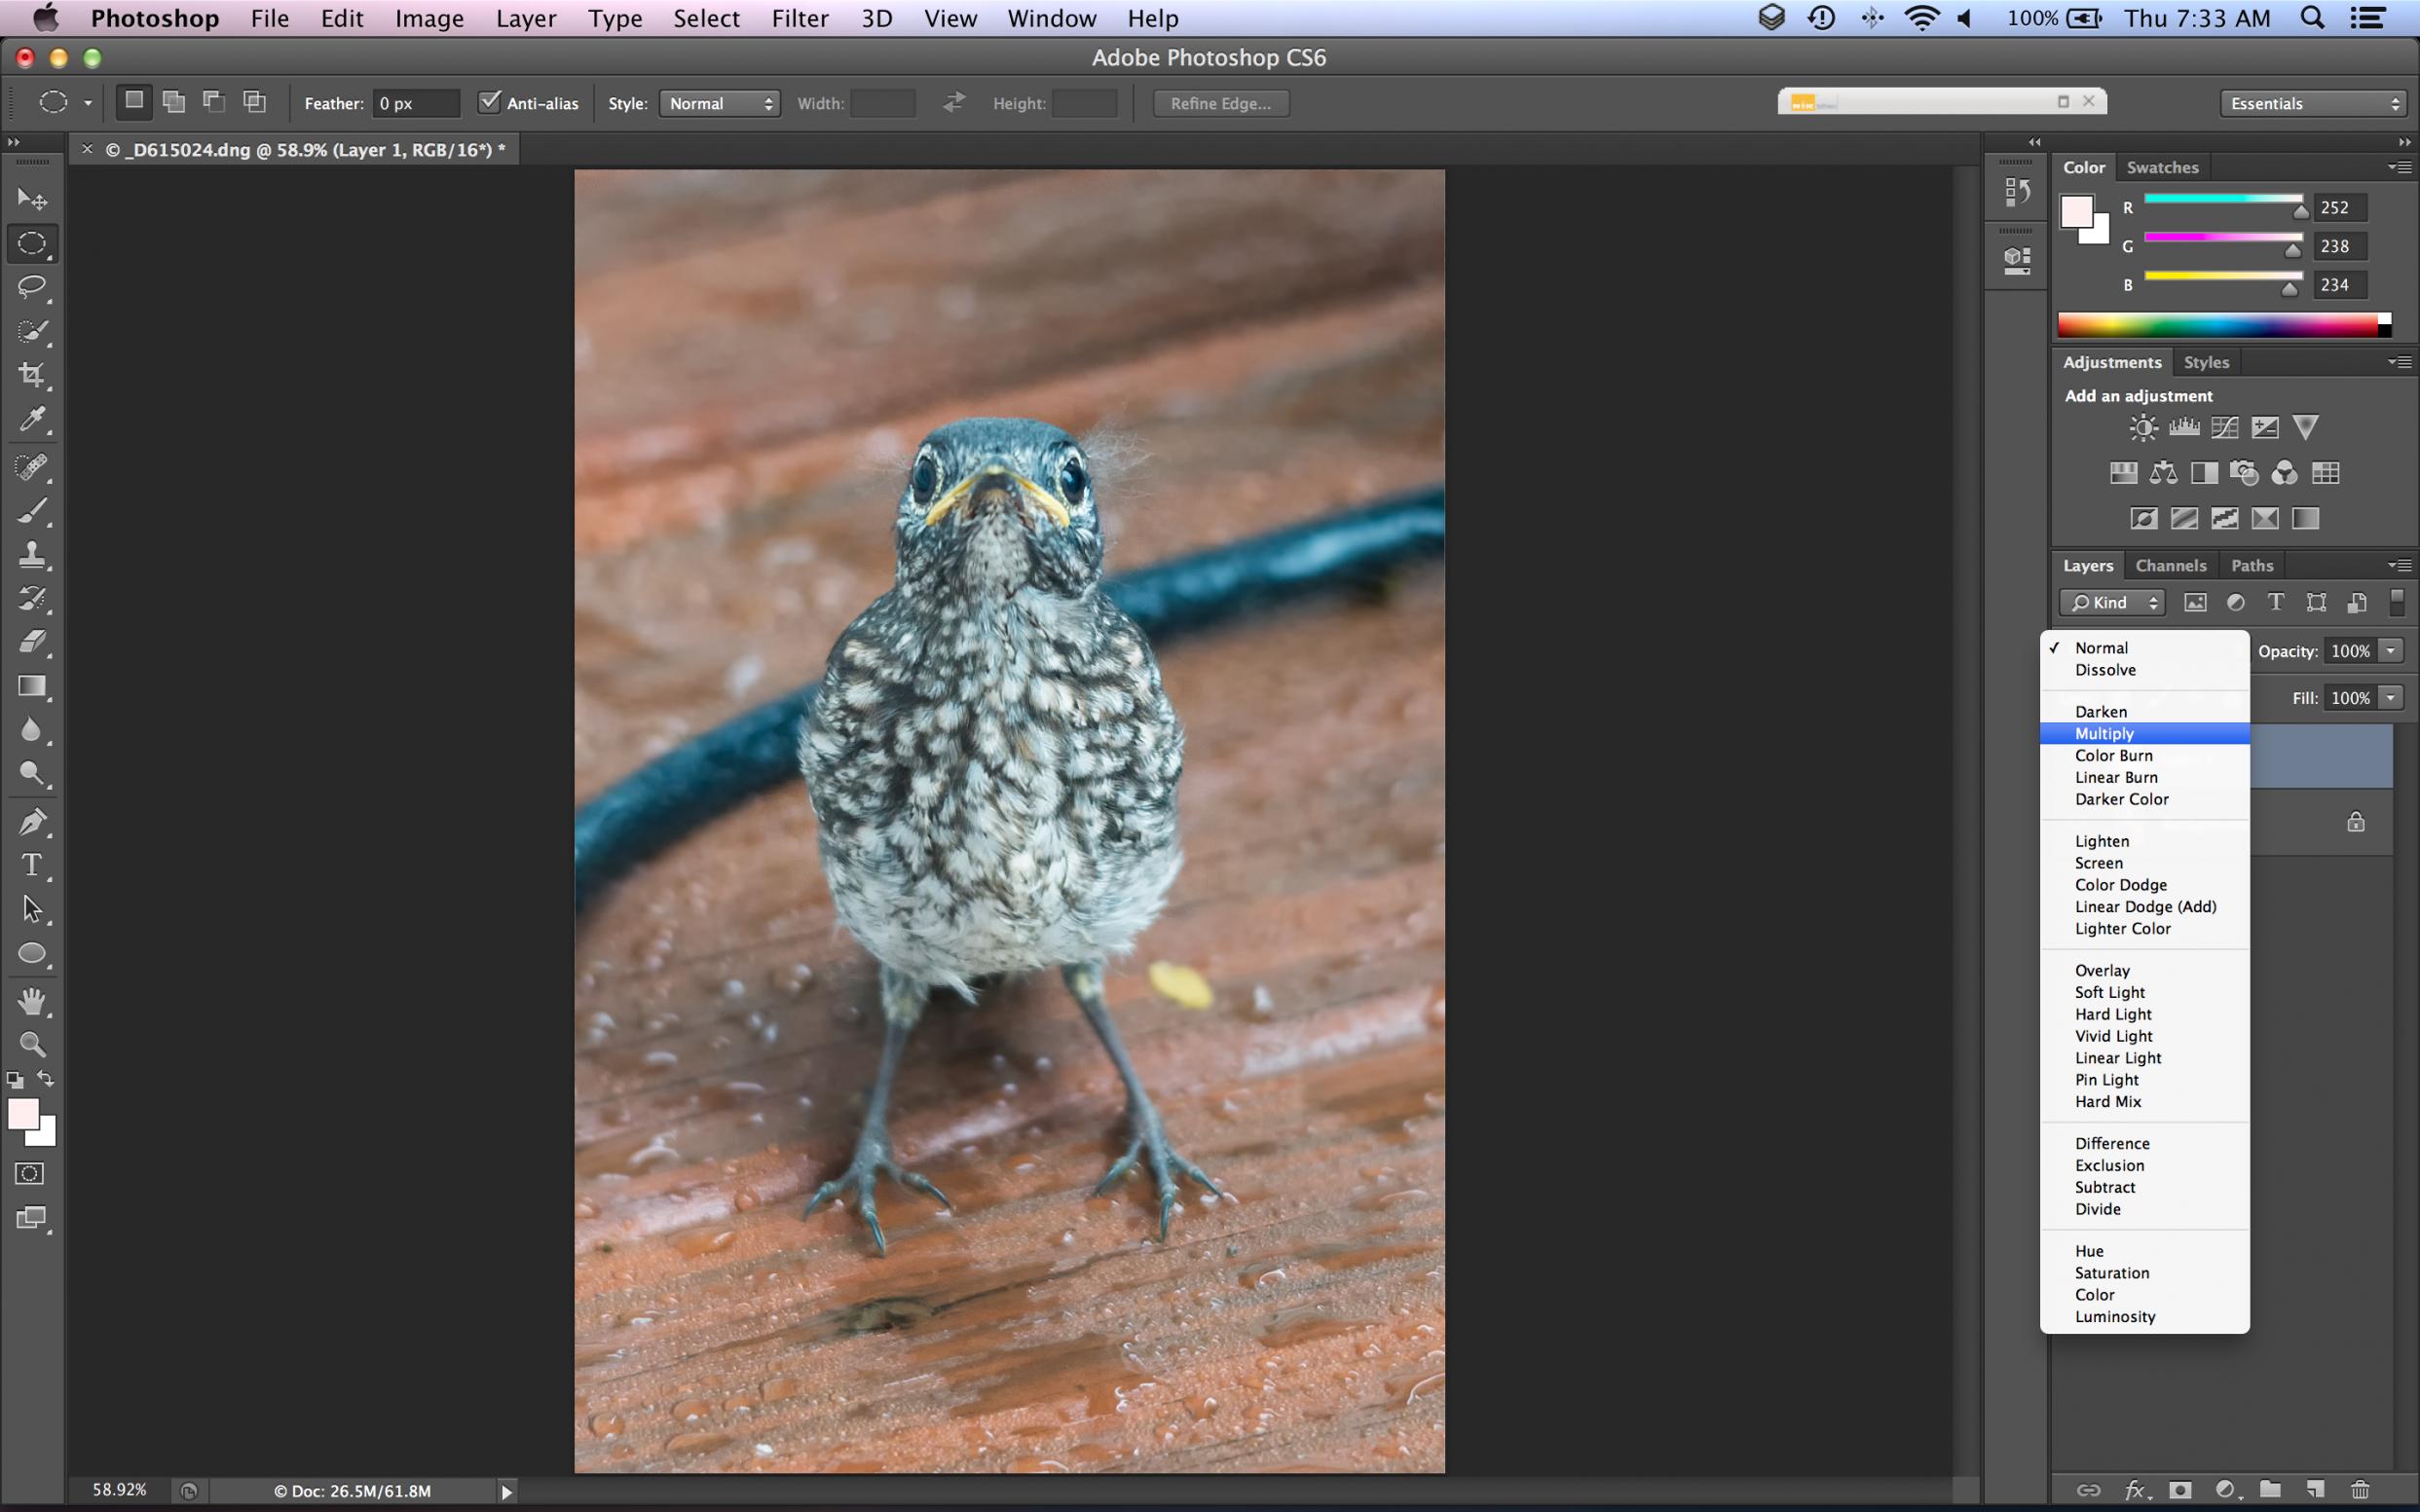
Most times, this darkening effect will be far too severe for the photo. So, I go to my layer Opacity slider and I decrease the layer opacity until the desired effect is achieved.
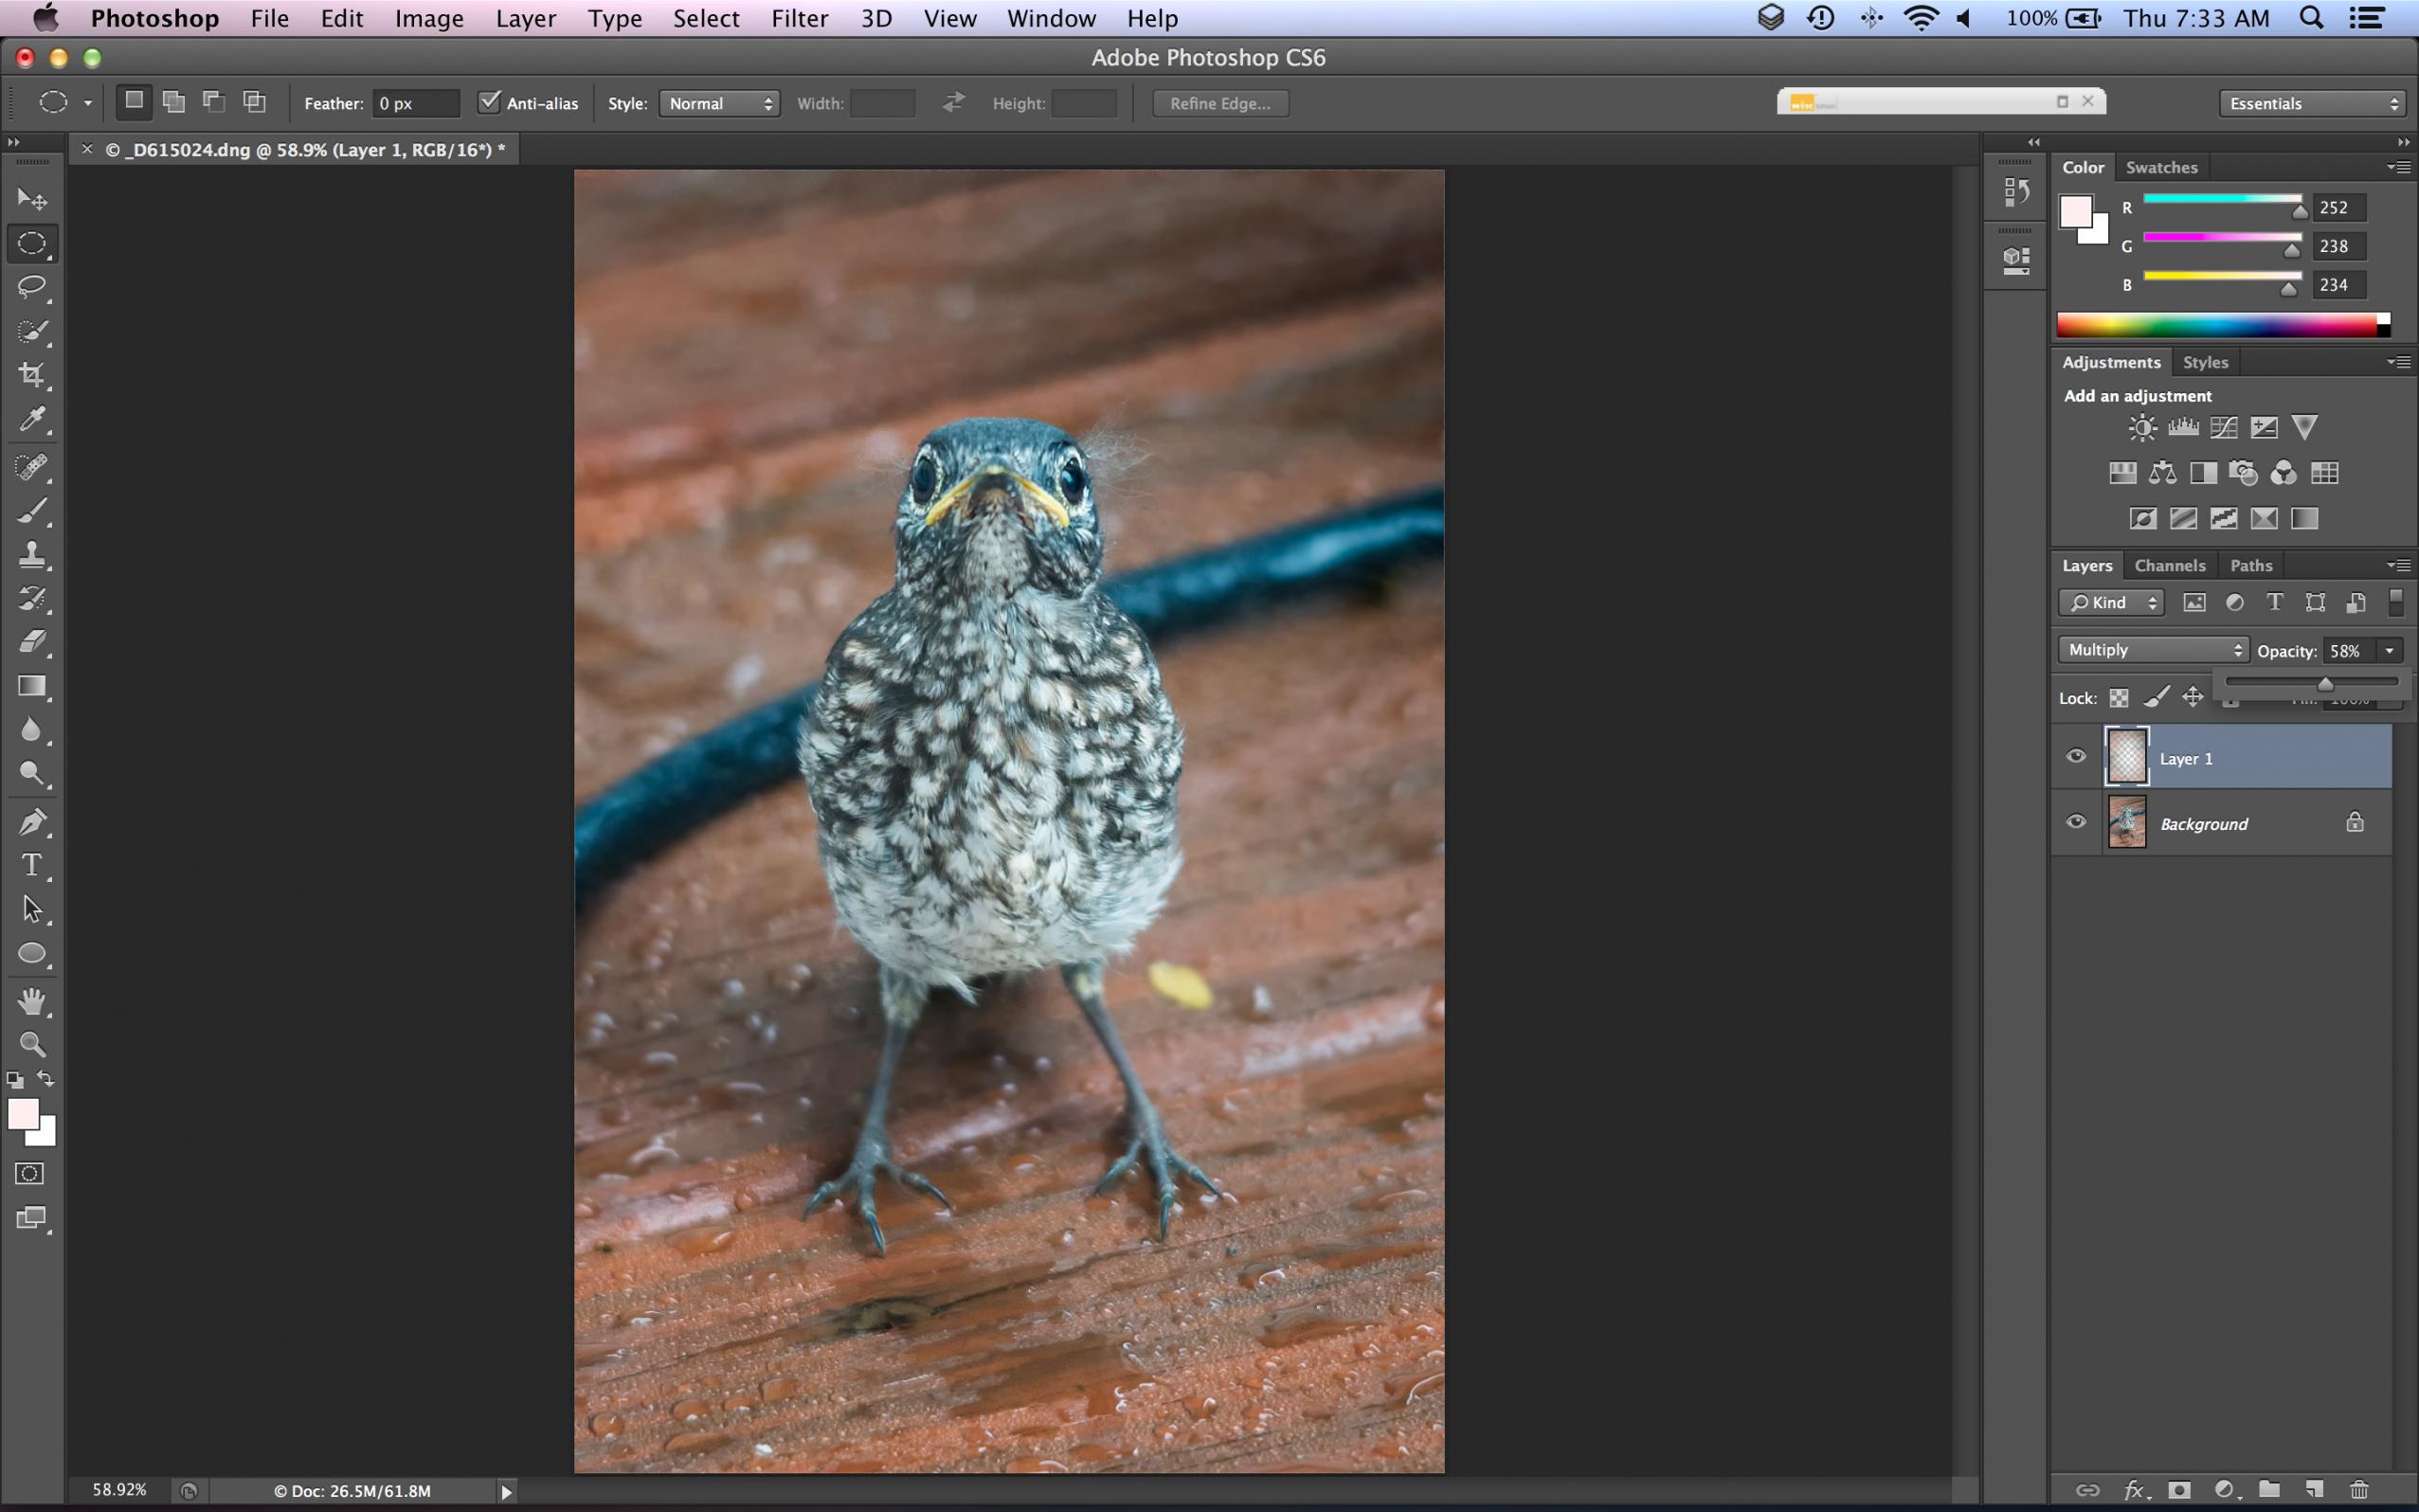
And now I can choose to just save the file as is, allowing me to play with the adjustment later, or merge the two layers before saving. And I'm done!!
What I love about this is the flexibility it gives me with vignetting. If I have multiple subjects I can combine multiple selections before applying the feathering. And while I haven't fully explored it, I suspect that many of the other layer blending methods could provide your with a bevy of interesting effects as you apply them at varying levels of opacity. And while the original article spoke of using it in landscapes, I've applied it to all sorts of subjects.
Thanks again to the folks at Photoshop User for demoing this.
UPDATE
Since the effect isn't immediately visible in the example images, here is a trio of images showing the blend opacity at 0%, 100% and then at my chosen effect level - I've skipped the feathering step to make the changes easier to see. Again, it's a subtle change meant to highlight the subject, not necessarily produce a typical vignette. Hope this is easier to see. With the feathering it's almost unnoticeable.
0%
100%
60%

Vignettes are a great way to focus attention on the subject of your photo. But there are times when that subject isn't located in an area that makes it convenient for the regular vignette tool to accent. I also tend to find that the graduated changes in the typical vignette often go too far when the subject of the photo is small compared to the total size of the photo. In other words, by the time I accent the subject the edges are too dark. With this technique, using layers, adding strategic vignettes can make your photo subjects pop, and most people won't even know that you did it.
I'm going to start with a photo that could probably be done with the typical vignetting tool given that it's location is in the center of the frame, and it takes up most of the frame.
Using the selection tool in the Oval shape, I'm going to make a selection around my subject to choose the area of the photo I want vignetted. Note, I want to select a slightly larger area due to one of the next steps.
Now that I have my selection, I Right-Click in the center and select the Feather option. I typically use a number between 300 & 500 for this, depending on how large the image is, and how much of a gradient I want. Note, Photoshop Elements limits Feather amount to 250.
Now that I've applied feathering, I now need to invert my selection so I can choose the area to which I want to apply the vignette. Right-click on the selection and choose Select Inverse.
Now that I have my selection, I hit Command-J (Control-J on a PC) to create a new layer from the selection (you can also Right-Click and choose Layer Via Copy). Nothing will appear different in the image since I'm simply stacking a portion of the image on top of itself. But when I go to my layer blending method (Normal by default) and choose Multiply it will darken the area comprised by my selection, with the feathering effect evident by the gradient effect created. Note: If you want to lighten instead of darken, choose Screen from the blending menu instead.
Most times, this darkening effect will be far too severe for the photo. So, I go to my layer Opacity slider and I decrease the layer opacity until the desired effect is achieved.
And now I can choose to just save the file as is, allowing me to play with the adjustment later, or merge the two layers before saving. And I'm done!!
What I love about this is the flexibility it gives me with vignetting. If I have multiple subjects I can combine multiple selections before applying the feathering. And while I haven't fully explored it, I suspect that many of the other layer blending methods could provide your with a bevy of interesting effects as you apply them at varying levels of opacity. And while the original article spoke of using it in landscapes, I've applied it to all sorts of subjects.
Thanks again to the folks at Photoshop User for demoing this.
UPDATE
Since the effect isn't immediately visible in the example images, here is a trio of images showing the blend opacity at 0%, 100% and then at my chosen effect level - I've skipped the feathering step to make the changes easier to see. Again, it's a subtle change meant to highlight the subject, not necessarily produce a typical vignette. Hope this is easier to see. With the feathering it's almost unnoticeable.
0%

100%

60%
