Creating Zone System Layers/Masks in Photoshop

BackdoorArts

Senior Member
I wish this was a tutorial, but I'm stumped.

Essentially what I'm trying to do is to create either layers or layer masks that would take Ansel Adams' Zone System and apply it to a digital image, splitting it into the 0-10 light ranges. Luminosity masks can get me part of the way there, but what I can't seem to get are the differences. I'm trying to figure it out, but in the meantime does anyone have/know of a Photoshop Action that will create these zones for me, either as layers or luminosity masks that I can grab? I've got Jimmy McIntyre's action that generates the 18 masks and I can approximate something there, but not exactly.
 

hark

Administrator
Staff member
Super Mod
Hmm...I honestly have no clue but did find these.

Sadly the first one is a plug-in for PC only. No Mac. :( Ansel Adams-style zone system Photoshop plugin

Have you seen this one using Silver Efex Pro? I don't think it is an action though. How to apply the Zone System in Silver Efex Pro - Life after Photoshop

This one may interest you the most. The page has a link on it that takes you to The Digital Zone System with Blake Rudis. It might cost money though.
All about the Digital Zone System with Blake Rudis « Topaz Labs Blog
 

BackdoorArts

Senior Member
Thanks, Hark. Blake Rudis is the guy who got me interested as he mentioned it in a Topaz tutorial, but when I went to his website and learned that it's included in a $99 video series I figured I could figure out most of it by myself if I could get the masks.

I did find a panel for $30 from Tony Kuyper that looks like it's worth the money given the actions it supplies, so I just sucked it up and bought that. Now I need to figure out how to use it. LOL

Tony Kuyper Photography?TKActions panel
 

J-see

Senior Member
When blending, you can define what range of each layer you blend with the other. Maybe by setting that range for each individual layer, it is possible to create these zones.

Maybe it's different in the new versions of PS but in mine, (in LAB color mode) I can use the blend option "lightness" for a layer and in that specify the range. In RGB it uses gray.
 
Last edited:

BackdoorArts

Senior Member
When blending, you can define what range of each layer you blend with the other. Maybe by setting that range for each individual layer, it is possible to create these zones.

Maybe it's different in the new versions of PS but in mine, (in LAB color mode) I can use the blend option "lightness" for a layer and in that specify the range. In RGB it uses gray.

Are you talking about the Blend Mode for adjustment layers? That doesn't limit based on tonal range, it just changes the way in which a layer interacts with the underlying layer(s). It's purely mathematical across the entire image - if it shows no effect it's because the resulting math (used to calculate hue, saturation, etc.) doesn't change. The only way to actually limit the effect based purely on where the pixel lies on a zone scale is to use masking.
 

BackdoorArts

Senior Member
Look at Tonality Pro... Why re-invent the wheel?

Nik Silver Efex Pro allows me to select the zones in a B&W photo, and I'm cool with all that. I'm looking to be able to use them in a properly exposed photo to allow me to apply edits to only selected parts of the photo. Deepen shadows, but only those in Zone 1 without pulling stuff from Zone 2 and maybe 3 into Zone 1. Apply the same Curve adjustment I now have across an entire image to just a portion, again without impacting any of the rest of it.

As for re-inventing the wheel, knowing how to use one and knowing how to build another one when the one you have breaks makes for a lot more tools in the toolkit. Half the stuff I know came from trying to figure out something else.
 

J-see

Senior Member
It's the advanced blending options when you right click the layer. If I leave the blending mode "normal" but define the "if gray" range, when using multiple layers I can split my image into different portions of gray values (or lightness values in LAB) that automatically compose the image when combined.

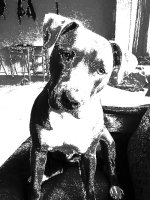
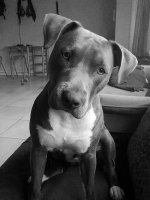
Here's a quick B&W composed of 2 layers and then a version I split into 5 different ranges (0-50, 50-100 etc). I use an empty layer as background.

bob003.jpg bob004.jpg

It might not be useful for what you desire to do. I didn't experiment enough with it to know for sure. I'll have to split one in 10 and then adjust them all separately to know how far one can take this.

To add; if you want to adjust them individually, you have to first change each one individual layer into a smart object and rasterize the layer while having disabled all others. It's a bit of work but you end up with multiple layers of separate values. I can not directly rasterize the layer but by using the group to smart object first, I can get around that.

You then can adjust any of the ranges as you like without it affecting anything else of the image.

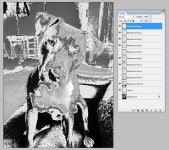
Here's what it looks like when I split into 10 regions and rasterized them to separate portions. They all have become separate images in which all but the specified range is transparent.

layers.jpg

Each part can now be adjusted as I like and they all combined compose the full shot.
 
Last edited:
Top