RAWTherapee

J-see

Senior Member
I don't know how many use RAWTherapee but, as suggested, it might be a good idea to have some post where we can ask others for advice or share tips. It's a fantastic program but not well documented.

I'm using it for a while now and only today I discovered something which other editors probably call "control points".

So if anyone of us has any tips or questions, let's use this post.
 

J-see

Senior Member
I installed the HaldCLUT pack today. It's basically a folder of png files each containing the color range a specific film uses or used.

After processing my shot, I can enable it, select the film I prefer and it'll analyse my shot, adjust mine to the film values and fill in any gaps if needed. I personally like some of the film looks and there are some pretty great B&W among them.
 

J-see

Senior Member

For me this version of RT is much faster than LR 5.7 and without a doubt, superior when it comes to color adjustments, sharpening and noise control. But the Mac version isn't as stable as I like. Sometimes it goes down but close to never during processing.

And it's annoyingly difficult to get started with. There's too much you can use at once without really knowing what you're doing.

LR is fast until you're some edits into a RAW, or use a couple of brushes. Then is can seriously start to slow down. Also, RT uses 32bit floating point calculations which can be system demanding. If you"re not running 64bit, it might suck the system dry.
 
Last edited:

J-see

Senior Member
I've been processing some old shots in RT to check them vs LR.

Here's one:

LR:
LR.jpg

RT:
RT.jpg

I didn't manage to save the highlights as well but that's to blame on my lack of knowledge and experience in RT. The data is in the RAW but I didn't get it out. What is much easier and better are skin tones. I find it hopelessly difficult in LR to get them right if they were not perfect in the shot itself. In RT it's a piece of cake. Both shots are processed with zero sharpening and noise control.

Details:

LR2.jpg

RT2.jpg
 

Scott Murray

Senior Member
I've been processing some old shots in RT to check them vs LR.

Here's one:

LR:
View attachment 141761

RT:
View attachment 141765

I didn't manage to save the highlights as well but that's to blame on my lack of knowledge and experience in RT. The data is in the RAW but I didn't get it out. What is much easier and better are skin tones. I find it hopelessly difficult in LR to get them right if they were not perfect in the shot itself. In RT it's a piece of cake. Both shots are processed with zero sharpening and noise control.

Details:

View attachment 141767

View attachment 141768
You need to adjust the WB slider in LR to a more cooler setting to achieve a similar result. Not hard.
 

J-see

Senior Member
You need to adjust the WB slider in LR to a more cooler setting to achieve a similar result. Not hard.

I used "WB as shot" in both. I tried it and yeah, it is better. I'm very bad in anything involving humans, even processing. ;)

Let's compare again:

024-2-2.jpg

RT2.jpg

It does make it a bit better but it's still noisier.
 

cwgrizz

Senior Member
Challenge Team
Today for the first time I noticed when shooting with the 18mm end of the 18-55 that I got some distortion. I have always pretty much used Capture NX-D for my RAW processing and then Gimp for finishing touches (crop, copyright, blemish touchup, etc) Knowing that RAWTherapee has settings for lens distortion correction and NX-D doesn't I tried RT. The lens distortion worked ok, but I have yet to get the brilliant colors with RT that I can get out of NX-D. By the time I got through trying to run the picture through RT, then NX-D, then Gimp, I had something from outerspace. Ha! I feel I should be able to get the brilliant sky blues and pinetree greens using RT, but just couldn't seem to. RT has much more to play with and I am probably missing something because of not understanding the terminology of the controls. Ha! [MENTION=31330]J-see[/MENTION] any suggestions or anyone else?
 

J-see

Senior Member
It's pretty hard to say without knowing what photo you are processing and I'm still learning the tricks in RT but all in all, I can get the colors of NX-D without any problem.

There are basically two approaches I use. Either I load the NEF into RT, load the cam and lens profile and start working on the shot or, which I also use; I browse through my shots in NX-D upon load, kill what I don't need and those I like I export as a TiFF with the ICC profile assigned. Upon load, they look in RT as they look in NX-D. Then I continue to process them. Often I prefer this second method because the Adobe cam/color-profiles have their own interpretation on the RAW settings of my NEF while Nikon-ware usually shows what Nikon shoots.

Both methods work; the one is a bit more work but you control more while the other is less work and more Nikon. The problem I have is that NX-D has a tendency to suddenly become retarded. There are times I adjust one setting and when exporting as a TiFF, it's simply incapable and even after five-six tries, I keep ending up with a 4k*6k of a portion of my shot. That's when I get really tired of their stuff and abandon it for some time. It's either that or continuing and end up hitting something with a hammer.

After the load, I set my exposure right if needed, tweak my black point, use highlight recovery or controls (or do that in NX-D before conversion) and then quit using the RGB model in RT. It has its use but doesn't do nature justice. It's a model for device output, not for photography. I usually work in Lab or in CieCam and adjust what needs to be. You can really make the colors pop when using Chromaticity or Colorfulness, especially when using the parametric option in their curve section. They're both an approach to color "boosting" like saturation but at the same time very, very different in their outcome. In Lab you can pick about anything, from color to luminosity, and adjusted it to your liking too.

But I can't really say that adjusting X or Y will result into A or B since that's for every shot different. But it's in Lab and CIECAM02 that the magic happens and you can make that as simply or complex as you prefer. I usually pick the Brightness/Colorfulness algorithm in the CIECAM to curve and adjust.

I'm still learning myself and find out new things each time I process another shot.

If I have more time later on, I'll load a shot using both approaches and show the NX-D, NX-D/RT and pure RT version upon load. You'll see it's very easy to make the one look like the other.
 
Last edited:

J-see

Senior Member
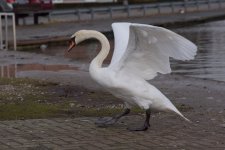
Ok; first my NEF as loaded in NX-D but I had to add two stops of light to the shot.

_DSC1465.jpg

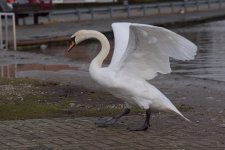
I simply exported the NEF as a TiFF with the ICC profile attached.

IN RT it then basically looks identical upon load. It looks better in the end because the demosaicing used is better in its output. I just loaded and saved.

SwanNXDRT.jpg

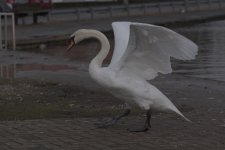
When I load the NEF directly in RT and use cam standard + the Tam profile it looks like this at start (two stops added).

SwanRT.jpg

I shoot Cam neutral with every setting at zero which makes me assume RT shows that while NX-D pops it up for me. Also in RT (as in LR) I see the lens profile being applied while in NX-D, not much happens which explains the sizing difference. Maybe I'm wrong but I have the impression Nikon gives other lenses the finger in their soft.

In the end, even the RT version is just some values different from the other, a slider here and there and that's it.

Btw, all three JPEG are saved in the same size/format/quality but I just notice the file size difference is massive (450/720/610). I think the method NX-D uses to scale down isn't very good compared to what LR/PS or RT uses.

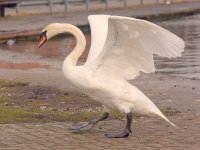
Once loaded, even with the NX-D colors, you can still push it into any direction you like. If I don't like overly white, I push it towards pastels and adjust blue or yellow when needed.

_DSC1465-1.jpg
 
Last edited:

cwgrizz

Senior Member
Challenge Team
Okay, [MENTION=31330]J-see[/MENTION] I tried some of what you are doing. First NX-D processed to TIF. Then loaded TIF into RT. Corrected lens distortion. Exported in jpg. Loaded in Gimp for copyright and exported as .jpg. This worked for what I was trying to do at the moment.. Lens distortion correction.


parktestB4-RT.jpg
Before RT Lens correction.. see light posts on right.


parktest-RT.jpg
After RT Lens Correction. Colors, etc did not seem to be affected.
 

J-see

Senior Member
Once you save as a TiFF, the colors remain as you saved them. It's when loading the NEF every editor can have its own interpretation based upon the color space it works in. TiFF they should load with the color space embedded.

I think standard RT uses ProphotoRGB, identical as LR, but I'm not sure what NX-D uses. It might use the color space you use in your cam which is either a or sRGB. I'd have to check to be sure.

I'm not familiar enough with GIMP yet but if it is a bit like Photoshop, there should be options to correct perspective and distortion. The only problem is that if you start working too often at a JPEG version, each time you load and save it, you corrupt it more and more. Which is why I use TiFF until my final save. Sadly GIMP does not do 16bit TiFF.

It's a good job on the correction. I frequently suffer that problem with short lenses and can't understand why NX-D lacks such a basic correction feature.
 
Last edited:

cwgrizz

Senior Member
Challenge Team
I just noticed that 4.2.74 version seems to be better than the last version I had for color representation loading RAW files. Before I had to set the RAW Black point settings to about -450 to get somewhat close colors, but now it seems to be recognizing the profile for my D5300 much better set at 0.
 

J-see

Senior Member
I'm a bit behind with the Mac version but my cam profiles are reasonable ok. I normally use the neutral or flat profile and start from there.

Does your version already have the wavelet sharpening?


I'm testing the RT deconvolution in the sharpening options and even when I don't fully control it yet, it does a mighty good job. It's basically an algorithm to deblur and can be used to fix minor shake but it can also be used to pull the detail a lens can no longer resolve. Unsharp mask isn't up to that task.

The last moon shot I posted is done using that technique. Two or three times deconvolution and finishing with unsharp mask. And some contrast/luminosity adjustments as well.
 
Last edited:

cwgrizz

Senior Member
Challenge Team
The only two options I have are Unsharp Mask and RL Deconvolution. I didn't find wavelet sharpening. I am still just barely starting to play with it when I have time. Not very deep into it as I really am quite lost with the terminology and what the settings apply to. Ha!
 

J-see

Senior Member
The only two options I have are Unsharp Mask and RL Deconvolution. I didn't find wavelet sharpening. I am still just barely starting to play with it when I have time. Not very deep into it as I really am quite lost with the terminology and what the settings apply to. Ha!

I read about wavelet but it then will probably be added in the next version. The terminology is something to get used to and I regularly have to check the documentation to try and make sense of it.
 

CharlesUK

New member
J-see, you mentioned discovering RAWTherapee has what some other programs call "control points". I'm just starting trying RT, where are these "control points", how do you get to them?
 

J-see

Senior Member
J-see, you mentioned discovering RAWTherapee has what some other programs call "control points". I'm just starting trying RT, where are these "control points", how do you get to them?

Here's the page with the "manual". You can also download it fully as a pdf which is much easier.

RawPedia

The "semi"-control points are called pipettes and you find some info about them here:

General Comments About Some Toolbox Widgets - RawPedia

I don't know in how far they resemble the control points in other programs but in RT they're handy.
 
Top