Vixen
Senior Member
Someone suggested I do a tutorial on creating a panorama and as I recently learnt how to fill edges rather than crop, I thought I'd share how it is done
Create a Panorama in Photoshop CS6/CC
This is purely the creating of the panorama. No editing included as we all have our individual editing styles, so I leave that part up to you
Select your images

Choose your Options

Create a Panorama
At this stage you can either crop the image (and lose some of the image) or fill the edges as below

Fill The Edges

This works well on images that are not cluttered ie clear blue sky, grass etc. You may need to do a little editing to clean the image up.
I hope this is of use to someone at least
Create a Panorama in Photoshop CS6/CC
This is purely the creating of the panorama. No editing included as we all have our individual editing styles, so I leave that part up to you
Select your images
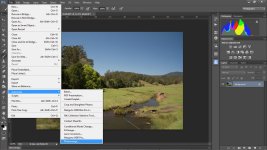
- Open the images you wish to merge into a panorama, in Photoshop
- From the File menu choose Automate > photomerge

Choose your Options
- Click on the Add Open Images box
- Select the Auto Layout option (if this does not merge nicely try selecting the cylindrical option)
- Tick Blend Images Together
- Tick Vignette Removal

Create a Panorama
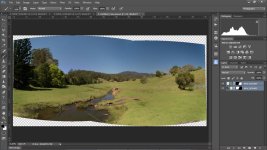
- Click OK. Photoshop will now merge the images.
At this stage you can either crop the image (and lose some of the image) or fill the edges as below

Fill The Edges
- In the Layer menu, click on Flatten Image. The chequered transparent image edges will turn white
- Grab the Magic Wand tool and click on the white area around the image
- In the Select menu choose Modify > Expand. Set the pixel amount to 4 and click OK
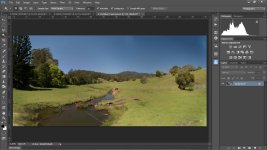
- In the edit menu choose Fill > Content Aware (in Contents Box)
- Press CRTL+D to deselect the marquee.

This works well on images that are not cluttered ie clear blue sky, grass etc. You may need to do a little editing to clean the image up.
I hope this is of use to someone at least
Last edited:
