Second Portrait Attempt

Rick M

Senior Member
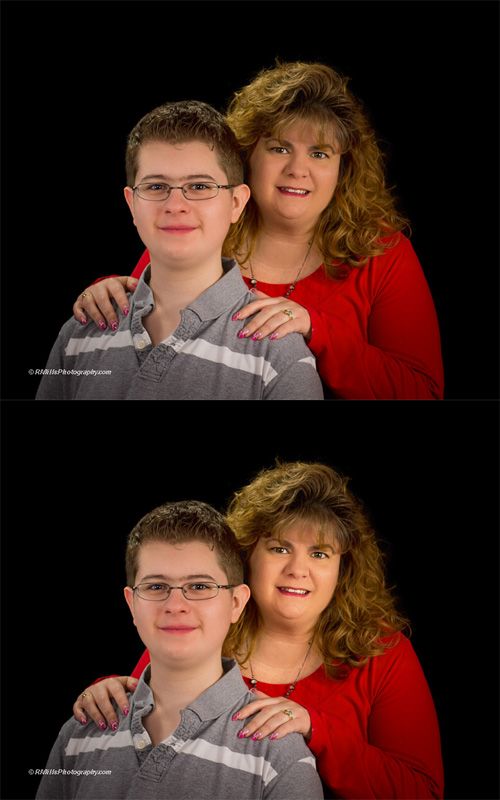
Here's a few shots from my second attempt, I like the results with the black background. Since my first attempt I've added a hair light and boom along with the black background. I've decided the tye-dye and blotted looking ones are a bit busy for me. I've learned from this shoot also, next time I need to adjust my lighting when moving between single and group shots. My son was in front a bit and I should have adjusted the lighting more, his fair skin also made him appear more exposed. Another important lesson- the bald guy should not be closest to the hair light! :).


DSC_2669_5698_pp.jpg


DSC_2678_5707_pp.jpg


DSC_2690_5719_pp.jpg


DSC_2701_5730_pp.jpg


DSC_2703_5732_pp.jpg
 
Last edited:

TedG954

Senior Member
Nice photos. For me, there's too much space above the humans. But, that's just my opinion. Not to be confused with someone that actually knows what they're talking about.
 

RockyNH_RIP

Senior Member
Rick, good job!! Much improved from your previous... Very impressive..

1. Like the black...

2. as you said, your son was in front some on 2 and 4 and he looks more exposed, especially 2 where she looks underexposed..

3. I think 5 is best with 1 a close 2nd...

I like what you have done... when I try my 1st attempt, I do NOT have a hair light so I will not do this well but hopefully be ok.. then I may (after looking yours) decide I need to add a hairlight too!

Thanks for sharing... lookinng forward to more... can you share your lighting setup and what lights were used??

Thanks

Pat
 
Last edited:

Rick M

Senior Member
Thanks guys!

Pat- I'm using continuous flourescent lighting. 1 shoot thru umbrella (close on forward left) and 2 reflective umbrellas (further back right and the other rear center slightly left). I should have adjusted these with the different poses. The hair light is a reflector on a boom rear slightly to the left. All bulbs are 425 watt 5500k. I actually tried to take a shot of the setup, but did not have enough room. I'm going to try another part of the house next time.
 

BackdoorArts

Senior Member
For me, who knows absolutely nothing about portraits, I'm thinking you need some sort of back light (is that you're hair light?) to define the edges of those heads. Probably 1/4 of what you have up front, but enough to give yourself some definition. And maybe even one on each side, brought down a little. It looks like the back lighting is more from above left than from behind, so maybe even a second light form the right?

Please feel free to ignore my specifics, as I know less about lighting than I do about nuclear physics (true - but not by much!!), but there's definitely a lack of definition around the people in the photos.
 

Rick M

Senior Member
For me, who knows absolutely nothing about portraits, I'm thinking you need some sort of back light (is that you're hair light?) to define the edges of those heads. Probably 1/4 of what you have up front, but enough to give yourself some definition. And maybe even one on each side, brought down a little. It looks like the back lighting is more from above left than from behind, so maybe even a second light form the right?

Please feel free to ignore my specifics, as I know less about lighting than I do about nuclear physics (true - but not by much!!), but there's definitely a lack of definition around the people in the photos.

Yes, I need to get a mini stand for my fifth light. I have a 325w bulb for that and will put it behind and slightly right to balance the back.
 

STM

Senior Member
These are very good Rick. I like the vignette, it helps to draw the viewer into the main subject. The hair light is ok, perhaps just a little tiny bit weak. I usually strive for about 1/2 stop above the key light exposure It is really important to have a good hair light against a dark background to get good separation. One thing to remember when you have subjects which are more than one subject deep, that if you meter on the front subject, light will diminish according to the inverse sqare law so you may have to "dodge" the back subject to make sure the exposure is even on both of them.

portrait3_zpscf755a5e.jpg


Next time try varying your lighting ratio. Halve (minus 1 stop) the light on one of the main lights to make it the fill light. Use the exposure for the other one (the "key" light) to determine your exposure. Doing this will give some modeling to the subjects so the light is not flat.
 

RockyNH_RIP

Senior Member
Thanks guys!

Pat- I'm using continuous flourescent lighting. 1 shoot thru umbrella (close on forward left) and 2 reflective umbrellas (further back right and the other rear center slightly left). I should have adjusted these with the different poses. The hair light is a reflector on a boom rear slightly to the left. All bulbs are 425 watt 5500k. I actually tried to take a shot of the setup, but did not have enough room. I'm going to try another part of the house next time.


Hey, isn't that what a WA is for (setup shots) :) Joking!!

So, if I followed this, you had 4 lights for the shot, 1 left, 2 right & 1 hair?? Wow.. Looks good... I am gonna struggle with my 2 simple speedlights!! :) I wonder if I could add a couple flourescent (much cheaper than speedlights) for things like hair/background lighting?? Or is mixing that a no no???

Again nice job and thanks to all the others with constructive comments! That is how we all will learn..

Pat in NH
 

Just-Clayton

Senior Member
I am going toward the strobe set up. Waiting for my taxes to come in so i can order. I will let you know in the next week or so how it's going rick. Nice first time shots by the way.
 

STM

Senior Member
I am going toward the strobe set up. Waiting for my taxes to come in so i can order. I will let you know in the next week or so how it's going rick. Nice first time shots by the way.

I have used Britek studio strobes for over 20 years (the same ones actually, and have only had to replace 1 flash ring) and they work very well. They all have modeling lights, which are slaved to the power setting; higher power setting, more light out of the modeling light. They are stand alone strobes, unlike ones which are connected to a single power supply. I have (2) 550 WS, (3) 200 WS and (2) 150 WS strobes. Get a "snoot" for your hairlight and a "barndoor" for your background light. You will need a small stand for the background light. I have not looked on their website in a long time, but they often had "kits" which would include the lights, stands, umbrellas, PC synch cords. I use softboxes for my key and fill lights, which can be pretty expensive. Umbrellas will work, though, you just don't have as much control as you do with softboxes. Silver umbrellas will reflect more light, but have harder edged shadows. I prefer white ones as you can either use them as reflectors or shoot through them, using them as diffusers.

Here is their website: http://www.briteklighting.com/
 
Last edited:

Rick M

Senior Member
These are very good Rick. I like the vignette, it helps to draw the viewer into the main subject. The hair light is ok, perhaps just a little tiny bit weak. I usually strive for about 1/2 stop above the key light exposure It is really important to have a good hair light against a dark background to get good separation. One thing to remember when you have subjects which are more than one subject deep, that if you meter on the front subject, light will diminish according to the inverse sqare law so you may have to "dodge" the back subject to make sure the exposure is even on both of them.

portrait3_zpscf755a5e.jpg


Next time try varying your lighting ratio. Halve (minus 1 stop) the light on one of the main lights to make it the fill light. Use the exposure for the other one (the "key" light) to determine your exposure. Doing this will give some modeling to the subjects so the light is not flat.

Thanks! How did you adjust this? Is that possible in LR4?
 

Rick M

Senior Member
Hey, isn't that what a WA is for (setup shots) :) Joking!!

So, if I followed this, you had 4 lights for the shot, 1 left, 2 right & 1 hair?? Wow.. Looks good... I am gonna struggle with my 2 simple speedlights!! :) I wonder if I could add a couple flourescent (much cheaper than speedlights) for things like hair/background lighting?? Or is mixing that a no no???

Again nice job and thanks to all the others with constructive comments! That is how we all will learn..

Pat in NH

Thanks Pat, not sure about mixing lights, but I would think you can.
 

STM

Senior Member
Thanks! How did you adjust this? Is that possible in LR4?

I used the select "tool" to select the woman's face and the "curves" tool to lighten her face in PS CS5. It was real quick and dirty and I think I may have lightened it just a tiny bit too much. I have never used LightRoom so I can't say but there has to be something similary
 

Rick M

Senior Member
I used the select "tool" to select the woman's face and the "curves" tool to lighten her face in PS CS5. It was real quick and dirty and I think I may have lightened it just a tiny bit too much. I have never used LightRoom so I can't say but there has to be something similary

Thanks! I just checked it out in LR4 and it works using the adjustment brush under "Dodge". This is awesome! Thanks for the example, made my day!!!
 
Great job. I used to have a full studio setup where we lived three houses ago. Have a 20 X 24 room with 14 foot ceilings. Had a full color darkroom attached. I do miss that. No room where we live now.
 

Rick M

Senior Member
I reprocessed these 3 from STM's tip on using the dodge tool. I'm much happier with the results now. Still need to fine tune lighting but I was able to balance the exposure better now. That and keeping the old bald guy away from the hair light should make for better results next time.

DSC_2678_5707_pp-2.jpg


DSC_2701_5730_pp.jpg


DSC_2703_5732_pp.jpg


I would never have ventured into portraits using film, too much trial and error for us novices!
 
Last edited:

Rick M

Senior Member
Another small victory was using the new background without any wrinkles showing. It had a lot of creases and wrinkles but I hung it that way to see if they would be an issue. We were about 4 feet in front of it and I shot all these at f5.6, no sign of wrinkles. I did use 4 mini clamps and bungie cords to for a little tension to elliminate any large wrinkles.
 

STM

Senior Member
Another small victory was using the new background without any wrinkles showing. It had a lot of creases and wrinkles but I hung it that way to see if they would be an issue. We were about 4 feet in front of it and I shot all these at f5.6, no sign of wrinkles. I did use 4 mini clamps and bungie cords to for a little tension to elliminate any large wrinkles.

I prefer to use muslin (cloth) backgrounds to seamless background paper. In the long run they are A LOT cheaper and if they get dirty, rather than having to throw away the dirty section, you can throw them in the washer (only single dye backgrounds, NOT painted (!) ones). But the disadvantage is they will wrinkle. There are two ways to overcome this. One is to use very narrow depth of field and have at least 10 feet of stand off between the subject, and the other is to use something like duct tape (painters tape works too but is not as secure) and tape the background to the background stands. I prefer the latter because I may not be able to get 10 feet of stand off depending on the subject. If you are using plain white, it is possible to light it with two strobes with an exposure 2 stops above the main (key) light exposure. Just be mindful that the lights must be behind the subject and you don't get any "spillover" onto your subject. For black backgrounds I use my patented anti-gravity machine which slows the photons down so much that the background gets essentially no light.
 

Marcel

Happily retired
Staff member
Super Mod
For a second trial, you sure did great Rick. Trial an error will get you places.

Keep it going. Nice post processing.
 
Top