A little general understanding help re D800, WB and lights

Angeldust

Senior Member
Hello everyone!

First post here- seems like a really wonderful community.

So- I've got a few questions about the setup I'm using and I'm wondering if anyone can possibly help?

Shooting with (for these examples) Nikon D800 (bought 14 days ago from Amazon direct), Nikon 50mm f/1.8, 2 softboxes with 5500K lightbulbs and a grey card.

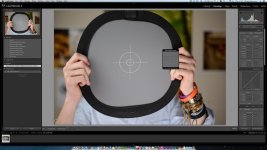
So, I've set up my D800 so that it's white balance is at 5560K, the lights are on the subject, a grey card is shot where his face will be- a series of pictures are taken and bought into lightroom (4).

Now the strange stuff happens- the original photo with the grey card shows having a colour temp at 5350K with +6 tint (as shot). Setting manual white balance by clicking on the grey card sets colour temp to 5450 and tint to -1, neither of those settings are concurrent with what's been set by me on the camera... any idea what's causing the issue?

Also, I've uploaded some of the photos from the set (totally unedited with the exception of changing the white balance by grey-card-clicking and syncing in LR)- I'd particularly appreciate feedback concerning whether or not the skin tones look 'normal' to you. I appreciate that this is subjective, but after having spent so much time looking at these, and comparable shots- I'm finding it hard to determine what 'normal' even is!

DSC_0544.jpg | Flickr - Photo Sharing!
DSC_0546.jpg | Flickr - Photo Sharing!

I would also appreciate some commentary on some video I took (same subject, same location, same lights- no colour correction in post) with the D800- to my eye it looks a little green, but- I can't be sure.

On turning 21 and snow! - YouTube

I'll add that the colour profile I set was 'Camera Standard' NOT Adobe standard.

Like I've said- I'd really, truly appreciate any comments that anyone can offer...
 

stmv

Senior Member
interesting,, and how certain of the Light source, distance, ambient light effects, etc. I would think you would need such a tight experiment to get a one for one match, having another meter source at the card,, validating the real world temperature.

How accurate are cameras,, you might find some deep dives on the net.

I personally shoot in daylight wb,, (and then adjust the temperature in RAW) to my liking.
 

Dave_W

The Dude
I'm not sure I understand your question. Is it that the 18% gray card is giving you a slightly different temp value than what you determine by eye? And if so, are you 100% convinced your monitor is calibrated and reflecting the "true" color hue?
 

Angeldust

Senior Member
Hi Dave,

Many thanks for taking the time to reply.

My query is to do with the differences in Kelvin reported temperatures between the 3 sources, the lightbulbs, the camera and then lightroom's interpretation.

On a more fundamental level though, I'm curious as to peoples opinions on the 2 photo's I linked to- specifically the skin tones- to my eye they appear a little too... something. I'm in the position of having been staring at images for so long now as to not be sure what constitutes 'normal'! And also peoples opinions on the video I linked to- to my eye it appears a little too green.

I'll add one thing- in lightroom the grey card shows values of 50% +/- 1%, is that correct?
 

Dave_W

The Dude
My impression of the photo you posted is that the boy's skin color is slightly washed out. As for the gray card values in LR, I'm not sure what you mean by 50%. What are you referring to when you say 50%?
 
Last edited:

Angeldust

Senior Member
By 50%, I was referring to the RGB values, the attached screenshot from LR may be of some use.

I would agree about the colours being washed out- that does strike me as being more of a proximity issue than a white balance/ colour/ camera issue, would that be a fair assessment, or is there more at fault that that?


Screen Shot 2013-01-24 at 17.10.15.jpg

Edit: Just remembered I used spot metering for some images in the shoot- these may well have been from that set, explaining the blown highlights and washed out skin.
 
Last edited:

Dave_W

The Dude
Ah, I see. I don't think you can conclude much from the 50% LR value. I may be wrong but I think LR will give this same value for all photos you import into the program, no?

And yes, I do not see a problem with the WB in the photos, I see an exposure (flash) problem that is washing some of the color saturation from the skin tones.

Also, don't underestimate the need for monitor calibration. You cannot make any solid conclusions until you're convinced you're seeing exactly what your camera is producing.
 

Angeldust

Senior Member
Hmm, it's the value that LR provides for neutrals- an equal value in each RGB channel. Honestly, I'm not sure beyond that.

That's good to hear. I thought so too- killing the highlights and dropping the white point and exposure have provided a better looking image.

Hmm- on the topic of monitor calibration, how does one do that with a mac?!

Finally Dave, if I may so presumptuous to ask you opinion on the video sample I posted?

Thanks so much for your help!
 

Dave_W

The Dude
I love the video, fantastic!! The editing looks very professional. Well done. If I could suggest anything it would be to experiment with light placement. I don't know if highlighting the subject from the viewers upper right would balance the lower left lighting? But I'm probably the worst person to ask about lighting. Robert would be the one I would consult.

As for calibration, yes. You can calibrate a Mac. Because until you're 100% certain you're seeing what is being produced, you cannot conclude anything about color saturation or hue. I would suggest you look in to Spyder or X-rite. Both are highly regarded systems.
 

Angeldust

Senior Member
Dave,

Thanks for the feedback! Would it be fair to presume that the green colour cast I mentioned is in fact a figment of my mind?!

I wholly agree about the light placement being an issue- I'll work on it for next time, certainly.

I'll look into both. Thanks again!
 

Dave_W

The Dude
I didn't detect a green hue at all. In fact, I went back and viewed it a second time just to make sure. Color management is digital photography's ugly Siamese twin. You can't carry on an affair with only the pretty sister, you've gotta make nice with the ugly one, too.
 

Angeldust

Senior Member
Thanks Dave, I really appreciate the feedback from you.

Haha- that's a nice way of looking at things, I think you may well be right- I'll grab a Spyder as soon as!
 

WayneF

Senior Member
My query is to do with the differences in Kelvin reported temperatures between the 3 sources, the lightbulbs, the camera and then lightroom's interpretation.

The camera does not report degrees K of correction. It has another internal scheme for its color correction, somewhat proprietary, and Adobe and Nikon interpret the reported numbers a bit differently. Adobe tries to convert to degrees K, but it is not particularly close.

Do this to understand the issue: (Other WB choices will show the same thing, but my example numbers are using Flash WB, and the point remains the same).

Set camera to Flash WB, which NIkon calls 5400K. Take a picture. Adobe will report it 5900K.
Then set Flash WB in Adobe, and it will report 5500K (and the color probably improves, now that WB has been set). If you are using Flash and RAW, then you should set Flash WB in Adobe, since someone has to set WB. Or, there are better methods too (the white or gray card).

Don't go by the numeric values reported in Adobe. They are sort of approximations, and don't matter. What matters is the image color being corrected. Use a white card or a gray card, click it, and use whatever it says. It will be right (if the card is neutral).

All things change. Light bulbs age and change color. Flashes change color with power level. Daylight changes with shade and sunset, etc. All things change. WB is a moving target. The neutral card is very huge help however, neutral remains neutral.

I'll add one thing- in lightroom the grey card shows values of 50% +/- 1%, is that correct?

If the gray card is 18%, then it is 18%. Whether it comes out that way depends on if the exposure does not make it brighter or darker. It is not very absolute. But if somehow the brightest part of the picture was of something 100%, and if it just reached the maximum level, then 18% would be near 18% (in linear RAW, at the sensor).

But... the histogram is NOT linear data. It shows gamma encoded RGB data (sRGB is gamma 2.2 for example), so ideally and mathematically (if exposures are good), 18% comes out about 46% (at 117 on the 0..255 scale). We don't see RAW, we only see gamma encoded numerical RGB values. 18% is 18% and is not supposed to be "middle", and FWIW, RAW 127 moved up to around 187 anyway (around 73% - EXCEPT, all the camera manipulations, WB, contrast, saturation, etc, etc, moves this around, this 73% is NOT a precise concept.

(still assuming gamma 2.2):
You can see this if by trial and error, you take a picture with exposure adjusted to move the histogram data right up to the 255 border.
Then reduce exposure exactly one stop.
One stop is 50%, and we would expect right edge to drop to 127 in RAW linear data, but we never see RAW, or linear.
In the gamma histogram, we see one stop drop back to around 73% (but with wide margin due to all the automatic adjustments the camera is doing). It is far from center however.

An 18% card is 18%, but it is gamma encoded in digital, which coincidentally brings it close to middle. It is NOT for the reasons we see told about it. It is because all our RGB data is gamma encoded.
 
Last edited:
Top