Does anyone have some tips for editing photos shot in harsh light?
Whenever I try editing a photo shot in harsh light, it ends up looking absolutely horrible. I understand that photography is all about light and bad light usually means a bad photo, but sometimes you just don't have control over the light.
I usually decrease the saturation, increase the shadows, and sometimes even decrease the contrast, but the image just ends up looking like garbage. I can convert to black and white and it looks alright, but I want color.
Any suggestions?


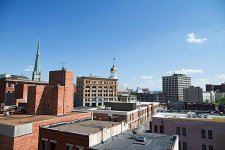
.jpg")
-2.jpg")