How to get those dreamy shots

Vixen

Senior Member
So I keep seeing photos of flowers and insects ON flowers etc and they all look sorta dreamy and I would LOVE to know how the photographers do it.
So I have had a go and would like your opinions

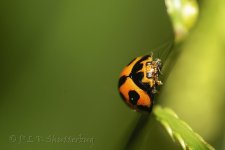
SOOC macro shot saved as jpg for uploading
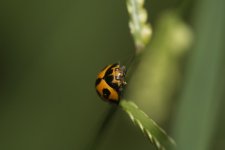
15B_0730.jpg

As I would normally PP

15B_0730_webshot.jpg

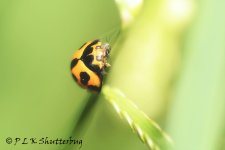
and my attempt at "dreamy
15B_0730#2_webshot.jpg

What do you think? All opinions valued :D
 

Lawrence

Senior Member
Its all about processing innit? I have often wondered the same thing ...
But back to your photo(s).
First of all good on you for attempting this.
Secondly I can't help. :) This is better than any effort of mine.
Have you tried you tube for some videos?

And just to really frustrate you (and inspire you) look up Shikhei Goh on Facebook for some unbelievable shots.
 

SkvLTD

Senior Member
Shoot into "dreamy" aka light and soft colored backgrounds, and then as far as I can tell, gently separate your subject from the background and go extra pastel/watercolor/etc filter on the background. That or a f/1.2 lens. Either way, heavy PP outside of camera raw is unavoidable. Think fashion magazine studio shots - NO makups nor perfect skin can make those girls look like silk and perfect hair without a single strand sticking out.

https://www.facebook.com/1119625022...1962502204881/823986461002478/?type=1&theater

For example, as far as I can tell is f/1.2 or 1.4 and some softening/background texture blended in with the flower.
 

Krs_2007

Senior Member
The difference appears to be lighting. The Facebook person uses soft light, how not sure. Could be by holding a diffuser above the subject or using a diffuser on the light source. Outside of that the lens aperture plays a part and I should imagine they might use focus stacking but I will let others chime in.
 

Fred Kingston

Senior Member
Using LR, you can increase the post-crop vignetting (highlight priority) turned on... Increase the feathering and adjust the mid-point setting to focus on the bug, and fade out/highlight everything else...

Start with wide-open aperture to increase the basic background bokah, f10 is too small... it increases DOF, but also forces a good distance behind the subject to get a creamy bokah
 

Moab Man

Senior Member
There are a few ways to get to that final look. I work in Photoshop and Nik Tools so that is where I am speaking from.

Photoshop
1. For portraits to get that dreamy look, often called glamour shots here in the U.S. a "Gaussian Blur" is used. This same technique can be used for your bug shot and then using a mask you could mask out the Gaussian Blur over the bug.

2. In Photoshop under Select there is a tool called "Select Focus." This tool will allow you to select all that is in focus, to which you can inverse the selection to grab what is out of focus and then apply a blur to soften the bokeh further. You have to be careful to not over do it and cause a defined line between the focus and the soft.

Nik Tools w/Photoshop

1. I will use Dfine (noise reduction) to soften the image. It will still work even if noise isn't actually present. Then I mask out the part I want in focus.


When making I use a very soft edge ("Hardness" slider) so that when masking I have a feathering transition and no hard line.


Orton Effect
This is another technique that is a little more complicated initially. There are many good tutorials that explain it as it is a bit more in depth than I can readily type up here. This effect can be really cool, but easily over saturated unless that is what you're looking for.

Hope this all helps.
 

Pretzel

Senior Member
There are a few ways to get to that final look. I work in Photoshop and Nik Tools so that is where I am speaking from.

Photoshop
1. For portraits to get that dreamy look, often called glamour shots here in the U.S. a "Gaussian Blur" is used. This same technique can be used for your bug shot and then using a mask you could mask out the Gaussian Blur over the bug.

2. In Photoshop under Select there is a tool called "Select Focus." This tool will allow you to select all that is in focus, to which you can inverse the selection to grab what is out of focus and then apply a blur to soften the bokeh further. You have to be careful to not over do it and cause a defined line between the focus and the soft.

Nik Tools w/Photoshop

1. I will use Dfine (noise reduction) to soften the image. It will still work even if noise isn't actually present. Then I mask out the part I want in focus.


When making I use a very soft edge ("Hardness" slider) so that when masking I have a feathering transition and no hard line.


Orton Effect
This is another technique that is a little more complicated initially. There are many good tutorials that explain it as it is a bit more in depth than I can readily type up here. This effect can be really cool, but easily over saturated unless that is what you're looking for.

Hope this all helps.

A lot of folks, locally, also do a bit of white vignette on a wide base and heavy feathering, then a darker vignette over the top to add to this. It seems to help control the "over saturated" bit for those that know what they're doing. Don't ask me the science behind it, though. ;)
 

J-see

Senior Member
I know that for LR there are some plugins that have a "dreamy" effect and if I remember well, Perfect Effects also has one included. In RT I can use Tone Mapping to get a similar look. It basically creates a difference between the global contrast of a shot and the local contrast. While it is mostly used to pull detail, when applying negative values, the shot gets softer.

I did a quick attempt at one of my latest shots but didn't succeed too well. It's something that requires practice. The plugins for other editors might be handier.

DSC_1520.jpg
 

T-Man

Senior Member
If you have the NIK plug-in collection, within Color Efex Pro, there's a filter called "Glamour Glow" that gives this effect, if I'm correctly understanding what you're looking for.
 

Englischdude

Senior Member
There are a few ways to get to that final look. I work in Photoshop and Nik Tools so that is where I am speaking from.

Photoshop
1. For portraits to get that dreamy look, often called glamour shots here in the U.S. a "Gaussian Blur" is used. This same technique can be used for your bug shot and then using a mask you could mask out the Gaussian Blur over the bug.

2. In Photoshop under Select there is a tool called "Select Focus." This tool will allow you to select all that is in focus, to which you can inverse the selection to grab what is out of focus and then apply a blur to soften the bokeh further. You have to be careful to not over do it and cause a defined line between the focus and the soft.

Nik Tools w/Photoshop

1. I will use Dfine (noise reduction) to soften the image. It will still work even if noise isn't actually present. Then I mask out the part I want in focus.


When making I use a very soft edge ("Hardness" slider) so that when masking I have a feathering transition and no hard line.


Orton Effect
This is another technique that is a little more complicated initially. There are many good tutorials that explain it as it is a bit more in depth than I can readily type up here. This effect can be really cool, but easily over saturated unless that is what you're looking for.

Hope this all helps.

+1 on the layers and gaussian blurr. gassian in combination with a layer of motion blue could also be used, using a mask to cut through the layers to sharpen the areas you want. in darktable I also have a module called "bloom" module which makes the highlights very soft and dreamy. Check out the description of the module on this page
https://www.darktable.org/usermanual/ch03s04s05.html.php
 

J-see

Senior Member
I'm experimenting with it at the moment and it's basically softness combined with glow.

I don't know if all editors allow shots to be processed soft but if, that combined with glow filters can get the effect or blending different versions of one shot can get similar results too.

Here's one I've just been playing with:

DSC_1820-1-1.jpg
 

Vixen

Senior Member
If you have the NIK plug-in collection, within Color Efex Pro, there's a filter called "Glamour Glow" that gives this effect, if I'm correctly understanding what you're looking for.

No... not quite T Man. I use Glamour Glow a fair bit and while it gives everything a nice soft look, it's not quite what I am after.
 

Vixen

Senior Member
I think layers and gaussian blur are probably the way to go. I did have a try while watching a youtube vid last night but didn't quite get it right. Lighting also....my ladybird is maybe not the ideal shot to try on.

Thinking I am going to have to play around with this a fair bit to get what I want
 

Scott Murray

Senior Member
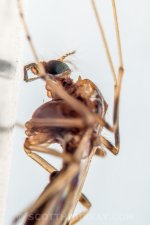
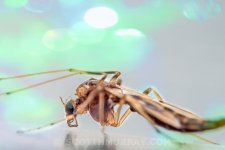
I created a duplicate layer in PS, downloaded a Bokeh background added that as a 3rd layer. Then blended via lighten I think then erased certain areas around and on the dragon fly. Adjust opacity etc.
 
Top