White fringe

J-see

Senior Member
I'm trying to get rid of "white" fringes in some of my shots.

They're not normal chromatic aberration and can't be corrected as such. They do appear only in high contrast areas and create a very tiny halo effect. I first assumed it was normal CA and tried about everything to get rid of them but it doesn't appear to be a color problem but a lack of color problem. It's not a processing issue either since it's there in the RAW.

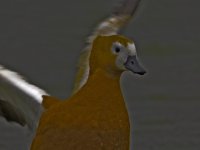
In this shot you see the white fringe or halo where dark meets the sky.

DSC_8690.jpg

If it was a color disturbance, it should change when lowering the luminance of specific colors but even when I lower all, this is what remains.

DSC_8690-3.jpg

That same white fringe.

It's not one lens that triggers it; it's about all and I'm not the only one suffering it since I see it in plenty a shot. When enlarging the shot, the effect is less visible but it's there even when looking pixel-sized.

Does anyone know how to get rid of it or how to avoid it? Maybe a filter blocking certain light?


Edit: I've been checking some shots at sites of those using the "better" equipment and lo and behold, the same can be seen there.

This page as an example: https://photographylife.com/how-to-photograph-birds
 
Last edited:

J-see

Senior Member
I've talked about it in another post but here's more on that contrast fringe.

There's some relation between the light and this fringe but I can't find any explanation out there. Usually whenever the fringe is mentioned, sharpening is blamed but it is already present in the RAW file regardless of sharpening.

While working on this one in PS, once I start adjusting the shadows/highlights, I noticed it affected the fringe. I decided to tweak the settings a bit to show the problem area.

fringe.jpg

The aura is clearly visible now and when bringing the highlights back in, it mostly disappears into them, except that nasty pixel-sized fringe. I still have no idea what it is but the subject was lit by the sun at that side which makes me wonder about the relation to that.

If I would know what causes it, I would also know how to avoid it while shooting. If it's a "digital" issue, there should be a solution to it. Now I try to make it blend into the background by increasing the luminosity of that. It's not the best of solutions.
 

Felisek

Senior Member
You don't know whether the contrast fringe is present in the RAW file, as you cannot see it. RAW is not an image. What you see is an image processed either by the camera or by other software. Even if you open a RAW file in a viewer, there is an on-the-fly conversion done.

I think that converting RAW data into an image might introduce such artefacts in high-contrast areas. The image sensor does not have pixels with RGB values, it rather consists of monochromatic pixels behind a colour mask (Bayer filter), so one pixel gets green channel, anther gets red and yet another gets blue. Hence, the RAW data does not contain RGB pixels. In the process of "developing" the RAW sensor data, i.e. converting it into an image, the information between the interlaced three colour channels is interpolated. In very high contrast areas this might lead to artefacts you see. You can imagine a situation where the red pixel is in the bright area, while the blue pixel is in the dark area; this would certainly lead to some loss of quality during interpolation.

Of course, these artefacts can be exacerbated in post processing by increasing contrast or sharpness.
 

J-see

Senior Member
You don't know whether the contrast fringe is present in the RAW file, as you cannot see it. RAW is not an image. What you see is an image processed either by the camera or by other software. Even if you open a RAW file in a viewer, there is an on-the-fly conversion done.

I think that converting RAW data into an image might introduce such artefacts in high-contrast areas. The image sensor does not have pixels with RGB values, it rather consists of monochromatic pixels behind a colour mask (Bayer filter), so one pixel gets green channel, anther gets red and yet another gets blue. Hence, the RAW data does not contain RGB pixels. In the process of "developing" the RAW sensor data, i.e. converting it into an image, the information between the interlaced three colour channels is interpolated. In very high contrast areas this might lead to artefacts you see. You can imagine a situation where the red pixel is in the bright area, while the blue pixel is in the dark area; this would certainly lead to some loss of quality during interpolation.

Of course, these artefacts can be exacerbated in post processing by increasing contrast or sharpness.

You're right, I have no idea if it is in the RAW file since I only see a compiled version of it when loading but it shows SOOC even when every setting is set to zero. JPEG, TiFF,aRGB, sRGB, ProPhoto; it all makes no difference. Sharpening set to zero neither.

Sharpening does increase it, as does changing the highlights, shadows but I can not explain why it is there. It's very present in birds in flight. It also does not contain color, I can play with the channels and it remains white which can not be else but a fully saturated pixel. It's like an aura of hot pîxels.

It annoyed me a while ago, then I could ignore it for a while but now it starts bothering me again and I try to find a solution. Constantly lightening the background is a bad solution and coloring it pixel by pixel would be an impossible task.

If I first could find the actual reason for it being there, it might give me some clues how to fix or avoid it.
 

J-see

Senior Member
Here is the question with no real answer except its unlikely to be the lens.

Printing 20x30" --- white fringing - Photo.net Large Format Forum

Yeah, I read plenty a question to which no definitive answer was given. The common reply is "sharpening" but that does not cause it. It's not the lens since my 200mm also has it in some shots and that lens is pretty good when it comes to imperfections.

That question was asked in 2006 I see. Almost a decade later there's still no answer to what this fringe is and how to get rid of it. At least none I find.
 
Last edited:

mikew_RIP

Senior Member
Well, over the years ive got quiet good at ignoring the elephant in the room,my feelings are its a combination of factors,high mp sensors,processing,cropping,contrast changes,i get it most when i crop to take advantage of the detail my camera will resolve instead of just saying the image is too small.
From the point of view of no knowledge i tend to blame the high MP sensor for doubling or trebling the amount of pixels in that white band so making it more obvious,would be interested to know if a D700 had it.
 

Marcel

Happily retired
Staff member
Super Mod
I've talked about it in another post but here's more on that contrast fringe.

There's some relation between the light and this fringe but I can't find any explanation out there. Usually whenever the fringe is mentioned, sharpening is blamed but it is already present in the RAW file regardless of sharpening.

While working on this one in PS, once I start adjusting the shadows/highlights, I noticed it affected the fringe. I decided to tweak the settings a bit to show the problem area.

View attachment 137147

The aura is clearly visible now and when bringing the highlights back in, it mostly disappears into them, except that nasty pixel-sized fringe. I still have no idea what it is but the subject was lit by the sun at that side which makes me wonder about the relation to that.

If I would know what causes it, I would also know how to avoid it while shooting. If it's a "digital" issue, there should be a solution to it. Now I try to make it blend into the background by increasing the luminosity of that. It's not the best of solutions.
In this particular case, it's a post processing thing. The shadows were pulled up and the adjustment mask seemed to have leaked around the bird's beak and chest. When you look at the back of it's wings, it's not there.
 

J-see

Senior Member
In this particular case, it's a post processing thing. The shadows were pulled up and the adjustment mask seemed to have leaked around the bird's beak and chest. When you look at the back of it's wings, it's not there.

I first assumed it was a processing issue but here's the SOOC, zero processing, zero sharpening.

_DSC4779.jpg

As you see, the aura is already present. All that processing does is make it worse.
 

J-see

Senior Member
Are you using active D lighting? This can also cause it.

Nope, I have everything set to zero in the D750. The same happens with the D3300. It is not cam nor lens related, I'm pretty sure of that.

I'm going to check the time on each shot suffering it. If it is all the same period of the day, it might have something to do with being backlit and the position of the sun.
 
Last edited:

hark

Administrator
Staff member
Super Mod
I believe @aroy offered an explanation when you asked in another thread.

Fringes appear at high contrast boundary, especially when the bright side is over3 EV above the maximum. It is due to electrons overflowing from the "over full" well to adjacent wells. You can easily duplicate the effect by using spot metering for a dark object, say a person with a dark dress in bright daylight. You will then see the fringes. If I recollect one of our forum members had the same problem while shooting tennis players.

These fringes also appear in mediocre to bad lenses, the 70-300 AF (non VR) is one such lense which exhibits colour fringing beyond 200mm.

Comes from this thread: http://nikonites.com/computers-and-software/28262-nef-files-quality-3.html#axzz3QDOXoBmh
 

J-see

Senior Member
I believe @aroy offered an explanation when you asked in another thread.


Comes from this thread: http://nikonites.com/computers-and-software/28262-nef-files-quality-3.html#axzz3QDOXoBmh

That could be true in some cases but considering the low light levels I shoot and the size of my full well, there must be another reason.

Shot as taken; this is the same as what hit the sensor. If you see the luminosity level of the wing, it's obvious the water next to the fringe isn't light enough to overload the pixel.

_DSC4779.jpg

It reminds me of chromatic aberration but colorless.

I'm curious to know what it is and since about everyone suffers it, there should be a denominator that goes beyond lens, cam or processing.
 
Last edited:

Marcel

Happily retired
Staff member
Super Mod
I first assumed it was a processing issue but here's the SOOC, zero processing, zero sharpening.

View attachment 137161

As you see, the aura is already present. All that processing does is make it worse.
That is chromatic aberration that should be corrected in post before any other sharpening done. It does not spread as much as shown in the processed shot in the previous post.
 

Horoscope Fish

Senior Member
[MENTION=31330]J-see[/MENTION]

I'm curious if you shoot with Polarizing filter or not? I'd be curious if one would diminish this.

I don't think this is CA. Chromatic Aberration is, by definition, a wavelength-discretion issue. I'm pretty convinced this is a byproduct of contrast edge detection/edge enhancement.

...
 

J-see

Senior Member
@J-see

I'm curious if you shoot with Polarizing filter or not? I'd be curious if one would diminish this.

I don't think this is CA. Chromatic Aberration is, by definition, a wavelength-discretion issue. I'm pretty convinced this is a byproduct of contrast edge detection/edge enhancement.

...

It'd be expensive to use a CP on my Tamron. ;) I don't even know if they make them in that size.

I can try to shoot my 200mm with a CP when I got more time and check if it solves the problem or has zero effect. If the CP doesn't suffer it, it's a light-caused problem.

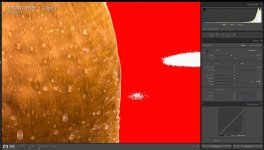
I pushed the exposure of the shot towards clipping and even when the sides clip, you still clearly see the problem area:

clipping.jpg

Everything clipped but not that fringe. I need to push it another 4 stops before it clips into the rest. But then the shot looks like this:

_DSC4779.jpg

It's a very persistent fringe. It isn't CA because I can move the correction sliders of all variables into every direction and while I can move colors, nothing affects the fringe itself.

It also seems to be colorless since I can adjust the luminosity of every available color and it doesn't affect it at all.
 
Last edited:

hark

Administrator
Staff member
Super Mod
For the bird image, this method might work for filling in the light areas. Outline the bird and copy/paste into a new layer. Increase the height and width to 101%. Create a blank layer in between the two layers then clone the background around the edges of the bird.


Horoscope Fish

Senior Member
It'd be expensive to use a CP on my Tamron. ;) I don't even know if they make them in that size.
The Tammy takes a 95mm, that's not an uncommon filter size... You would be able to find a cheap one (just for testing purposes) for less than $50 USD. A proper one would set you back $300 USD or close to it, that's true; but you knew what you were getting into when you bought the Tamzooka... :)


I can try to shoot my 200mm with a CP when I got more time and check if it solves the problem or has zero effect. If the CP doesn't suffer it, it's a light-caused problem. ... It's a very persistent fringe. It isn't CA because I can move the correction sliders of all variables into every direction and while I can move colors, nothing affects the fringe itself. It also seems to be colorless since I can adjust the luminosity of every available color and it doesn't affect it at all.
Clearly, from the photos, the affected pixels are blown out; so I'm not surprised you can't recover any detail there. I don't think this is a natural phenomena, and by "natural" I mean I don't think this is being caused by light as it is entering the lens. I think this is contrast/edge detection aberration (I'm coining that phrase right now); which means the camera's processing is creating the problem under certain circumstances and, further I'll wager, once this aberration is there, it's going to be next to impossible to remove "globally", like you can with CA.

Methinks if you want to fix it CORRECTLY, you're going to have to learn how to avoid it, which may be impossible on a practical level (unless a CPL knocks it out) or... you're going to have to Zoom in to pixel-level using Photoshop or Lightroom or whatever you use, dial down your Healing Brush or Clone Stamp tool and do "corrective surgery" at that level. It's tedious but I've been known to do it because sometimes that's the only thing that works.
....
 
Top