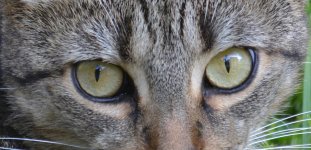
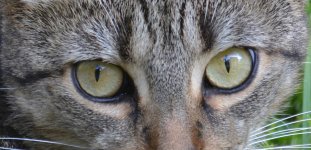
Post your 'before' and 'after' pictures

Needa

Senior Member
Challenge Team
Concerning the crop, I started with a square crop but found it too symmetrical. I wanted to leave less space on the right to create an uneasiness feeling of enclosure. If there would have been more space to the right, I think the image would have less impact. But hey, I've been wrong once or twice before in this lifetime. :)

Don't think it a matter of right vs wrong. Just ask because my first though was the other way. But never been accused of being overly creative. :)
 

Blacktop

Senior Member
Visited the Robert Dole Institute the other day when my sister and family were visiting us. I only had my 50mm lens and was forced to try and take two pics and then merge them together in order to get the reflection in the floor....next time I'll bring the wide angle. I merged them in LR using pano, and then touched the final one up slightly.

View attachment 220295

View attachment 220296

The final version....the largest American Flag stained glass in the world

View attachment 220297

I think you did an excellent job. Next time bring the Tokina. You know, the one I sold you!:cheerful:
 

Blacktop

Senior Member
This is what can happen when a person spends too much time in Nik Tools. In this case Color FX Pro.:)

I started out by looking at this image and almost hitting the delete button. I saw nothing in this shot that even remotely excited me, except maybe the arc of the wings.
I always like wings on the down stroke, when I shoot BIF so that was ok.

Fortunately I had no other shots to process , so I started to play with it.

A little insight to my workflow.

Most times when I take a shot, there is a purpose and some sort of vision in my head of the outcome, so when I open up the image on my computer, I pretty much have an idea of what I want to accomplish.
In this case, I wanted to try out my kenko 1.4 TC on the 70-300mm lens, since I had not tried yet, so I wasn't really out to take shots to keep, just wanted to see how it handled really.

Ok, back to how I got from here to there.

Normally I start in LR and the first thing that I check and fix is the composition, before I do anything else. So I do some cropping a few different ways to see how I like it. I don't follow any rules , just what pleases my eyes.
The next thing I do, is lower highlights and exposure. I like to start with a little under exposed image at first, which I can correct later if needed.

After that I pull shadows to my liking, to get a right balance. The only other thing that I do in LR, is to adjust the "whites", and "blacks" sliders. Sometimes I don't touch those until the very end after everything else is done. It really depends on the shot.

Now that I'm done in LR, I'll export to PS. I don't do much in PS really, except maybe take out a few distractions. (content aware tool) .
Having Nik Tools there is really no reason to do layers and all that stuff in PS, when it all can be done a lot simpler in NIK.

In this particular shot, I did some NR in Define2, then I brought the shot into Color FX Pro.

At this point I still didn't know what I wanted to do with this shot. The only thing I liked so far was the wings on the dragonfly and the roses around it.

Normally when I enter Color Efex Pro, the first thing I adjust is the contrast. I use "Pro Contrast" for this.
The second thing I go for is, "darken/lighten center". I love this tool, because I can pick where the center point is., It's like a control point in "Viveza" but I don't have to leave Color FX Pro to do it.

After I got done with this, I thought that I might try a softer ,dreamy type of an image. I liked the way the roses were starting look, but the dragonfly wasn't really that sharp.
The thing about sharpening is, that if you don't start out with a somewhat sharp shot or subject, trying to force it to look sharp will do more harm then good. It will certainly ruin a shot.

As I was saying, I needed to get a softer, dreamier look, so I played with "glamour glow" until I found the right balance that I liked.

I added a little vignetting/ blur to the image while I was still in CFX pro, and then I exported the image back to PS.

Normally I do my sharpening in PS, with either "unsharp mask" or "smart sharpen", but this time I skipped and took the shot back to LR for a few finishing touches.

I then I pulled some whites and added a tiny bit of overall exposure.
I also selectively sharpened a few parts of the dragonfly. Mostly the wings, and some parts of the leaves on the rose. That's it I think. I might have forgotten to mention a few other things but for a shot that I was going to trash, I'm almost happy with the result.;)

So here is the before and after.
_DSC9068.jpg


_DSC9068-Edit.jpg
 

canuck257

Senior Member
Before image; Lightroom for Highlights, Shadows and Lens Corrections. After image; Nik HDR Effex, Color Effex then Output Sharpener Pro.

Before
IVA_3862.jpg


After

Horsefly Upper Falls.jpg
 

cwgrizz

Senior Member
Challenge Team
Before processed in Capture NX-D and Gimp

9-10-16-cr-ND10-TurkeyCreek__D7K4237.jpg


After processing using stand alone NIK tools

Turkey_Creek-NIK-cr.jpg


Not sure which one I like better, but I am leaning toward the second one.
 

cam36

Senior Member
Hi there,

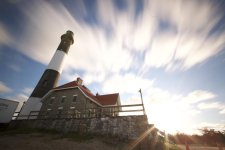
Before:
DSC_0124.jpg

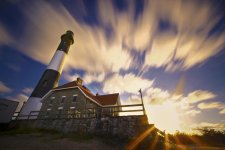
After using Adobe Camera Raw and Photoshop CS6:
sunriselighthouseAlt.jpg

I have a tendency to oversaturate everything in post, so please let me know your thoughts! Thanks!
 

sl60

Senior Member
Nice photo!

It seems like you took a lot of steps for the final result--just as a test, I got the same result with Gimp in about 30 seconds!
 

RobV

Senior Member
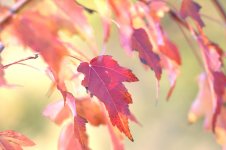
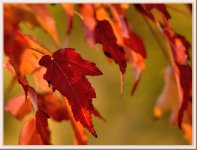
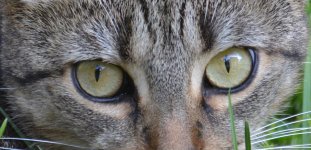
I just installed the trial version of Lightroom/Photoshop CC. I have been working with a 2.0 version of Elements for over 10 years. I had to try that Spot Healing Brush tool! (and I am now employed)

I removed two blades of grass on the right, and a couple of smaller (and fainter) on the left.

DSC_0392 - Copy-Edit.JPG

DSC_0392 - edit small.jpg

With Vibrance and Saturation But I see no difference. I must not've saved it.

DSC_0392 - edit small V and  S.jpg
 
Last edited:

Blacktop

Senior Member
Didn't do any shooting today, except a few cloud shots. The Missus is sick and I feel lazy today. I have a gull shot from yesterday that I really like, but the sky just ruined the whole thing. I don't replace the sky much (I have done it on occasions) so I set out to do just that today. First I replaced it with a very subtle sky so it could blend in nice and look natural, but then I started playing.(That's a dangerous thing).:)

Soon I had a sky that looked like the apocalypse was coming.;) I did all the processing in Nik Color FX Pro. It's amazing what you can achieve with that program.

Once I was done with my composite, I took it back to Nik to finish it off trying to get the bird and the sky to blend in so as to look like it was from one shot.

Before

_DSC8480.jpg


_DSC8261.jpg


After

_DSC8261-Edit-2.jpg
 

LouCioccio

Senior Member
If anyone see this shame less plug. We are doing a fundraiser for our church. A Basic DSLR class 3 sessions and an outdoor. A photoshop elements class 5 week 2 session class. Both classes will have an afternoon and evening sessions. The class is located in Erie, PA. Just email me for more info. Starts on Feb 20th for Elements and Basic DSLR on the 24th.
 
Top