PP techniques...

alfaholic

Banned
Hello everyone...

I shoot RAW and I usually like to extract all dynamic range from the files by lowering highlights and raising the shadows, and then adding contrast, so I can recover as much data as my camera and sensor gives me.
Most of the time I like the results, just raising the shadows and adding contrast gives me more saturation than I like, or it is more Vibrance than Saturation, so I need to lower it down.

I would like to ask you is there a right way to do it, or everyone can do it the way he likes? Also, am I doing something wrong by expanding dynamic range this way, because sometimes colors are not natural anymore?
 

BackdoorArts

Senior Member
Every picture is different, every photographer is different. Dynamic range, once you're aware of just how much there is in a RAW file, is there to be extracted or ignored as you see fit. Some folks like the compressed light look of HDR-like images, which is similar to what you're describing. Others prefer a less "flattened" look.

The only way to know if you're doing it "right" (i.e. a way that's pleasing to others) is to post some examples, perhaps with an pre-edited copy, and ask for a critique. Otherwise, if you're happy with your work, that's ultimately what's important.
 

Horoscope Fish

Senior Member
As for the "best way" to adjust a photo, as Jake points out every shot is different and needs different things. Everyone has individual tastes as well. Complicating this is the fact that there are probably no less than ten different ways to do ANYTHING in Photoshop. For basic RAW processing I use Adobe Camera RAW for most of the basic adjustments, like white balance, The sliders in ACR for Vibrance, Saturation and Clarity are awesome if used with restraint. For fine tuning I use a Levels adjustment layer or a Curves adjustment layer in Photoshop.

....
 

alfaholic

Banned
Thank you.

OK, here is some quick and simple edit...


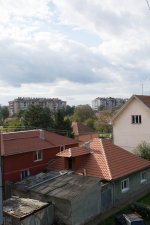
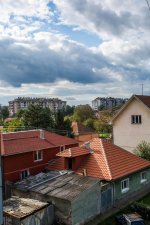
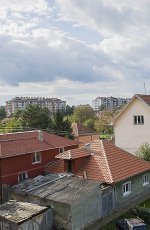
DSC_1042.jpg DSC_1042-4.jpg

On the left is RAW file just converted to JPG without any processing.
On the right I lowered highlights to -100, raised shadows to +100, and added contrast to +100, and that is 90% of my work in most cases, when I process many photos at once.
I do not go to -100 and +100 for every and each photo of course, but I asked this because when I do this, colors are not accurate anymore so I need to lower down Vibrance, so I thought that I am doing something wrong with this procedure.
I like the results, but I am not feeling comfortable changing colors with shadows and highlights sliders, if you understand what I mean...
 
Last edited:

SkvLTD

Senior Member
@alfaholic I too prefer to squeeze everything out of most shots in a similar way and to me, that separates getting the most out of/using a proper camera from all the cellphone wannabes as well as complete amateurs that shoot jpegs. Only area thus far where too much is bad, is portraiture.
 
Last edited:

wornish

Senior Member
As Jake and Horoscope Fish say one method does not work for all pictures. You have to do what you like and then if others like it that's a plus.
 

WayneF

Senior Member
On the right I lowered highlights to -100, raised shadows to +100, and added contrast to +100, and that is 90% of my work in most cases, when I process many photos at once.
I do not go to -100 and +100 for every and each photo of course, but I asked this because when I do this, colors are not accurate anymore so I need to lower down Vibrance, so I thought that I am doing something wrong with this procedure.


Perhaps unwanted, but an alternative option to consider...

The philosophy of Contrast is to make the dark tones darker, and the light tones lighter. This increases visual contrast. Any tonal changes affect color of course. Color often can't stand too much contrast (less is often more, the color is the actual contrast), but grayscale often specifically needs a little something to be quite black and a little to be quite white.

The editor tool named Contrast (generally, in all photo editors) are old fashioned simple tools. It works, but I sort of cringe when you mention it. :)

If you watch the histogram as you increase Contrast, you see that it is merely pushing data off the right end, and pushing data off the left end, expanding the range to push data off both ends (if you go very far). Equal amounts in both directions. 100 is pretty far.
Darks are darker then, and light tones are brighter, it is the idea, but there can be substantial clipping at both ends. Depending on the data, this clipping can be different in each of the RGB channels, so actual color changes can occur. And clipping can cost detail at both ends. Raw is lossless, so you can undo and get it back, but the tool is sort of old fashioned.

Assuming ACR (like Lightroom), you have a better choice.

The second little menu toolbar icon is a Curve tool. In it, there is a tab called Point. It offers a few preset menus, named Linear, Medium Contrast, Strong Contrast, or Custom. Just to see it once, select Strong Contrast (you can restore Linear). You see a S-Curve. The Curve tool is a response curve, and S-Curve is a very standard tool for contrast. You see in the shape of the S-Curve that it lowers dark tones, and raises bright tones. Darker darks and brighter lights, which is contrast. But it does not clip. You can see that it leaves the 0 and 255 ends alone. This is normally a superior tool.

Watch the histogram, and compare histogram action (to the other Linear and then Basic Contrast tool). Don't do both.

Or, you can grab the points on the curve, and move them differently, which becomes Custom (any response curve you want).

Linear (default) is a straight line response curve, no contrast action at all.

I often like to have the Medium S-Curve be default for snapshots (but maybe not often for portraits).

More about understanding the general Curve Tool is at Photo Editor Curve Tool (comparing it to Levels)
 
Last edited:

alfaholic

Banned
Perhaps unwanted, but an alternative option to consider...

The philosophy of Contrast is to make the dark tones darker, and the light tones lighter. This increases visual contrast. Any tonal changes affect color of course. Color often can't stand too much contrast (less is often more, the color is the actual contrast), but grayscale often specifically needs a little something to be quite black and a little to be quite white.

The editor tool named Contrast (generally, in all photo editors) are old fashioned simple tools. It works, but I sort of cringe when you mention it. :)

If you watch the histogram as you increase Contrast, you see that it is merely pushing data off the right end, and pushing data off the left end, expanding the range to push data off both ends (if you go very far). Equal amounts in both directions. 100 is pretty far.
Darks are darker then, and light tones are brighter, it is the idea, but there can be substantial clipping at both ends. Depending on the data, this clipping can be different in each of the RGB channels, so actual color changes can occur. And clipping can cost detail at both ends. Raw is lossless, so you can undo and get it back, but the tool is sort of old fashioned.

Assuming ACR (like Lightroom), you have a better choice.

The second little menu toolbar icon is a Curve tool. In it, there is a tab called Point. It offers a few preset menus, named Linear, Medium Contrast, Strong Contrast, or Custom. Just to see it once, select Strong Contrast (you can restore Linear). You see a S-Curve. The Curve tool is a response curve, and S-Curve is a very standard tool for contrast. You see in the shape of the S-Curve that it lowers dark tones, and raises bright tones. Darker darks and brighter lights, which is contrast. But it does not clip. You can see that it leaves the 0 and 255 ends alone. This is normally a superior tool.

Watch the histogram, and compare histogram action (to the other Linear and then Basic Contrast tool). Don't do both.

Or, you can grab the points on the curve, and move them differently, which becomes Custom (any response curve you want).

Linear (default) is a straight line response curve, no contrast action at all.

I often like to have the Medium S-Curve be default for snapshots (but maybe not often for portraits).

More about understanding the general Curve Tool is at Photo Editor Curve Tool (comparing it to Levels)

Thank you, this helps a lot. :)

Sorry for simplifying, but you suggest that I use Curve Tool because it does not change the ends at 0 and 255 so it does not clip?

But, there is something that I do not understand, what is the difference between Tone and Tone Curve in LR and ACR?
Both have sliders with the same names, but why we have two of them?
 
Last edited:

aroy

Senior Member
I also shoot only RAW;as there is no dearth of space or need for faster shooting; and like to extract most from the DR. I use the Nikon NX-D and it makes what I want pretty easy.

1. For highlights and shadows I use the "Active D-Lighting" presets. There are five of them, and they boost the shadows by different amount.

2. For general exposure I use "Exposure Compensation". My D3300 over exposes by upto 1EV, especially the reds, so I pull them back. If the image is underexposed I pull it up.

3. For colour I find that "Vivid" gives me most pleasing effect.

Beyond these, it depends on the image.
. Some require straightening
. In some critical ones I use the "Distortion Control" tool
. I usually sharpen to +6 or +7
. In case there is noise that I want to get rid of, I use the "Noise Reduction", but then I reduce the sharpness to +1 so that the noisy regions are smoothed out.

I did try curves and and other exotic options, but barring cases when it is really required, I avoid it. One place where it worked well was in bringing out vibrant colours of the evening sky.

In general I try to get it right in camera, so there is less manipulation required (of course getting maximum out of DR is an exception)
 

WayneF

Senior Member
Thank you, this helps a lot. :)

Sorry for simplifying, but you suggest that I use Curve Tool because it does not change the ends at 0 and 255 so it does not clip?

Yes, right. The Contrast slider clips seriously at both ends if you apply much at all. True of the "Contrast Tool" in virtually all photo editors, it was one of the first tools invented, and in fact, clipping is often not a bad thing for grayscale images. You see this clipping occur if you watch the histogram as you slide it. This clipping loses detail in those areas. IMO, the tool works better for smaller adjustments than for large ones.

The Tone Curve is a more sophisticated method, does not clip, and it also provides a couple of good and useful presets. The S-curve is standard good practice for contrast, esp for color images. And the presets make it be just one click.

But, there is something that I do not understand, what is the difference between Tone and Tone Curve in LR and ACR?
Both have sliders with the same names, but why we have two of them?

I think you mean Auto Tones. "Tones" threw me, because I use Photoshop instead of Lightroom, and it is the same ACR module, but PS just calls it Auto, I don't see the word Tones there. :)

Auto Tones is a automatic system that "analyzes" your image, and automatically "corrects" exposure and contrast and whatever... a few settings change (but not White Balance). It does whatever it thinks the image needs. Often not bad, but it is just dumb automation, and sometimes makes mistakes humans wouldn't make. :) Sometimes overexposes, IMO. It surely might be helpful, but I rarely use it, preferring to watch my own images. :) One of my pet peeves is including this Auto Tones in the default preferences, so it is always applied automatically. The problem then is that we never see the real image that came out of the camera, and never know we are screwing up our camera exposures. Then we think we are wonderful photographers, when maybe we're not. :) Automation is not a way to learn, it's a way to avoid learning. :)

Whereas the Tone Curve is just a standard curve tool, which is just a graphical way to adjust tones, mapping input to output values, as we specify by shaping the curve. It can do many more things than Contrast. It can do whatever you shape the curve to do.

For example, if you want your image to be brighter now...

Photo editors have a Brightness tool, another oldie, that simply adds a numerical constant to all tones, shifting everything higher in the histogram. This clips highlights, and leaves blacks a somewhat lighter gray tone. Not the best tool either.

You can use the Exposure slider, which is just the White Point in Levels, and it clips the bright end (stretching the data higher, but leaving the dark end unshifted). However, for images that we want to be lighter, which are dark now, then we probably have no bright end data to clip (any clipping is just areas of non-existent data). But too much Exposure can clip, just like in the camera.

Or if the highlights are OK but you just want it brighter... You can just raise the center point of the curve tool, which makes dark and midpoint tones brighter, without any bright end clipping, without much effect at all at the bright end.

We can watch the histogram, and generally see the action, and the clipping, etc.
 
Last edited:
Top